How to Make AI Videos With Hyperframes (Free Guide)
Make unlimited free videos with Hyperframes and Claude Code, no credits, no editing skills. The exact prompts and the auto-publish step I use.
I filmed a live stream where I built four AI videos in one sitting, and the whole setup ran for free on my own laptop.
The reason I can say make AI videos with Hyperframes and mean unlimited is that Hyperframes is a free, open-source tool. It has no credit system, no per-video charge, and no subscription. You point an AI agent like Claude Code at it, describe the video in plain English, and it renders an MP4 locally.
Most guides on this stop at “look, it made a video.” They skip the part the Blotato crowd actually cares about: what happens after the MP4 exists, and how you get it onto every platform without doing it by hand. That is the part I will cover here.
How to Make AI Videos With Hyperframes (Video Guide)
If you would rather watch the full walkthrough, this is the live version where I build all four videos start to finish. The written guide below covers the same builds with the exact prompts, plus the auto-publish step the stream did not get to.
Why Free AI Video Actually Matters for Creators
If you post video every day, credits are the tax that quietly eats your margin.
Most AI video tools bill per render or per minute. A HeyGen avatar, an Opus Clip export, a Submagic caption pass: each one draws down a credit balance you have to top up. Ship a few shorts a week and that number climbs fast. The subscription tools are worse than they look on this point, because unused credits usually expire at the end of the month, which is the structural difference between the paid video generators.
Hyperframes flips the cost model. It does not generate pixels the way a diffusion model does. It writes the video as an animated HTML page, using CSS and JavaScript, then plays that page and records it as an MP4. Because it is just code running on your machine, there is no separate render bill. I like to compare it to Remotion, which does the same trick with React. If you have already read my guide on how to make AI videos with Claude for free, this is the same idea with an easier on-ramp.
The only real cost is the tokens your AI agent spends writing the code. You do not need a top-tier model for it. I run mine on Claude Sonnet at medium thinking, and that is plenty.
My Tool Stack for Making Videos With Hyperframes
Here is everything the workflow touches. It is short on purpose.
- Hyperframes: the free, open-source engine that turns your prompt into an animated HTML video and records it as an MP4. Built by HeyGen. The source is on GitHub if you want to see how it works.
- Claude Code (or Claude Desktop with the Code tab): the AI agent that writes the video code. It needs local computer access, so the website chat will not work. The desktop app is the easy path for your first videos. The terminal is more reliable for the long, complex edits.
- HeyGen (optional): sign in and Hyperframes can use HeyGen text-to-speech for clean voiceover. Skip it and you can still add music or free text-to-speech.
- Blotato: the publish layer. Once the MP4 exists, Blotato sends it to all 9 platforms from one place, so the video does not just sit in a folder.
Blotato is mine, and it generates none of the video, so it sits beside Hyperframes rather than replacing it.
The credit tax I mentioned above is exactly why the publish step matters. You just made a free video, so the last thing you want is to pay a scheduler to distribute it or spend an hour uploading it nine times. Blotato connects to Hyperframes through its MCP server at mcp.blotato.com/mcp, which means the same Claude session that renders your video can hand it straight to the publish step. If you want to run that full loop on your own accounts, start a free 7-day Blotato trial, connect your platforms, and let one chat go from prompt to posted.
Hyperframes vs Buying AI Video Credits
Before the build, here is the honest trade-off between coding your videos and renting them from a credit-based tool.
| Hyperframes + Claude Code | Credit-based AI video tools | |
|---|---|---|
| Cost per video | Tokens only, no render fee | Credits per render or per minute |
| Best for | Animated explainers, motion graphics, edited talking-head | Realistic AI actors, stock-style footage |
| Setup | One-time install, runs locally | Sign up, buy a plan |
| Editing control | Talk to the agent, iterate freely | Preset templates and sliders |
| Ceiling | Unlimited videos | Capped by your credit balance |
The takeaway is simple: Hyperframes wins when your videos are graphics, text, and edited footage, which covers most social content. It is not the tool for a photorealistic AI actor. For a broader look at where it fits, see my roundup of AI content repurposing tools and the full faceless video factory build.
How to Make AI Videos With Hyperframes (Step-by-Step)
Here is the exact sequence from the stream. Do the first prompt, then the rest are just variations on it.
Step 1: Install Hyperframes in Claude Code
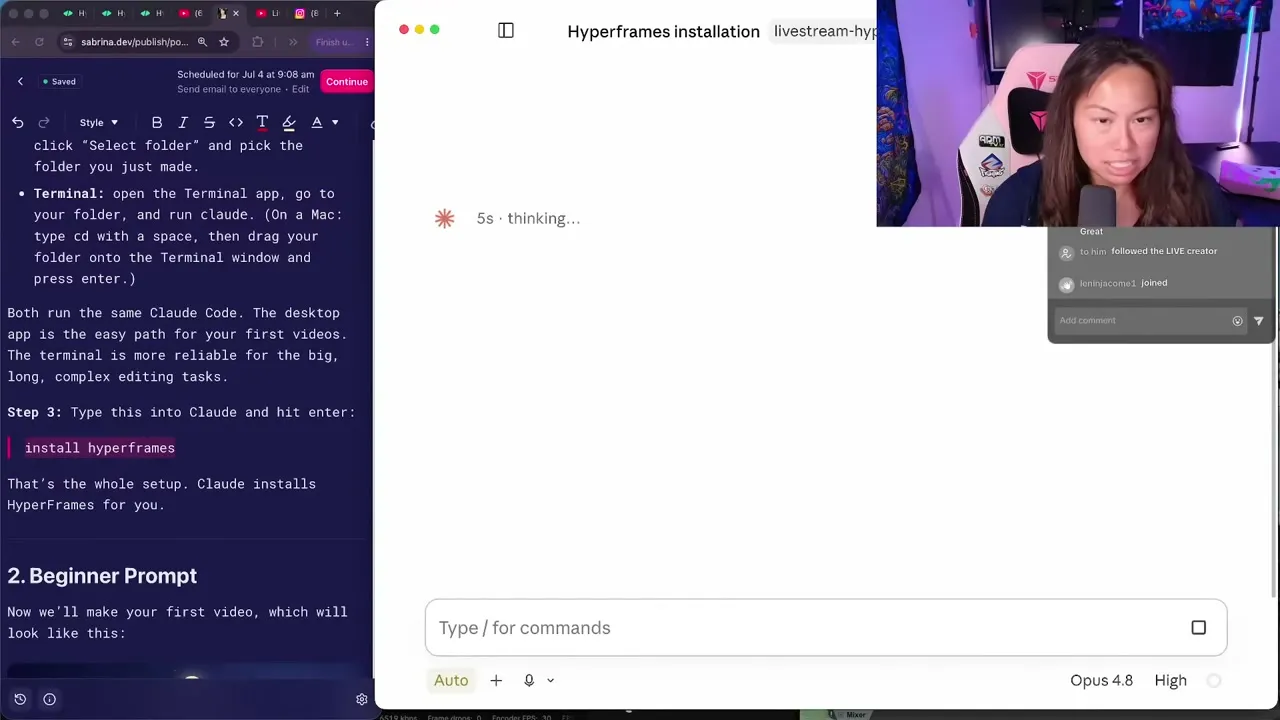
Open Claude Desktop and click the Code tab in the top section. You want Code, not the website chat, because Hyperframes needs access to your local computer. Start a new session and pick a fresh folder, I always make a scrap folder for demos. Then type this and hit enter: install hyperframes. That is the whole setup. Claude figures out the rest, and it takes about five to ten minutes.
Step 2: Run the Beginner Prompt
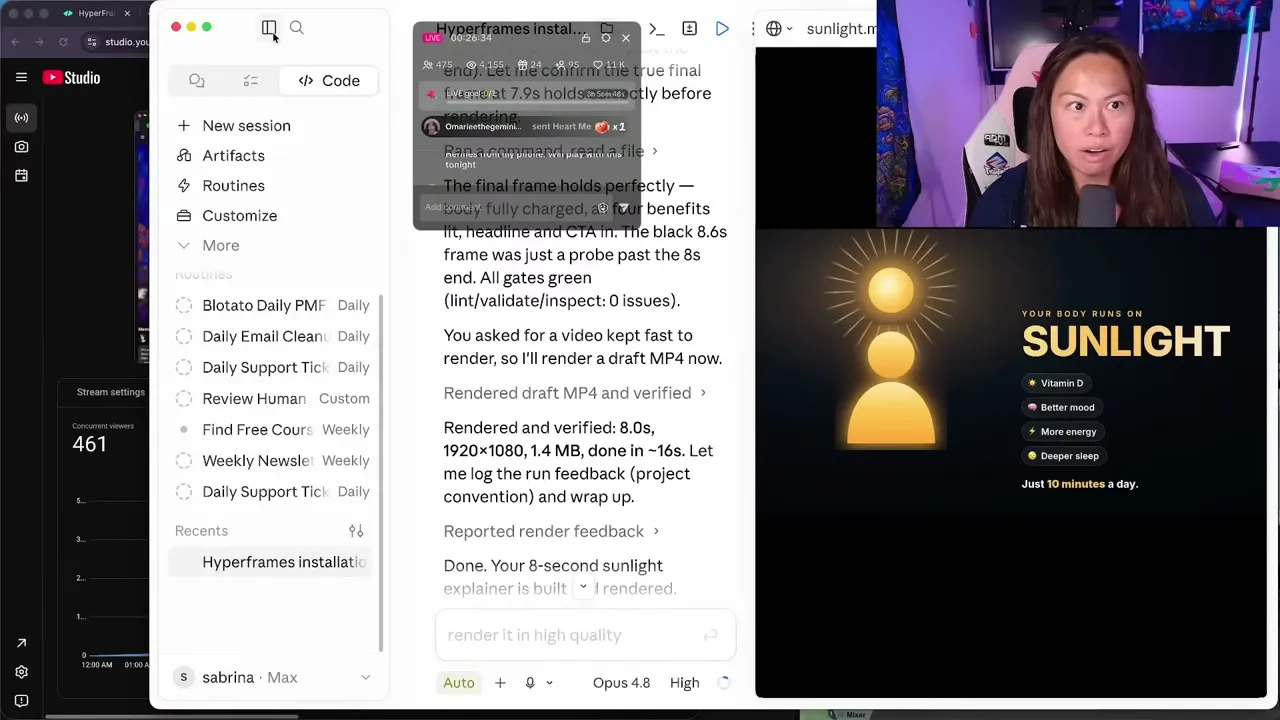
Once it is installed, test that everything works with a short video. Here is the beginner prompt I use: Create an 8-second horizontal video explaining the health benefits of sunlight, and choose one strong animated visual metaphor that makes the idea instantly understandable. Keep it fast to render.
Keep the first one short. Even an 8-second video can take upwards of 10 minutes to render, and longer videos take longer.
Step 3: Open the Preview Studio
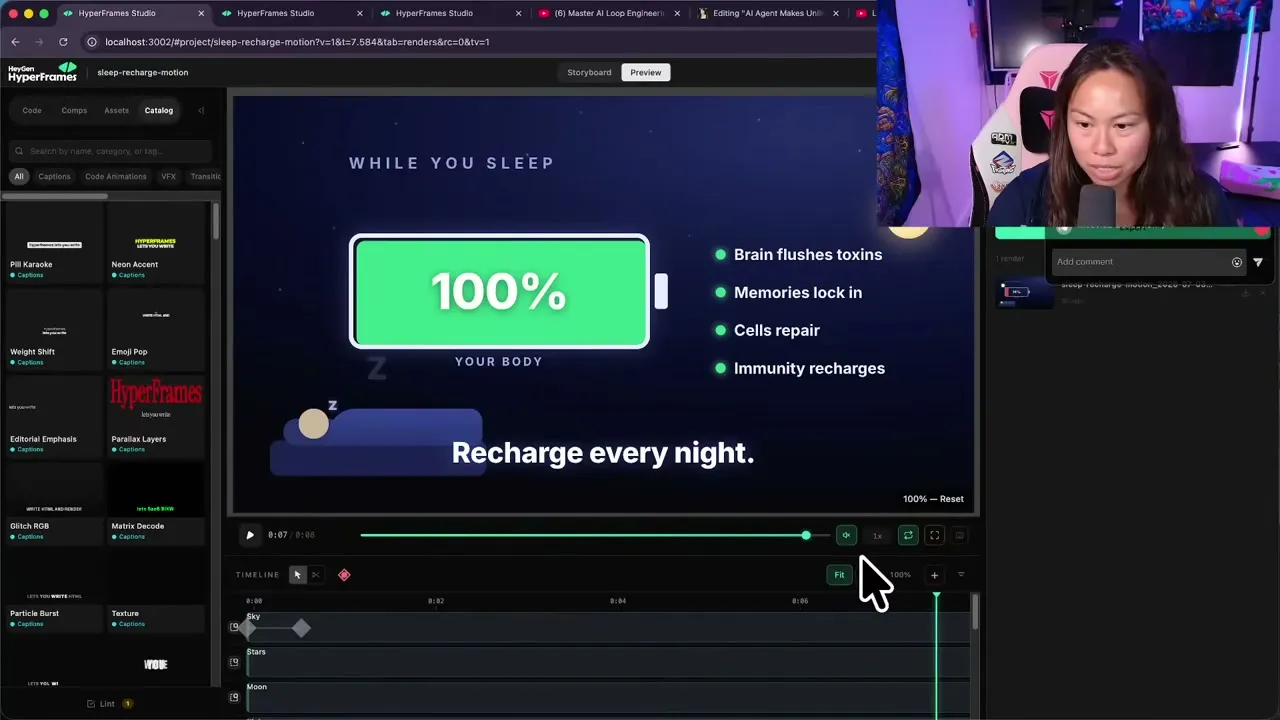
Type launch preview in the chat and Hyperframes opens its Preview Studio in a browser tab. This is where you scrub the timeline, browse the caption and animation catalog, and see every render.
You never touch a drag-and-drop editor. If you want a change, you tell the agent. Something like change the background from black to pink is all it takes. Treat it like a video team, give feedback, and iterate until you like it.
Step 4: Use a Faceless Explainer Skill for Cinematic Videos
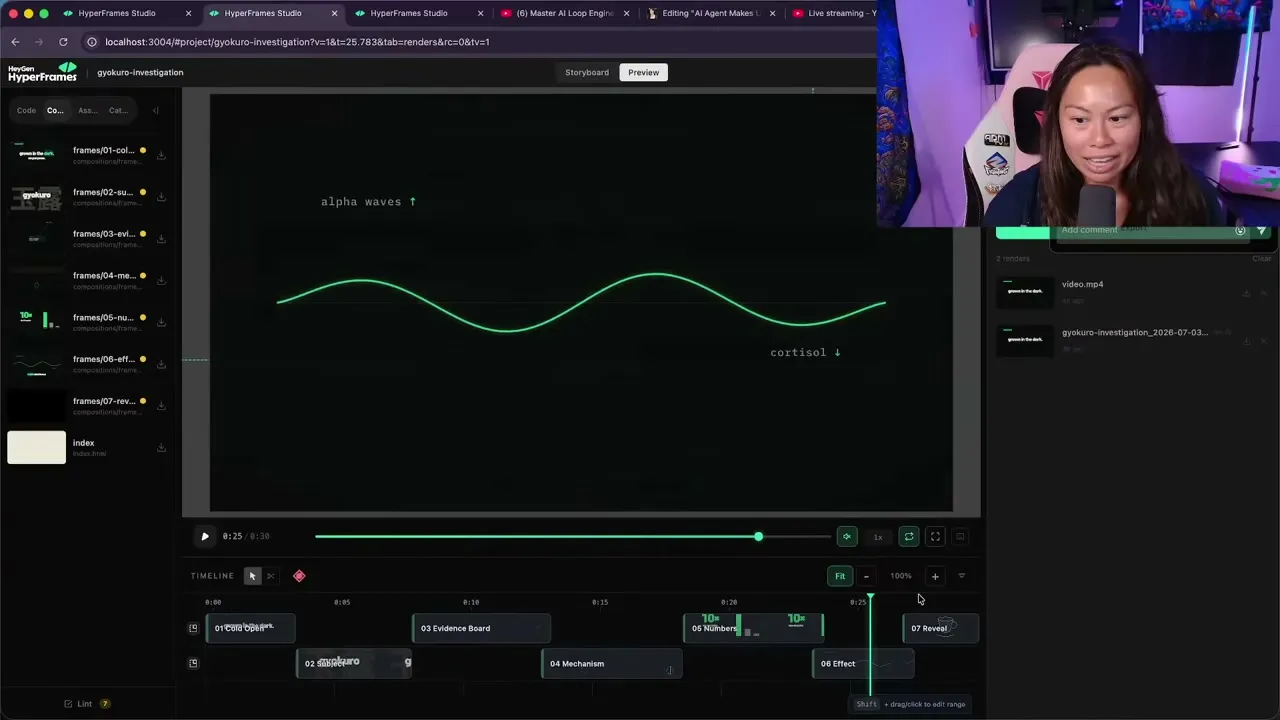
Hyperframes ships optional skills you can import for specific video types. For a dramatic explainer, use the faceless explainer skill. Here is the prompt: Using hyperframes and /faceless-explainer, create a 30-second faceless explainer about the health benefits of high-protein diets. Do not make it educational looking. Make it feel like the opening sequence of a high-budget Netflix investigation: dark cinematic typography, mysterious animated diagrams, fast evidence-board transitions, one shocking hook in the first 3 seconds, and a satisfying visual metaphor by the end.
It will ask you to approve a storyboard first. Look at it before you build, because changes at the storyboard stage are cheaper to fix than after a 20-minute render.
Step 5: Turn a Website Into a Launch Video
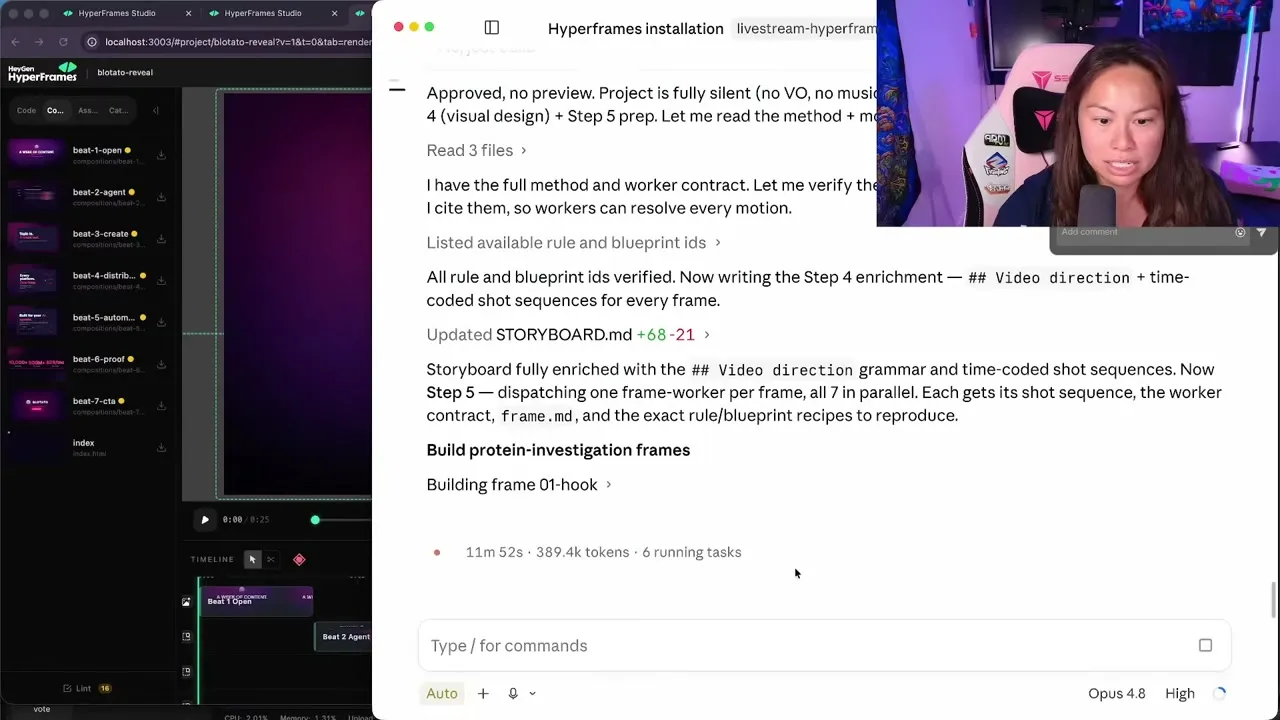
For the intermediate prompt, feed Hyperframes an external source. It can pull a website’s colors, fonts, and brand feel and build a launch video from it. The prompt I ran: Using hyperframes and /website-to-video, create a 25-second cinematic product launch video from [your URL]. Capture the site’s actual colors, typography, UI, and brand feel, then turn it into a premium Apple keynote-style reveal with dramatic pacing, animated zooms, three big benefit cards, clean voiceover, subtle sound effects, and a final CTA. Make it feel like this tiny website is announcing the future.
You are not limited to websites. You can feed it a YouTube transcript, a PDF, or a podcast as context and build an explainer from any of them.
Step 6: Edit a Talking-Head Video (Next Level)
This is the one that surprised me. You feed Hyperframes a raw talking-head video and it edits the whole thing. It transcribes your audio with a tool like Whisper, removes false starts and filler words, trims pauses over 0.3 seconds, then reads the script and brainstorms a relevant visualization for each key point.
My latest long-form YouTube video was edited 100% by Hyperframes: the chapter markers, the animated text, the visualizations, even clipping my face into the corner. I gave it feedback where a visual did not land, but it did most of the work itself. If you already have an ElevenLabs voiceover, tell the agent and it will burn that audio on top with FFmpeg.
Pro Tips for Hyperframes
Shorten the duration to test fast. Render time scales with video length because Hyperframes builds scene by scene. When you are testing a prompt, ask for an 8-second video instead of 30, and you get feedback in a fraction of the time.
Run multiple sessions in the same folder. You can have several videos rendering at once. Open a new session in the same folder and kick off a second prompt while the first one cooks. On the stream I had all four builds running at the same time.
Approve the storyboard, do not skip it. For anything longer than a quick test, review the storyboard before the full render. Fixing the structure early is far cheaper than re-rendering a finished 20-minute video.
What This Workflow Can’t Do (Yet)
Hyperframes is coding animations, not generating footage from scratch. It will not produce a photorealistic AI actor or a cinematic live-action clip the way a video-diffusion model does. Everything it makes is built from shapes, text, and motion.
It is also slow for long videos. A 30-second render can take 20 minutes, and a full talking-head edit takes several passes of feedback before it is right. This is a build-and-iterate tool, not a one-click generator. If you want realistic avatars, that is where a paid HeyGen render still earns its place.
Results You Can Expect
On the stream I built four videos, an 8-second explainer, a cinematic faceless explainer, a website launch reveal, and a full talking-head edit, all in one session and all for free. The website reveal honestly looked better than my actual product.
The real payoff is the repeatable loop: describe a video, render it, and push it out. Your render is free now, so the only thing standing between a finished MP4 and nine platforms is the publish step. That is the piece the 7-day Blotato trial handles from the same Claude session, which is what keeps the marginal cost of the next posted video close to nothing.
Sabrina’s Final Take
Hyperframes is the easiest way I have found to make free, on-brand video without touching a timeline editor. It is the iPhone to Remotion’s Android: less powerful at the far edges, but you get something good on the first try instead of fighting the tool. If you make a lot of short-form content and you are tired of watching a credit balance tick down, this is worth the one-time setup. Start with the 8-second beginner prompt, get one video out the door, then wire the publish step in so your videos actually get seen.
Hyperframes FAQs
Is Hyperframes really free?
Yes. Hyperframes is open-source and runs locally, with no credit system or subscription. The only cost is the tokens your AI agent spends writing the video code, and that runs fine on a mid-tier model like Claude Sonnet.
Do I need to know how to code?
No. You describe the video in plain English and the AI agent writes all the HTML, CSS, and JavaScript. Plenty of non-coders run Hyperframes through Claude Code. You give feedback in normal language, not code.
Hyperframes or Remotion, which should I start with?
Start with Hyperframes if you are new. It is easier to set up and looks polished out of the box. Remotion is more extensible because it is React-based, but it has a steeper learning curve. Once you know one, the other is easy to add.
How do I post the videos to social media?
Export the MP4 from Hyperframes, then send it out with a scheduler. Blotato publishes to all 9 platforms from one place and connects to your AI agent through its MCP server, so the same chat that renders the video can publish it.
Can Hyperframes add a voiceover?
Yes. Sign in to HeyGen for clean text-to-speech, add music, or use free text-to-speech for quick tests. If you already have an ElevenLabs file, the agent will merge it onto the video with FFmpeg.