How to Make AI Videos With Claude for Free (Remotion)
Make AI videos with Claude Code for free using the Remotion skill. The exact stack, 5 prompts, and the publish step I use to post everywhere.
In this tutorial, I’m going to show you how to make AI videos with Claude and a pre-built skill called Remotion. We’re going to make five different types of videos, each one very distinct: an education animated explainer, a product launch video where you feed in your website, a showcase of Google testimonials for a local business, an edited avatar video with captions and b-roll, and an animated data visualization infographic. It works for both 9:16 vertical short-form videos and 16:9 horizontal videos for YouTube. Remotion is 100% free, runs locally and private on your computer, and the only cost is whatever you already pay for Claude Code.
I’ll also show you how to install Claude in Chrome, which lets Claude take screenshots from the internet so it can pull content directly from any website you point it at. And at the very end, I’ll show you how to automate posting all of this to social media.
How to Make AI Videos With Claude (Video Guide)
If you’d rather watch the full walkthrough, this is the video version with every prompt visible on screen. The written guide below covers the same five builds with the prompts laid out so you can copy and paste them.
Why Remotion Costs Nothing Extra
Descript recently launched an AI agent where you just talk to it and it edits your video. I use Descript for recording, but the AI agent itself is significantly worse than Remotion, more expensive, and limited in the types of things it can actually do.
Remotion is open source. There are no credits for Remotion. There’s no additional credit system or billing system. The cost to make one video versus 100 is the same, because the only thing you’re paying for is whatever tokens Claude Code uses to do the work. Like I said, it’s really not that bad after you install Remotion because it’s not an MCP server, it’s a skill.
You can also customize anything Claude generates just by talking to it. Don’t like the dark theme? You can ask Claude to make it light themed. Don’t want a donut chart? You can have Claude remove it and replace it with another type of visualization. If you don’t like the music, you can change it. If you don’t like the hook, you can change it. Every single change happens just by talking to Claude Code.
Remotion is React-based, which makes it endlessly extensible but a little more work to set up. If you’d rather start with the easier on-ramp, HeyGen’s Hyperframes does the same code-a-video trick with plain HTML. I break down that setup in my guide on making free AI videos with Hyperframes.
My Tool Stack for Making AI Videos With Claude
Four pieces across all five video builds:
- Claude Code ($20/mo Pro plan is enough). The Remotion skill runs locally, so it doesn’t burn as many tokens as you think because it’s a skill, not an MCP server.
- Remotion skill as the video engine. It’s a pre-built open-source skill you add to Claude Code with
npx skills add remotion-dev/skills. No credits, no per-video cost. - Claude in Chrome extension for the video types that need to pull content from a URL. The product demo and Google testimonial builds both depend on Claude opening Chrome, navigating to a site, and grabbing screenshots automatically.
- Blotato MCP server for the publish step. Optional and paid, but it’s the only piece that lets Claude Code post the finished video to TikTok, Instagram, YouTube, LinkedIn, Twitter, Threads, and Facebook from a single message.
I’m involved with Blotato as a creator and tester, so take this with whatever grain of salt feels right. I built the Blotato MCP because I’m on a billion different social platforms posting multiple times a day, and the publish step is the part that turns “I made five cool videos in Claude” into actual posts on TikTok, Instagram, YouTube, LinkedIn, Twitter, Threads, and Facebook. From inside Claude Code you can say “post this video to TikTok, Instagram, YouTube, LinkedIn, Twitter, Threads, and Facebook” in one sentence, and you can manage your entire content calendar from Claude Code so you never actually have to open the Blotato website. If you work in Claude Cowork instead of the terminal, the same posting and calendar flow is in how to automate social media with Claude Cowork.
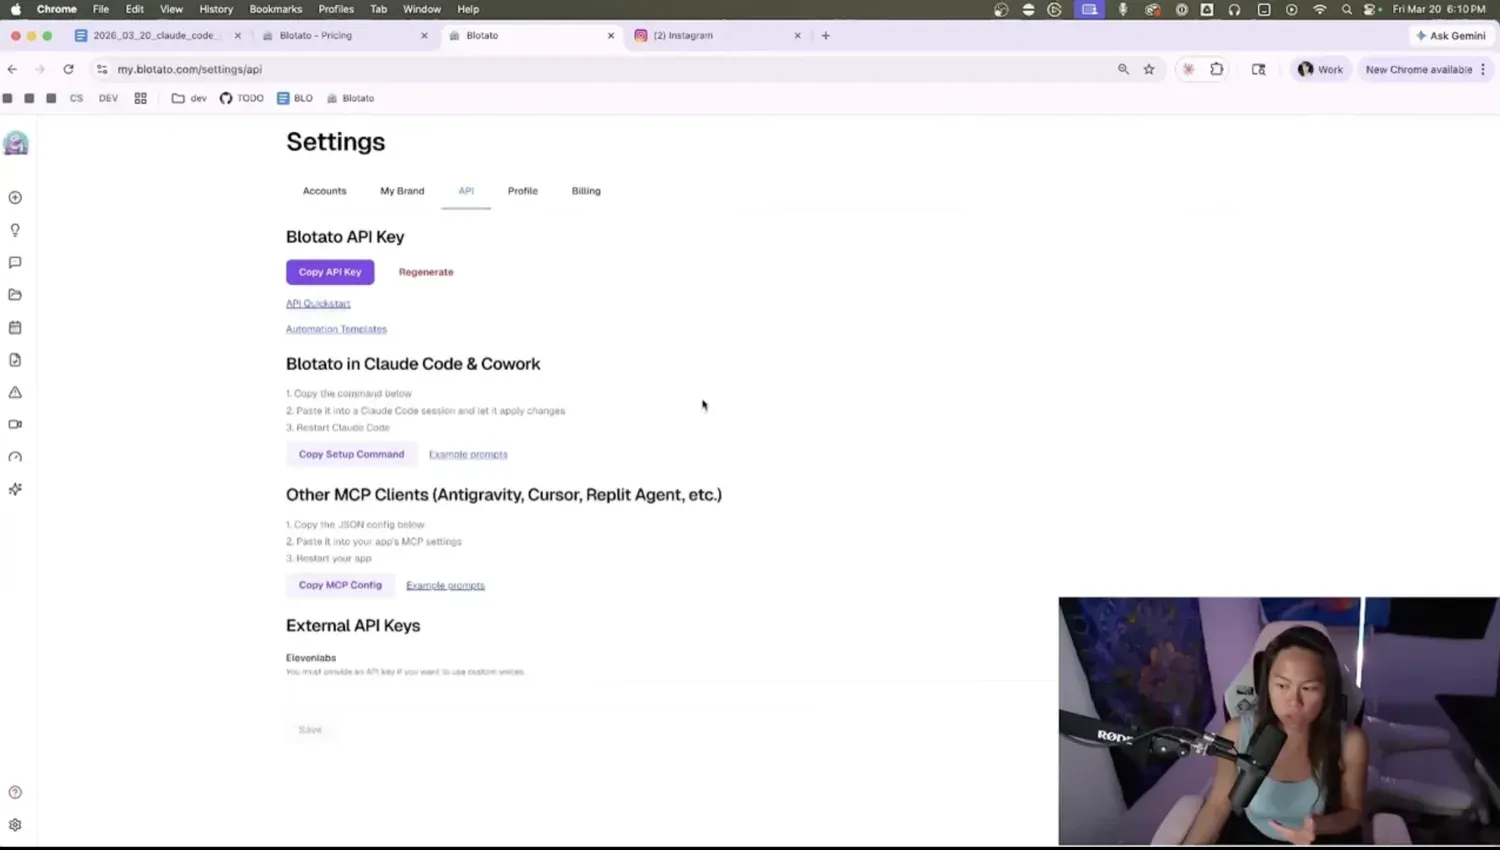
If you want to try the publish step on your own social accounts, you can grab a Blotato account and connect your profiles. You generate an API key in Blotato settings, paste the setup command into your terminal, and Claude Code can post to all your connected platforms from a single message. For the bigger picture of how this fits into a full content stack, my social media automation tools breakdown walks through where Claude Code, Remotion, and the publishing layer sit relative to everything else.
Why Remotion, Not HeyGen or Descript
They’re not mutually exclusive. I use HeyGen when I want an AI avatar (the avatar in step 5 below was originally created in HeyGen). I use Descript as a recorder because it has eye correction and a nice pink border around my face, even though I also use OBS.
What’s different about Descript’s AI agent is that it recently came out, and you just talk to it and it does these things, but it’s significantly worse than just using Remotion. It’s expensive, and it’s limited in the types of things it can do compared to what Remotion can do today. So Remotion is what handles the actual editing layer for me, captions, overlays, b-roll, and the scratch-built videos, while HeyGen and Descript handle the parts they’re built for.
How to Make AI Videos With Claude (Step-By-Step)
The same seven-step flow covers all five video builds. Step 1 is the one-time install, steps 2 through 6 are the prompts themselves, and step 7 is the optional publish layer.
Step 1: Install Claude Code, the Remotion Skill, and the Chrome Extension
Open a terminal in whatever folder you want to keep your video projects in, run claude to start Claude Code, then install the skill with npx skills add remotion-dev/skills.
This is going to take a while the first time because Remotion itself takes a while to install. If the npx command feels intimidating, you can also just open Claude Code and literally say “install pre-built skill Remotion” and it’ll work, just slower because Claude has to figure out what you meant before it acts.
Two things to flag before you move on. First, this won’t work on desktop Claude, it requires Claude Code. This is the most important step because if you skip this, you can’t make any videos. Second, after installing the Remotion skill, you probably need to restart your Claude Code session so that it has access to the new skill. If it’s not using the Remotion skill after this, just make sure you restart Claude Code.
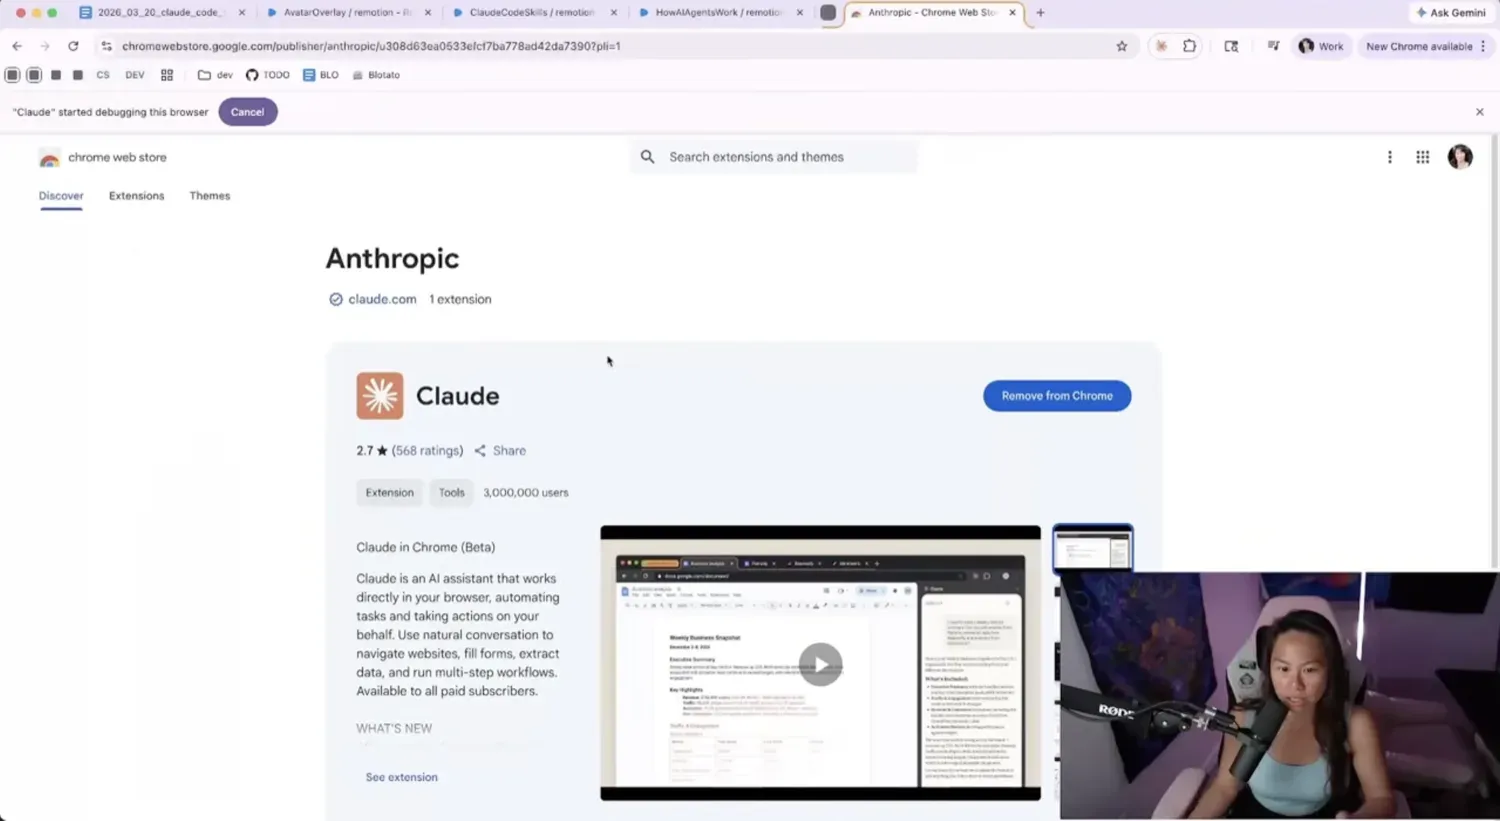
For two of the video types below (product launch and Google testimonials), you also need the Claude in Chrome extension installed. Search “Claude Chrome extension” in Google, install it from the official extension page, and Claude Code will detect it automatically. You don’t have to manually open it.
Step 2: Build a Scratch Explainer Video From a Single Prompt
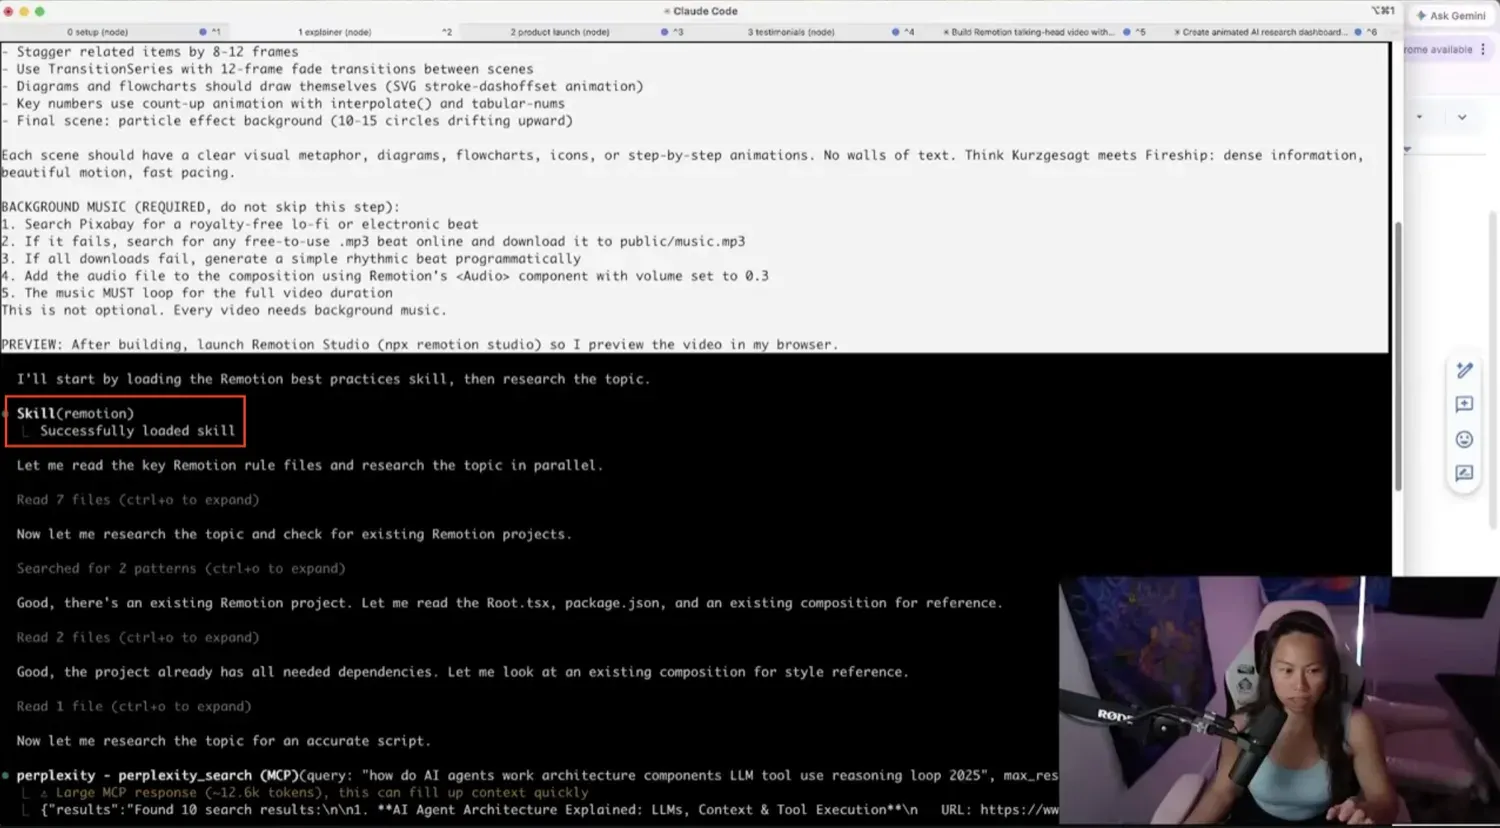
For the first build I used a long structured prompt that hands Claude the topic, the safe zones for vertical video (so the captions don’t disappear behind the TikTok UI), a visual style, and a set of animation rules (“each scene needs a clear visual metaphor, a diagram, flowchart, or step-by-step animation”). The full prompt is visible on screen in the source video at the 4-minute mark, so grab a screenshot from there and paste it into your own session.
When Claude receives the prompt, it loads the Remotion skill, kicks off a research pass on the topic (web search by default, or Perplexity MCP if you have it installed), and produces a scene-by-scene storyboard. The storyboard is your gate. If you don’t like the hook, you can change it. If you don’t like some of the ideas for the visuals, you can give feedback as well. Once you say yes, Claude runs the actual render.
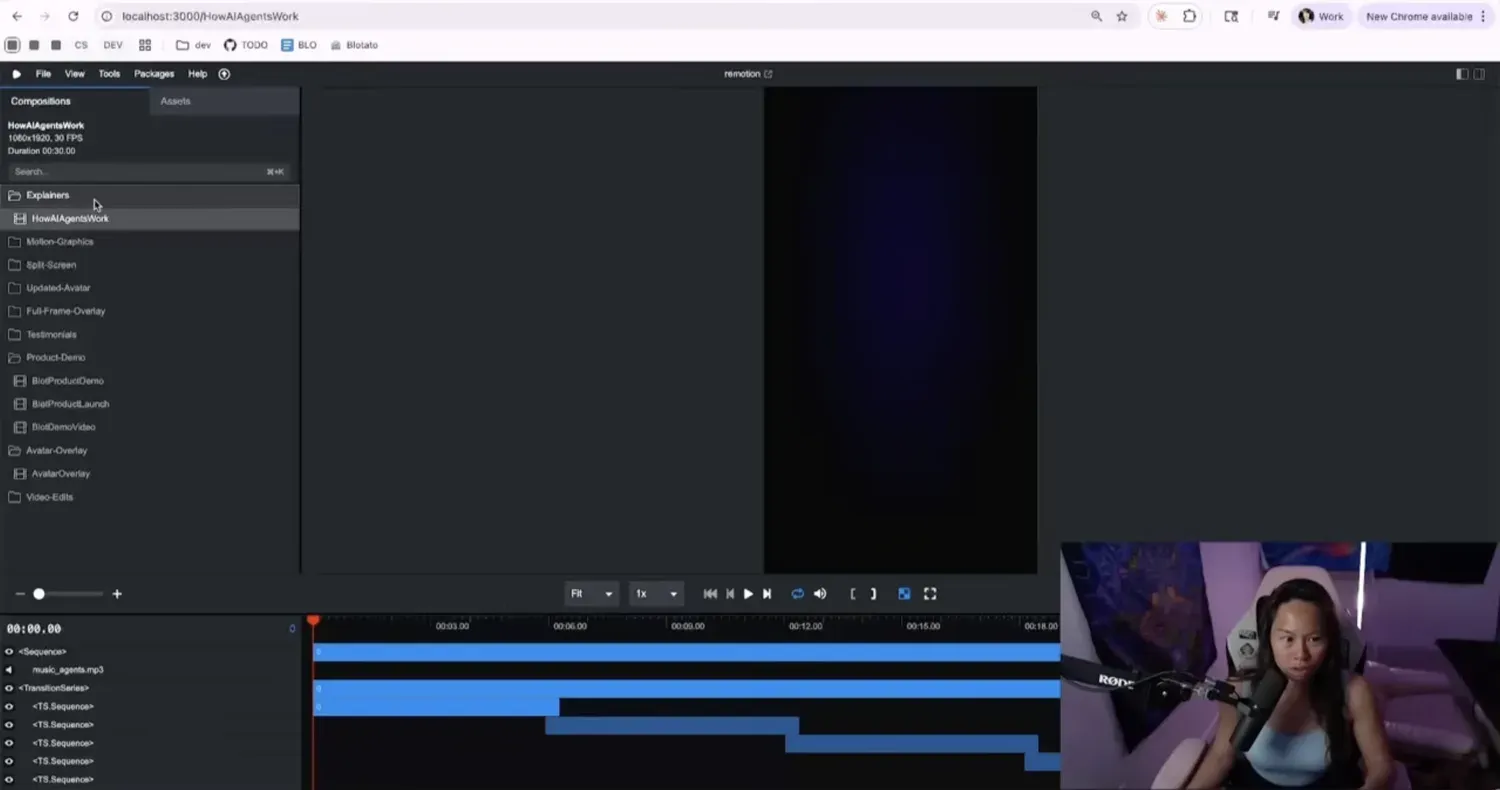
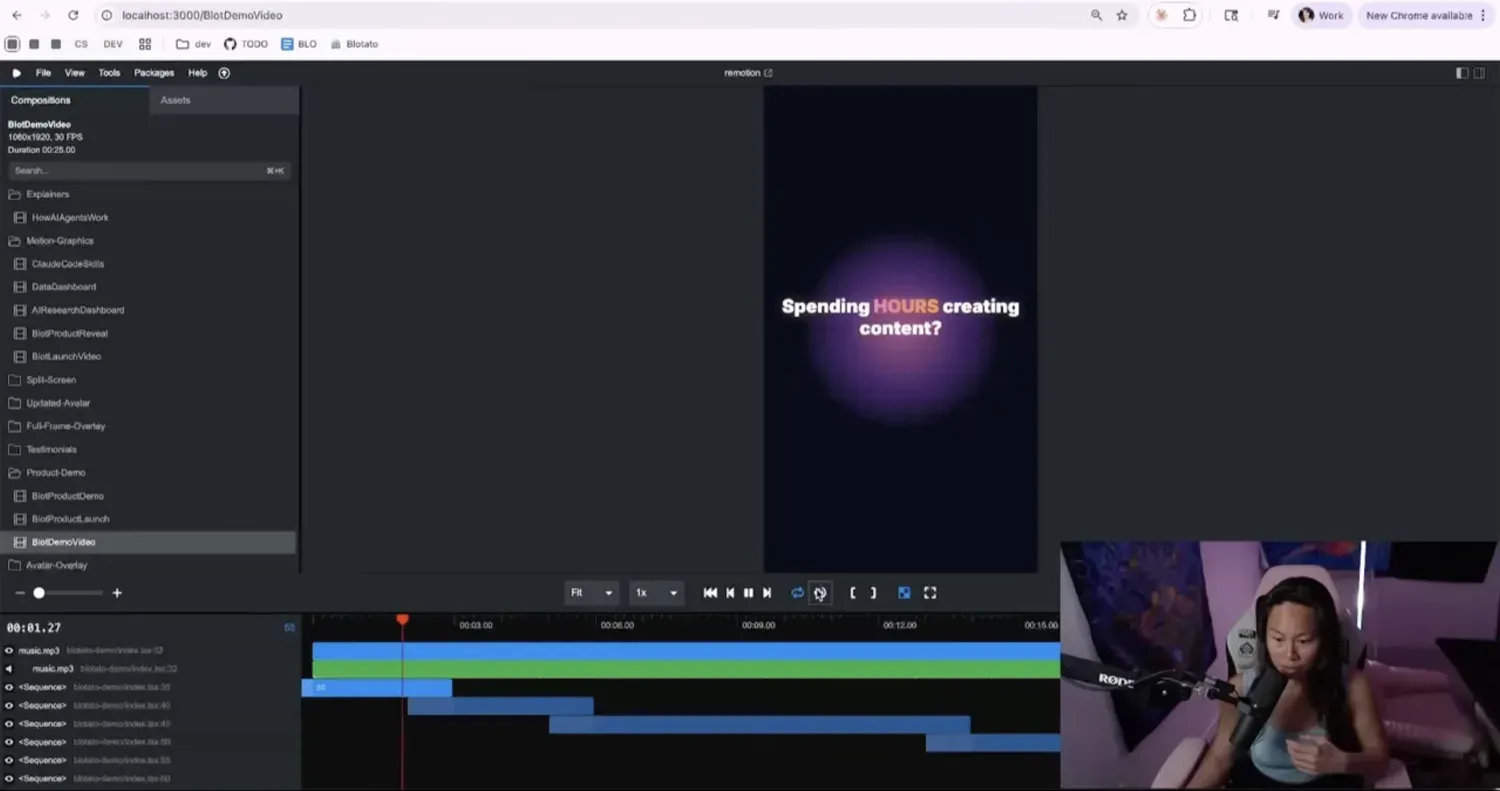
The render itself takes 2 to 10 minutes depending on the video duration (longer if you asked for specific background music, because the music-fetching step adds a search-and-download cycle on top of the render). When it finishes, Remotion auto-opens its own studio at localhost:3000 in your browser so you can preview the video, and the left sidebar lists every project Claude has built for you.
That’s the entire video-one workflow: one prompt, one storyboard approval, one render. This was on the very first try, with no edits to the storyboard at all.
Step 3: Generate a Product Launch Video From Any Website
The second prompt does something I hadn’t seen before. You give Claude a URL and it uses the Claude in Chrome extension to open the page, pull the brand colors, download the logo, grab product screenshots, and build a six-scene launch video from all of that (hook, product intro, simulated demo, real product screenshots, feature callouts, and social proof). You don’t manually export a single asset.
I gave it blotato.com on the livestream. Claude analyzed the website, understood what the product is, and made a simulated demo for lack of a better word, then it also supplemented that with product screenshots it grabbed from the site. Honestly, its simulated demo looks a lot better than my actual product screenshots, funny enough. The brand colors, the logo, the social proof, it pulled all of it automatically.
Claude went to the website, figured out what the product was, what the brand colors are from the website, social proof from the website. It looked for product images on the website and downloaded them to embed in the video. All I had to do was say “here’s the website.”
Step 4: Scrape Google Reviews Into a Testimonial Reel
The third prompt is the one I think will be most useful for agencies and local businesses. You hand Claude the URL of any Google Business Profile, and it scrapes a few of the reviews via Claude in Chrome, animates the star ratings, and frames the Google reviews so they look really professional. I tested it on a random Florida plumber I literally just Googled (I’m not associated with this business, I just grabbed its link). It scraped three of the reviews and built the whole testimonial video without me doing anything other than pasting the link.
Imagine doing this for clients if you’re an agency, or if you’re a small business yourself and you have your own set of Google reviews. The only manual step is dropping each business’s URL into the variable line, and you can customize the theme to match the brand. I made it light-themed for the plumber demo, but the prompt accepts any direction you want to give.
Step 5: Edit an Existing Avatar Video With Captions and B-Roll
This was the build that flipped my brain on the livestream. I had a 52-second avatar video I’d originally recorded in HeyGen (raw footage, no captions, no overlays, no title). I cut it down to 30 seconds just so it would load faster, and fed that to Remotion. I asked for captions and a title in the original prompt.
Remotion ran ffmpeg under the hood to extract the audio and used a tool called Whisper to transcribe what the avatar was saying (so it could figure out what the visuals should be at each timestamp). The first version came back with captions and a nice title, but no website screenshots. So I followed up with one more instruction, “update this with screenshots from each website,” and about five minutes later Claude had pulled screenshots for every course in the script and overlaid them at the right moments. That follow-up is the part that turned a decent avatar edit into one I’d actually post on social.
If you were to just post an avatar video like the one on the left, it would be tough to do well on social media. It is possible. There are avatar videos where it’s just the avatar talking, but it’s harder compared to the one on the right, where you have some visuals going on in the video. It’s a little bit more interesting than the avatar just talking.
Step 6: Animate Data Into a Time-Lapse Infographic
The fifth prompt asks Claude to go find relevant CSV data for a niche and turn it into an interactive time-lapse visual. It’s like an explainer video but cooler because it’s visualizations. The prompt accepts your own CSV or your own data set if you have something specific you want to use, otherwise Claude researches the internet to find a relevant data set on its own. On the livestream I asked for AI research trends, and Claude pulled together a four-panel infographic called “The AI Research Explosion.”
Anthropic just released a huge research report today and you can imagine plugging that into Claude and making visuals like this. It could be the green screen of your TikTok video while you talk about what the implications are. It’s really cool to think of all the different things you can combine this with now that it costs near zero to make.
Step 7: Publish to Social Media With the Blotato MCP
The last step is the only paid part. If you want to publish from inside Claude Code instead of switching to a dashboard, install the Blotato MCP server. Once it’s connected, you can say “post this video to TikTok, Instagram, YouTube, LinkedIn, Twitter, Threads, and Facebook” in one sentence. You can schedule it 30 minutes from now or 2 months from now, and Claude Code figures it out.
To set it up, go to Settings in your Blotato account, click Generate API Key, copy the one-line setup command, and paste it into your terminal. Restart Claude Code one more time so the MCP loads.
Once you see post submission ID come back, that means it’s already submitted, and it’s usually available within 30 seconds or so. It depends on the length of the video, so a 3-minute video takes a couple minutes to upload and get approved. You can also ask Claude follow-up questions like “did it go live?” or “get me the final URL” and it’ll pull the answer from Blotato’s API without you opening the dashboard at all.
Pro Tips From the Build
Save each prompt as its own personal skill. After your explainer or product-demo prompt produces a video you actually like, tell Claude “save this prompt as a skill called /video-explainer.” Next time you want the same format, you type /video-explainer plus a topic and you’re done. After two or three sessions you have a personal skill library that does most of the prompt work for you.
Add a self-grading loop for virality. One of the tricks I like is adding this line to the prompt: “Don’t stop until you take screenshots every 5 seconds and the video scores 8 out of 10 on virality.” Some variation like that. That gives Claude Code an agentic feedback loop, so it’s going to keep going until it watches your video every 5-second interval and it looks good. That means things like captions are not blocking your face, the images are not weirdly sized or located, it just looks good.
Restart Claude Code after installing any skill. After installing the Remotion skill, you probably need to restart your Claude Code session so that it has access to the new skill. If it’s not using the Remotion skill after install, just make sure you restart Claude Code.
What This Workflow Can’t Do (Yet)
A few honest gaps worth naming before you commit a weekend to this:
- You still need HeyGen for AI avatars. Remotion edits existing avatar footage, but it doesn’t generate the talking head itself. The avatar in step 5 above was originally made in HeyGen and then handed to Remotion for the captions, title, and screenshot overlays.
- Renders take 2 to 10 minutes. On the livestream I tried five in parallel to save time and ran into issues midway through a couple of them. Normally I wouldn’t make five videos in parallel. Run them one at a time and the workflow’s reliable.
- It’s Claude Code only. The skill system that makes this work doesn’t run in desktop Claude. The $20 Pro plan is the price of admission.
- It runs locally and stays private on your computer. That’s a feature, but it means the rendered files live on your machine until you publish them.
Results You Can Expect
On the livestream I built five completely different videos and posted one of them directly to Instagram from a single follow-up Claude Code message, with the post going live within about 30 seconds (the full walkthrough is in how to post to Instagram with Claude). Every video I showed was made on the very first try, with no feedback to Claude on its storyboard or anything like that. After the first render I did go back and ask for a few changes (a light theme on one, screenshots added to another), and Claude made each change in a couple of minutes.
For my own channels, this is now part of every social batch. I typically batch a week of content at a time, the rendered videos sit in Blotato’s calendar, and the volume goes out across platforms automatically. If you want to combine Remotion with the rest of your AI editing stack, my list of the best AI content repurposing tools covers what I pair it with for clipping, captioning, and turning one long recording into a week of posts. For format-specific automations that complement the Remotion video build, I’ve written full walkthroughs on automating TikTok slideshows and automating Instagram carousels. For the design side of the same Claude workflow, I also wrote a full breakdown on how to use Canva with Claude to spin up finished social posts in the same chat. The part that genuinely surprises people is that every video I show was made on the very first try (I have not told Claude to edit it in any way), and except for my highly polished YouTube videos, I don’t have a team for any of the content I post.
Sabrina’s Final Take
If you already pay for Claude Code, the only thing you need to do is run npx skills add remotion-dev/skills, copy one of the five prompts from the video, and run it. The cost to make one video versus 100 is the same, because there are no credits for Remotion. If you also want to publish what you make without leaving Claude Code, the Blotato MCP is what handles that step.
Make AI Videos With Claude FAQs
Can you actually make unlimited AI videos with Claude Code?
Yes, in the sense that Remotion has no credits, no per-video fee, and no rate limit on rendering. The real cap is Claude Code token usage, which sits well under the $20 Pro plan ceiling for video work because the skill does most of the work locally instead of round-tripping every step through an MCP server.
Do I need to know how to code to use the Remotion skill?
No. Claude does the heavy lifting. Your job is the prompt, the storyboard approval, and clicking render. If you don’t like something Claude makes, you can just talk to it to fix it. Don’t like the music, ask it to change. Don’t like the hook, ask it to change. Don’t like a chart, ask it to remove it.
Can Remotion replace HeyGen?
For most things, yes. For realistic talking-head AI avatars, no. The two work well together: generate the avatar in HeyGen, feed the raw footage to Remotion for captions, overlays, and timed b-roll. That’s the build I walked through in step 5 above and it’s the strongest combination I’ve found so far.
How long does each video take to generate?
About 2 to 10 minutes per video depending on duration. The music-search step adds extra time when you ask for a specific genre, because Claude has to search and download from Pixabay before the render starts.
Why use the Blotato MCP instead of opening each social dashboard?
If you’re posting on multiple platforms multiple times a day like I am, the MCP just saves a lot of switching. From inside Claude Code you can say “post this video to TikTok, Instagram, YouTube, LinkedIn, Twitter, Threads, and Facebook” and schedule it for whenever you want. You can also ask follow-up questions like “did it go live?” or “get me the final URL” and Claude pulls the answer back without you opening the Blotato dashboard.