How to Make Faceless YouTube Shorts With AI (Beginner's Guide)
How I make faceless YouTube Shorts with AI using n8n and Blotato. The exact no-code build I walk through, step by step, in one sitting.
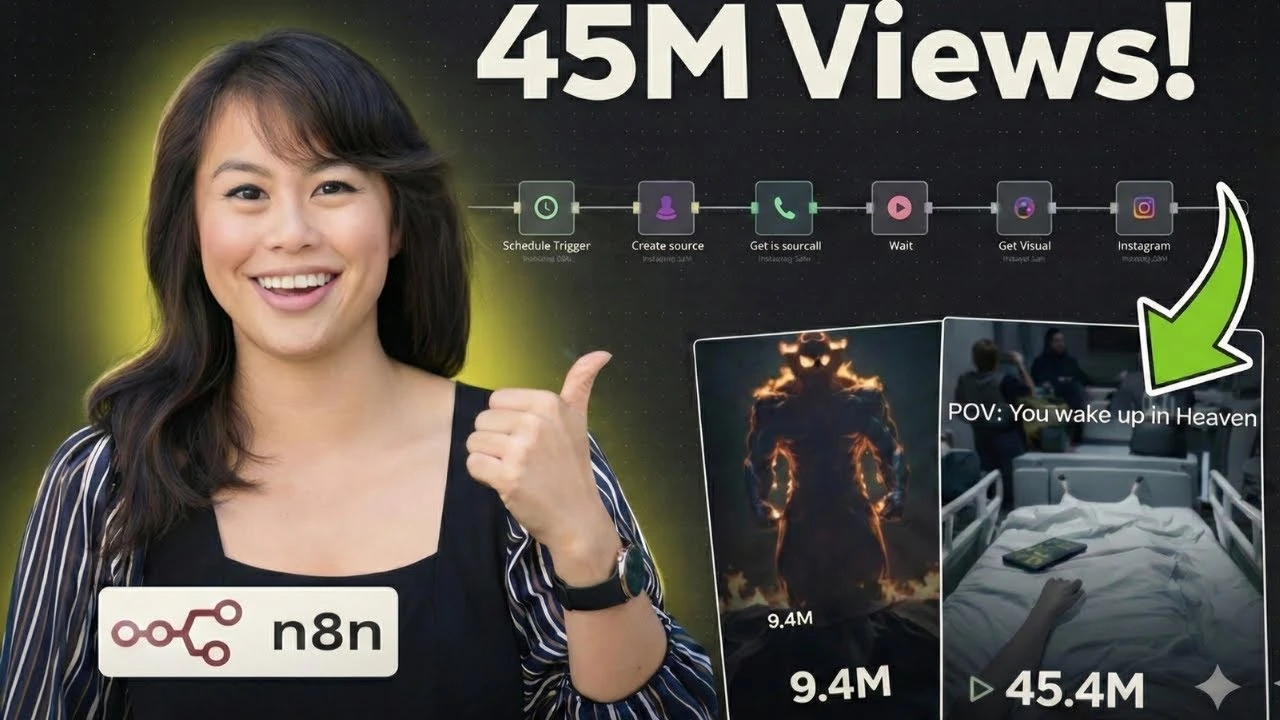
If you want to know how to make faceless YouTube Shorts without paying for an all-in-one AI generator that’s locked into one style, here’s the exact no-code build I walk through on the live stream. We’re starting in n8n with a blank canvas, adding the Blotato node, and turning it into a faceless video factory in five connected steps. Then we layer on an AI research agent and a schedule trigger so the workflow’s running every morning at 10am without you having to touch it.
Most “faceless Shorts” guides on page one of Google are product landing pages for a single tool, or 10-niche listicles that never show you the build. This one shows the actual wiring: which nodes go where, what wait time each template needs, and the small handoff step that’s easy to miss the first time (dragging the Get Visual ID from one node into the next).
How to Make Faceless YouTube Shorts With AI (Video Guide)
If you’d rather watch the full walkthrough, this is the live stream where I build the whole workflow on screen. The written guide below covers the same build with extra detail on the wait-time-by-template rule, the AI research agent at the end, and the part of the SERP nobody covers: when an all-in-one generator beats the modular workflow and when it doesn’t.
How to Make Faceless YouTube Shorts: The Stack
Three tools across the whole build. All free or freemium.
- n8n as the workflow runner. Sign up for the cloud version on your first run, then self-host later when you want unlimited executions for free. It’s the part that wires every other tool together.
- Blotato as the faceless video generator and the social publisher. The same node creates carousels, AI image slideshows, and true AI videos with ElevenLabs voiceover, then pushes the finished asset to the social accounts you’ve connected (the live demo posts to Instagram and TikTok).
- An LLM of your choice for the AI research step that comes later. The Blotato Create Source node uses Perplexity under the hood, so you don’t need a separate API key for research.
Three tools is deliberate, but it is not the only way to build this. If you want to see what else fills each slot before you commit to this stack, I compared the best AI tools for faceless content by the bottleneck each one removes.
I built Blotato, so take this with whatever grain of salt feels right. The part Blotato earns in this stack is the visual generation and the multi-platform publish step, because the generation is what turns “another AI Short” into something with a designed look, and the publish step is the part new builders almost always skip until they get tired of uploading to each platform one at a time.
If you want to follow along on your own account, start a free 7-day Blotato trial to test the templates, then grab the API key from Settings then API when you’re ready (generating it ends the free trial and activates your paid Starter plan), and paste it into the n8n credentials screen we cover in Step 2. The trial covers every template type the workflow uses (carousel, AI image slideshow, true AI video with voiceover) so you can test the visuals before you commit. If you also want the bigger income picture before you build, see the faceless passive income ideas breakdown for where Shorts fit alongside Substack and long-form YouTube.
Faceless Shorts: All-in-One Generators vs Modular Workflow
Before you build, decide which trade you want. The all-in-one tools that dominate the SERP win on speed-to-first-video. The modular workflow wins on flexibility and on not getting flagged for repetitive output a month in.
| Approach | What it does | What it can’t do | Best for |
|---|---|---|---|
| All-in-one Shorts generators (Invideo AI, AutoShorts.ai, Faceless.video) | One prompt, one finished Short, one preset style | Locks you into one visual style, one voice, one platform, with no easy way to swap the research source | Beginners testing if Shorts work for them before investing in any stack |
| Single video tool + manual posting (Creatomate, Pictory, plus CapCut) | Custom templates, more control over scenes | Doesn’t research topics, doesn’t post for you, so every platform is a manual upload | One-creator brands posting under 5 Shorts a week |
| n8n + Blotato modular workflow (this build) | Researches the topic, generates the asset, picks the style per run, posts in parallel to every platform | Can’t replace the hook or the niche choice | Solo creators or agencies running 5+ Shorts a week, or multiple accounts |
The modular workflow earns its keep around the 10-Shorts-a-week mark or as soon as you run more than one account. Under that, the all-in-one tools are fine and faster. If you want the code-first version of AI video generation instead of no-code, the make AI videos with Claude Code post walks through the Remotion + Claude alternative.
How to Make Faceless YouTube Shorts (Step-by-Step)
The build is a straight line. Trigger, create visual, wait, get visual, publish. Then we layer on research and scheduling.
Step 1: Set Up n8n and Enable Verified Community Nodes
Sign up at n8n.io, click Get Started, and you’ll land on the cloud dashboard with an Open Instance button. Hit it to spin up your account.
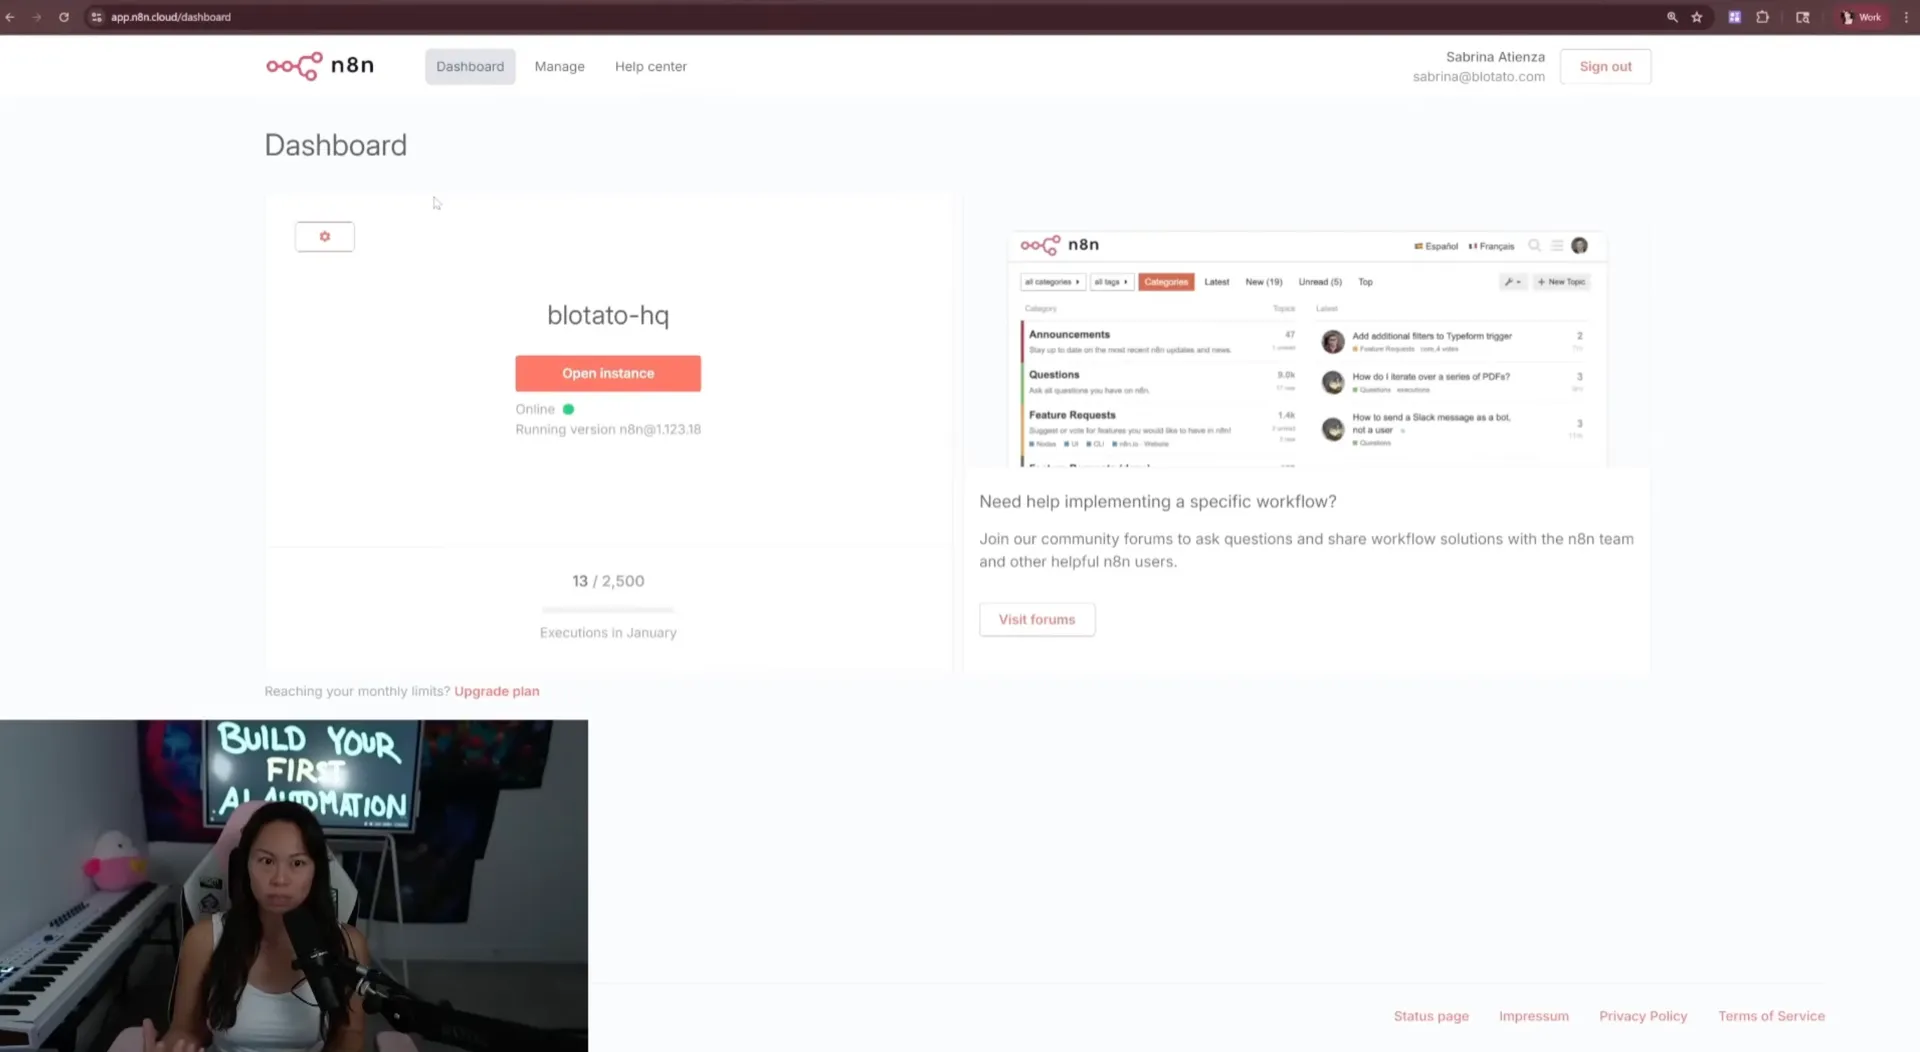
Before you build anything, go into Settings (the gear icon, top left of the admin panel) and scroll down to Verified Community Nodes. Flip the toggle on. This is the setting that lets you install community-built node packages, which is how the Blotato node gets into your instance. n8n usually needs a quick restart for the change to take effect.
Step 2: Add the Blotato Node and Paste Your API Key
Back in your dashboard, click Create New Workflow and name it “My First AI Automation.” On the right panel, pick the manual trigger (the “click to run” option) for now. You’ll swap this for a schedule trigger later.
Click the plus button on the canvas, search for “Blotato,” and hit Install. Once it’s in, double-click to open it. The first time, it asks you to create a credential.
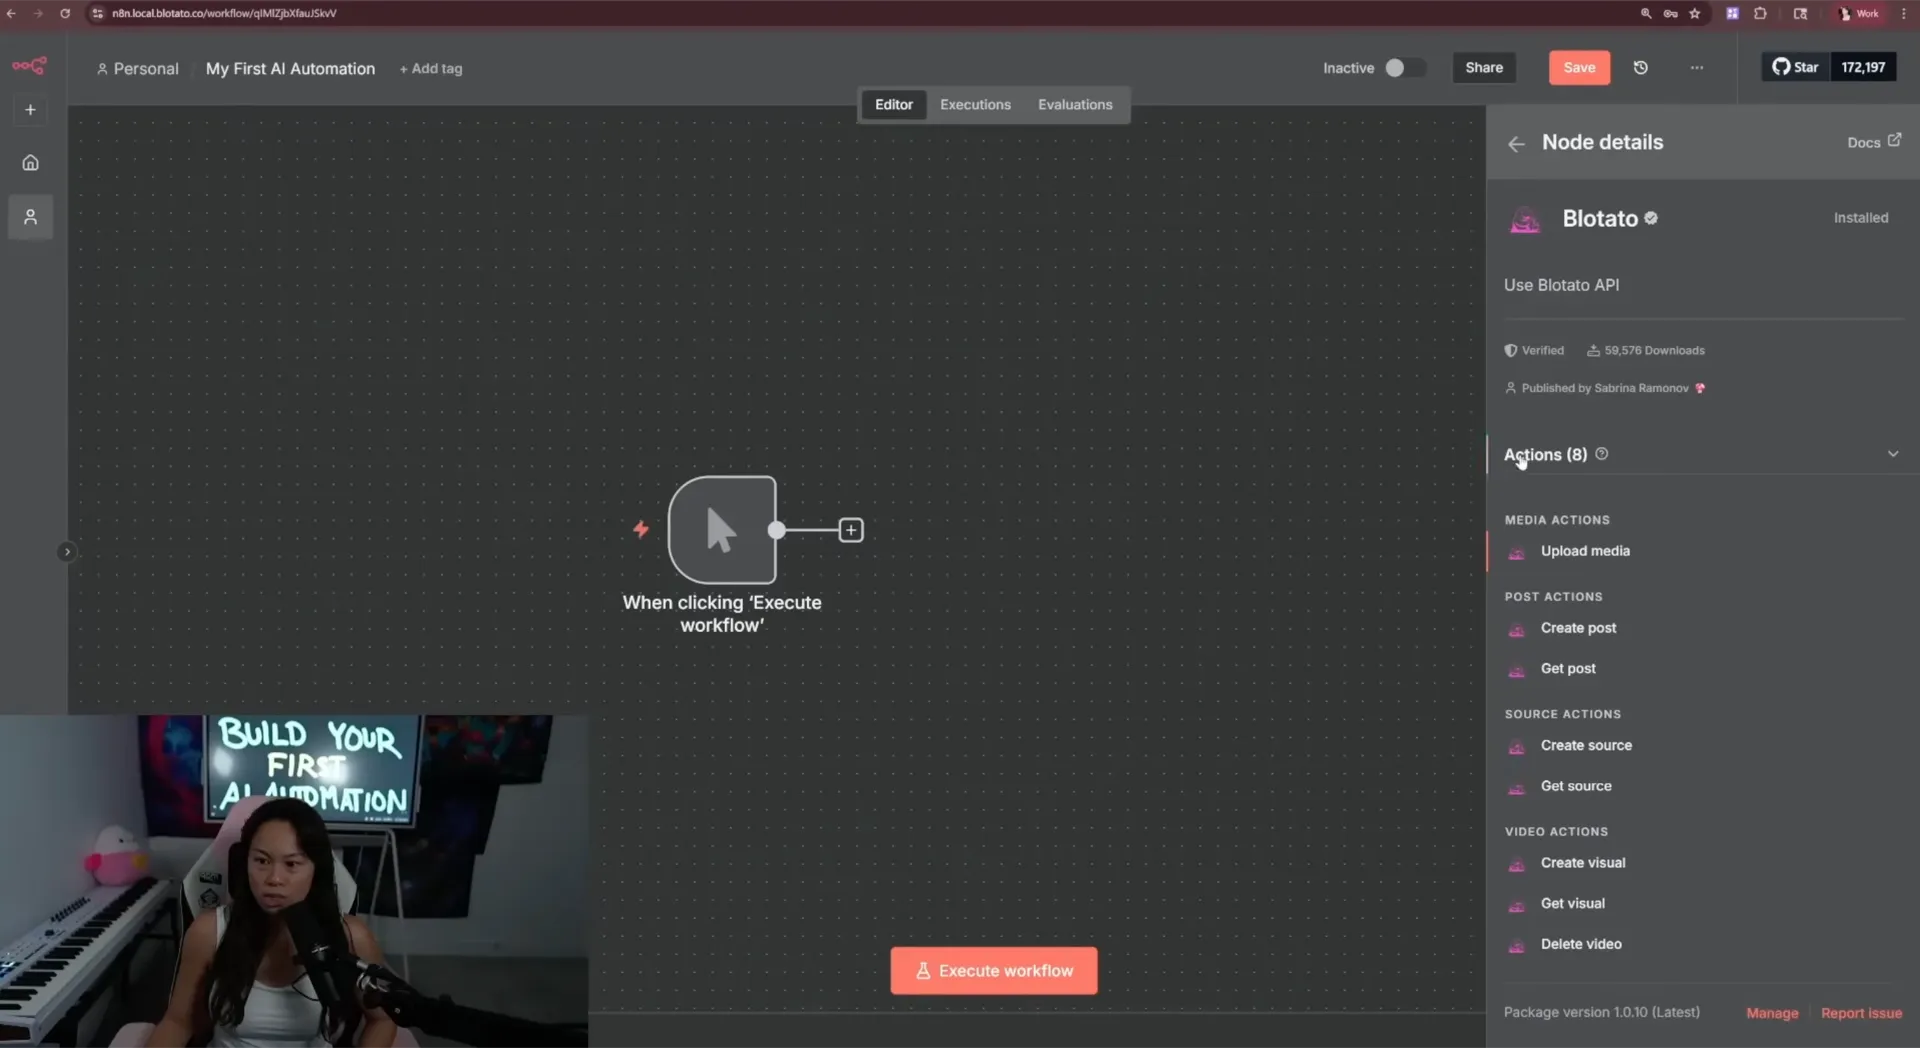
To get your API key, open your Blotato account, go to Settings, click API, and hit Generate API Key. Copy it, switch back to n8n, paste it into the API Key field, and click Save. You should see a green “Connection tested successfully” banner.
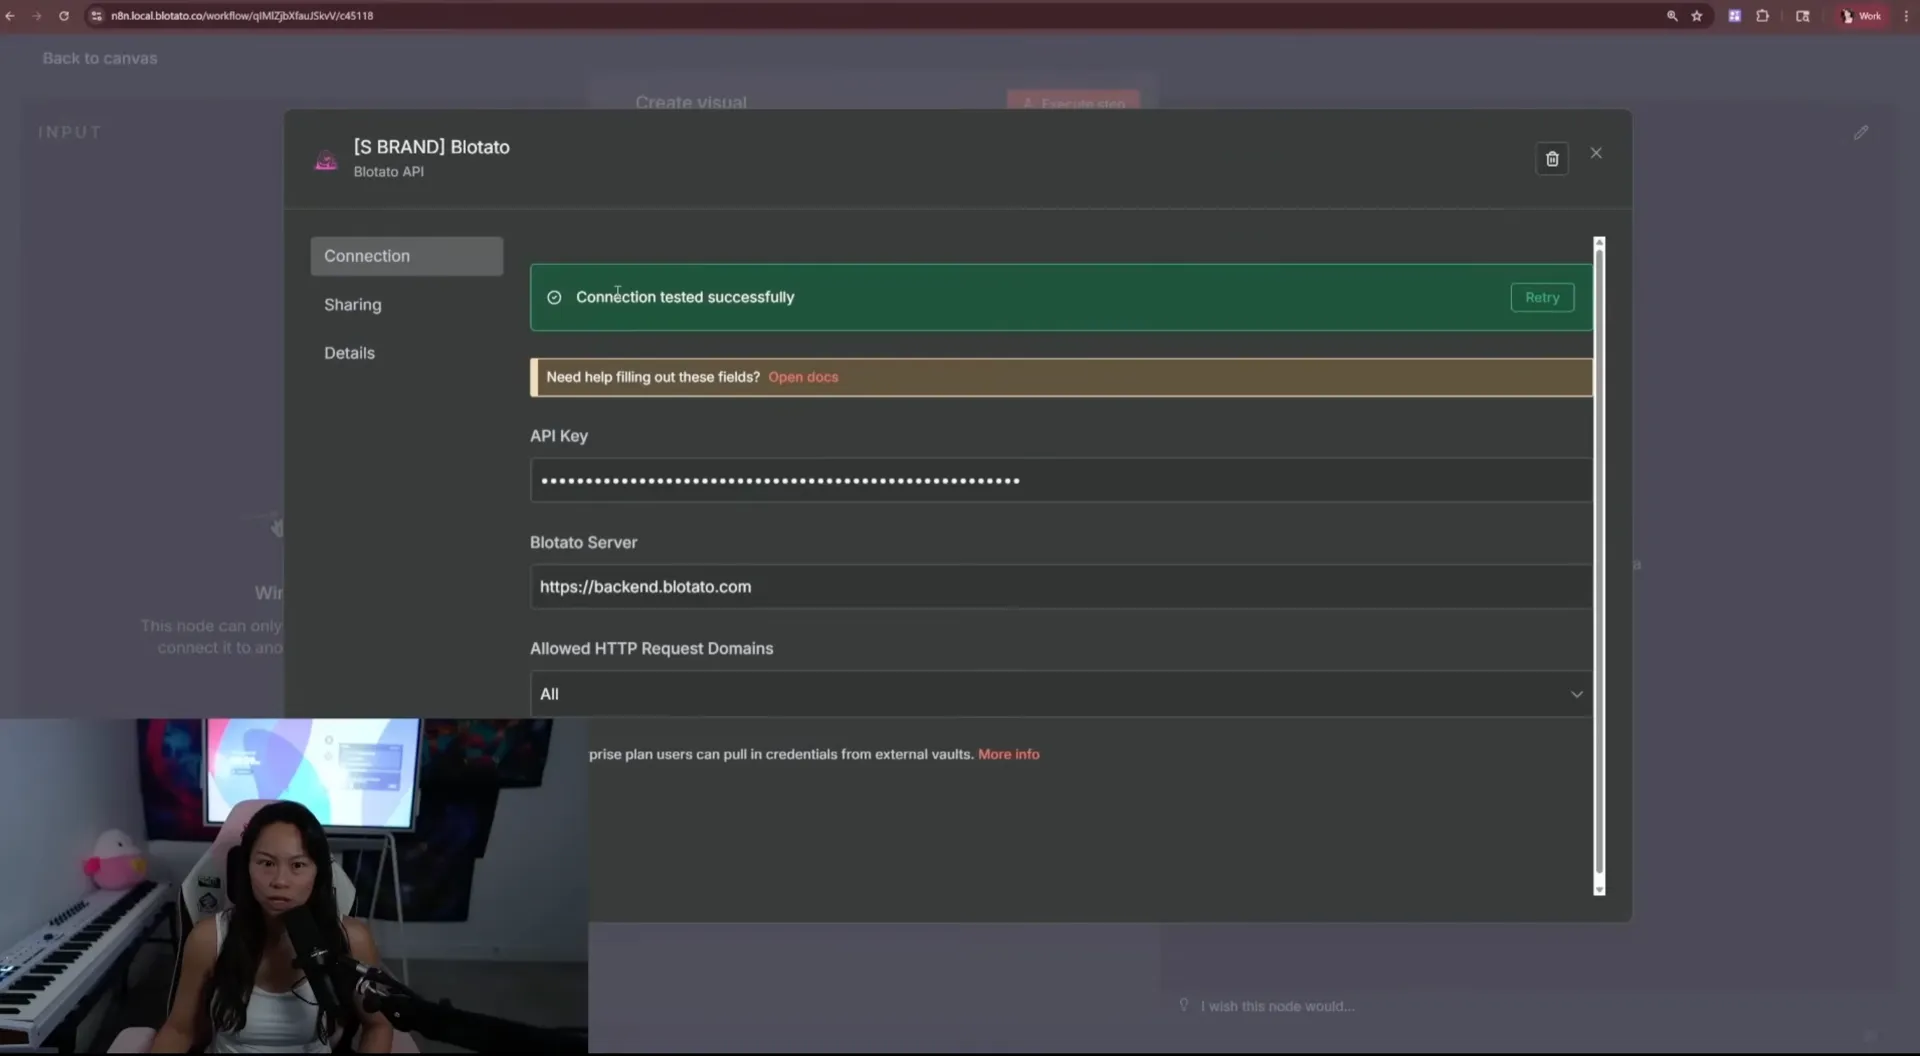
That’s the entire setup. From here, every Blotato node in this workflow uses the same credential.
Step 3: Build the Carousel First (So You Can Test the Loop Fast)
We’re going to build a faceless video factory, but we’re going to test the wiring on a carousel first. Carousels render in about five seconds, while a true AI video can take five to ten minutes. Test fast, then swap the template.
Set the action to Create Visual. Resource: Video. Operation: Create Visual. Template: pick “Tutorial Carousel with Minimalist Flat Style” from the dropdown. In the Prompt field, type any topic (“Claude coding tips for vibe coders,” “Five things you didn’t know you could do with NotebookLM,” anything).
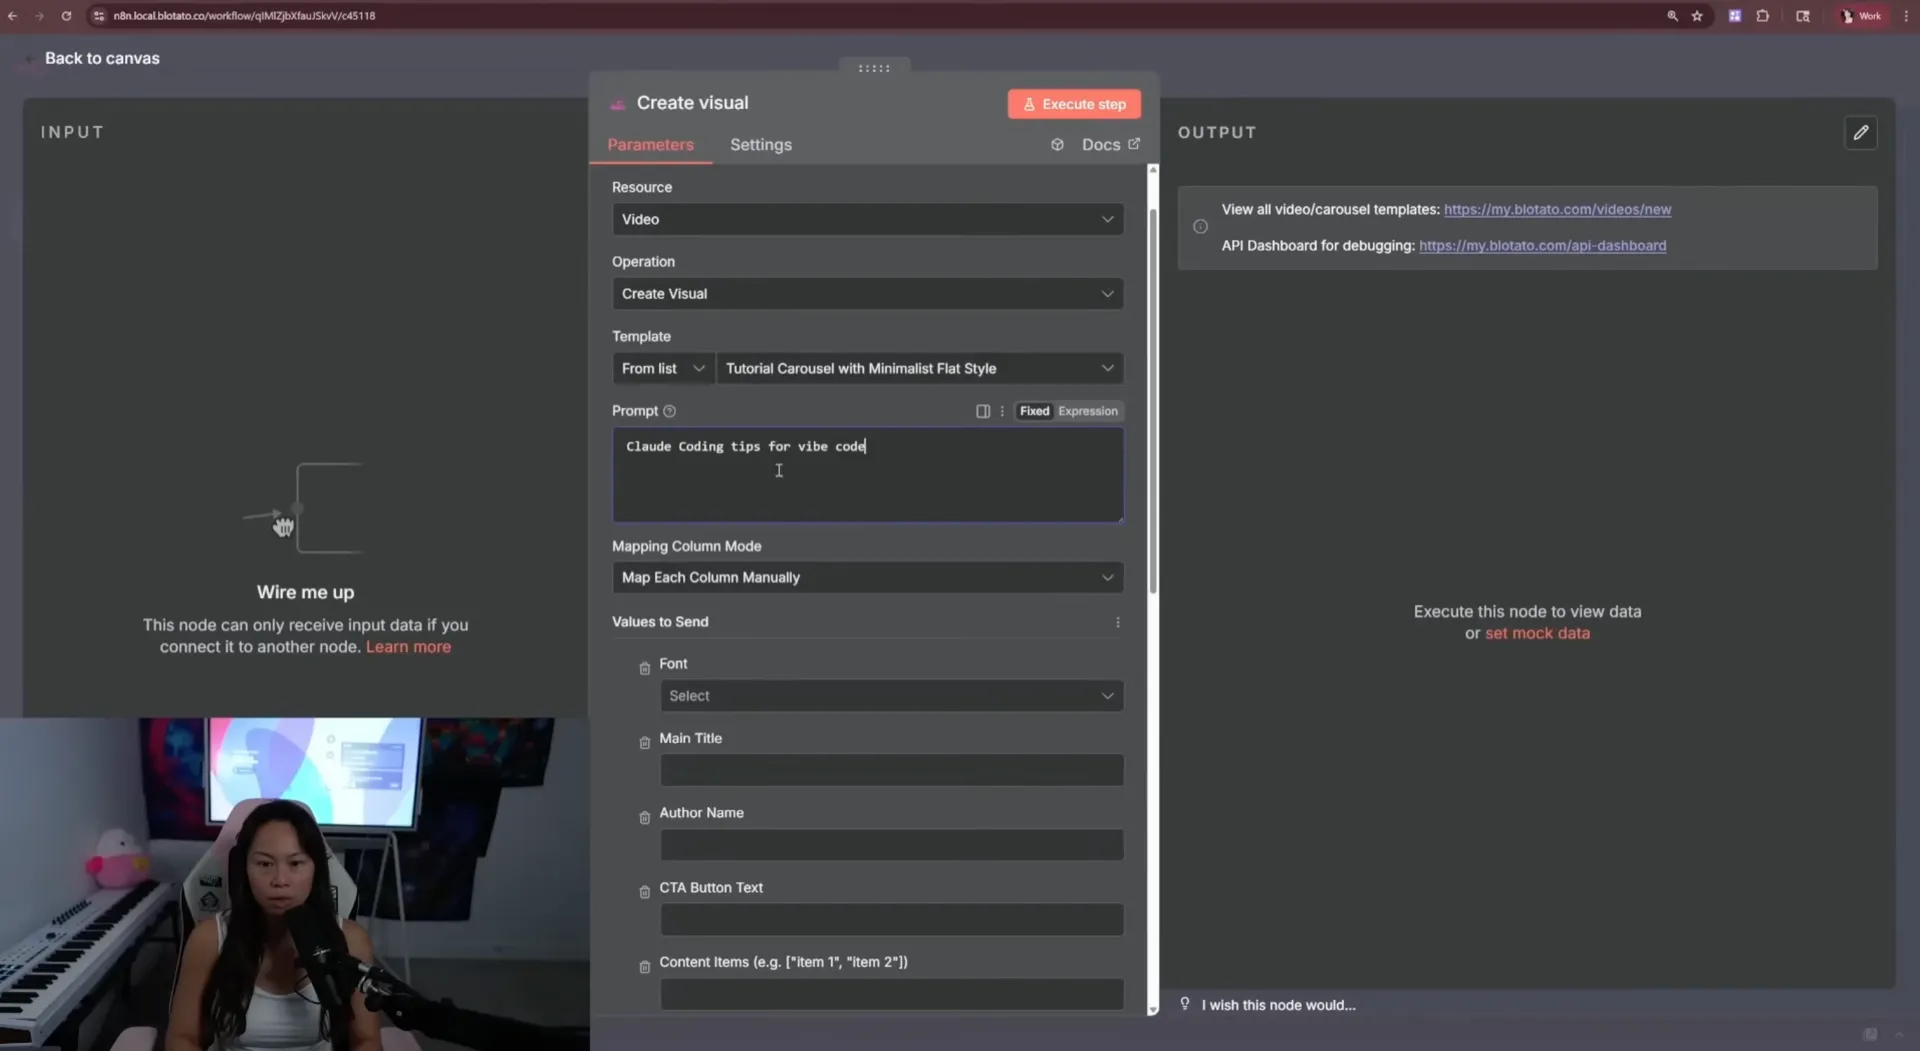
Click the per-node run button. n8n fires that node in isolation so you can see if it works before you wire up the rest. The response comes back as JSON with a status of “queueing” and an id field. That id is the only thing the next node needs.
Step 4: Wire Up Get Visual and Add a Wait Node
Duplicate the Create Visual node and change the Operation to Get Visual. Connect the arrow from Create Visual into a Wait node (search “wait” in the plus menu), then from Wait into Get Visual. Three connected nodes plus the trigger.
The Wait time matters and most beginners miss this. The rule from the video:
- Pure text carousel: 5 seconds.
- AI image slideshow: 1 to 2 minutes (bump to 2 to be safe).
- True AI video with voiceover: 5 to 10 minutes depending on model and clip count.
For the test run on a carousel, leave it at 5 seconds. When you swap the template later, change this.
Inside Get Visual, you need to drag the id from the Create Visual response into the Video ID field. n8n shows the data from the previous step on the left panel. Drag the ID across. That’s the handoff that breaks most first-time builds.
Step 5: Add Create Post to Publish to Social
One more Blotato node. Set the action to Create Post. Pick your platform (Instagram, TikTok, YouTube Shorts, whatever you connected in Blotato), pick the account, type a caption, and drag the Image URLs or Video URL from Get Visual into the Media URLs field.
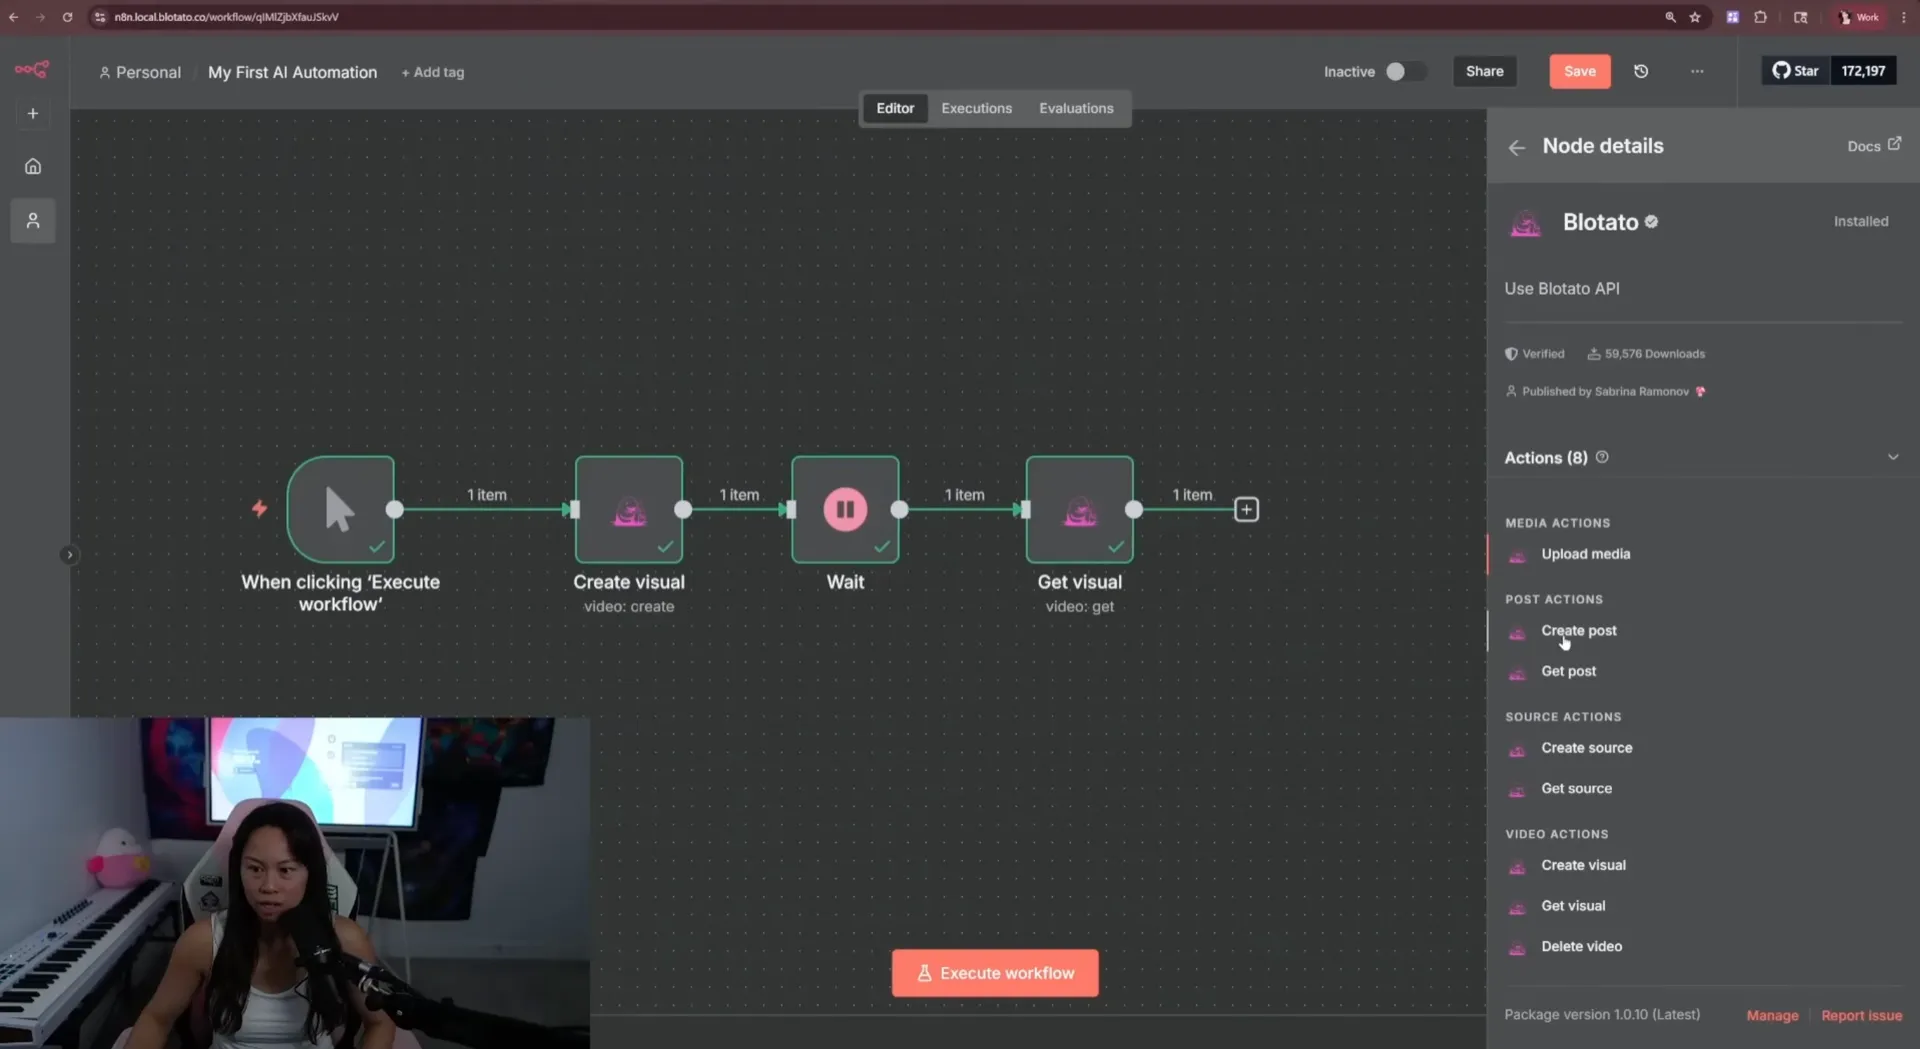
Click the Run Workflow button at the bottom of the canvas. The whole chain fires: trigger, create the carousel, wait 5 seconds, get it back, post it. The carousel shows up on your social account within a minute. That’s the full first AI automation, in five connected nodes.
Step 6: Swap the Template for a Faceless AI Video
Now the same workflow becomes a faceless video factory. Open the Create Visual node again and change the Template to one of the video-style options. Two good ones to start with:
- AI Image Slideshow (the “ski tips for icy conditions” demo in the video). Generates a stack of AI images, adds caption text per slide, plays back as a vertical slideshow. Great on TikTok, fine on YouTube Shorts. If you need the same character across every slide (a specific pet, product, or person), the TikTok slideshow build uses a reference-image lock that keeps the subject consistent.
- Create Scenes With Images, Videos, or AI-Generated Images (the true AI video). Generates the images, adds an ElevenLabs voiceover, adds light transitions between scenes. This is the closest output to what most people picture when they hear “faceless YouTube Short.”
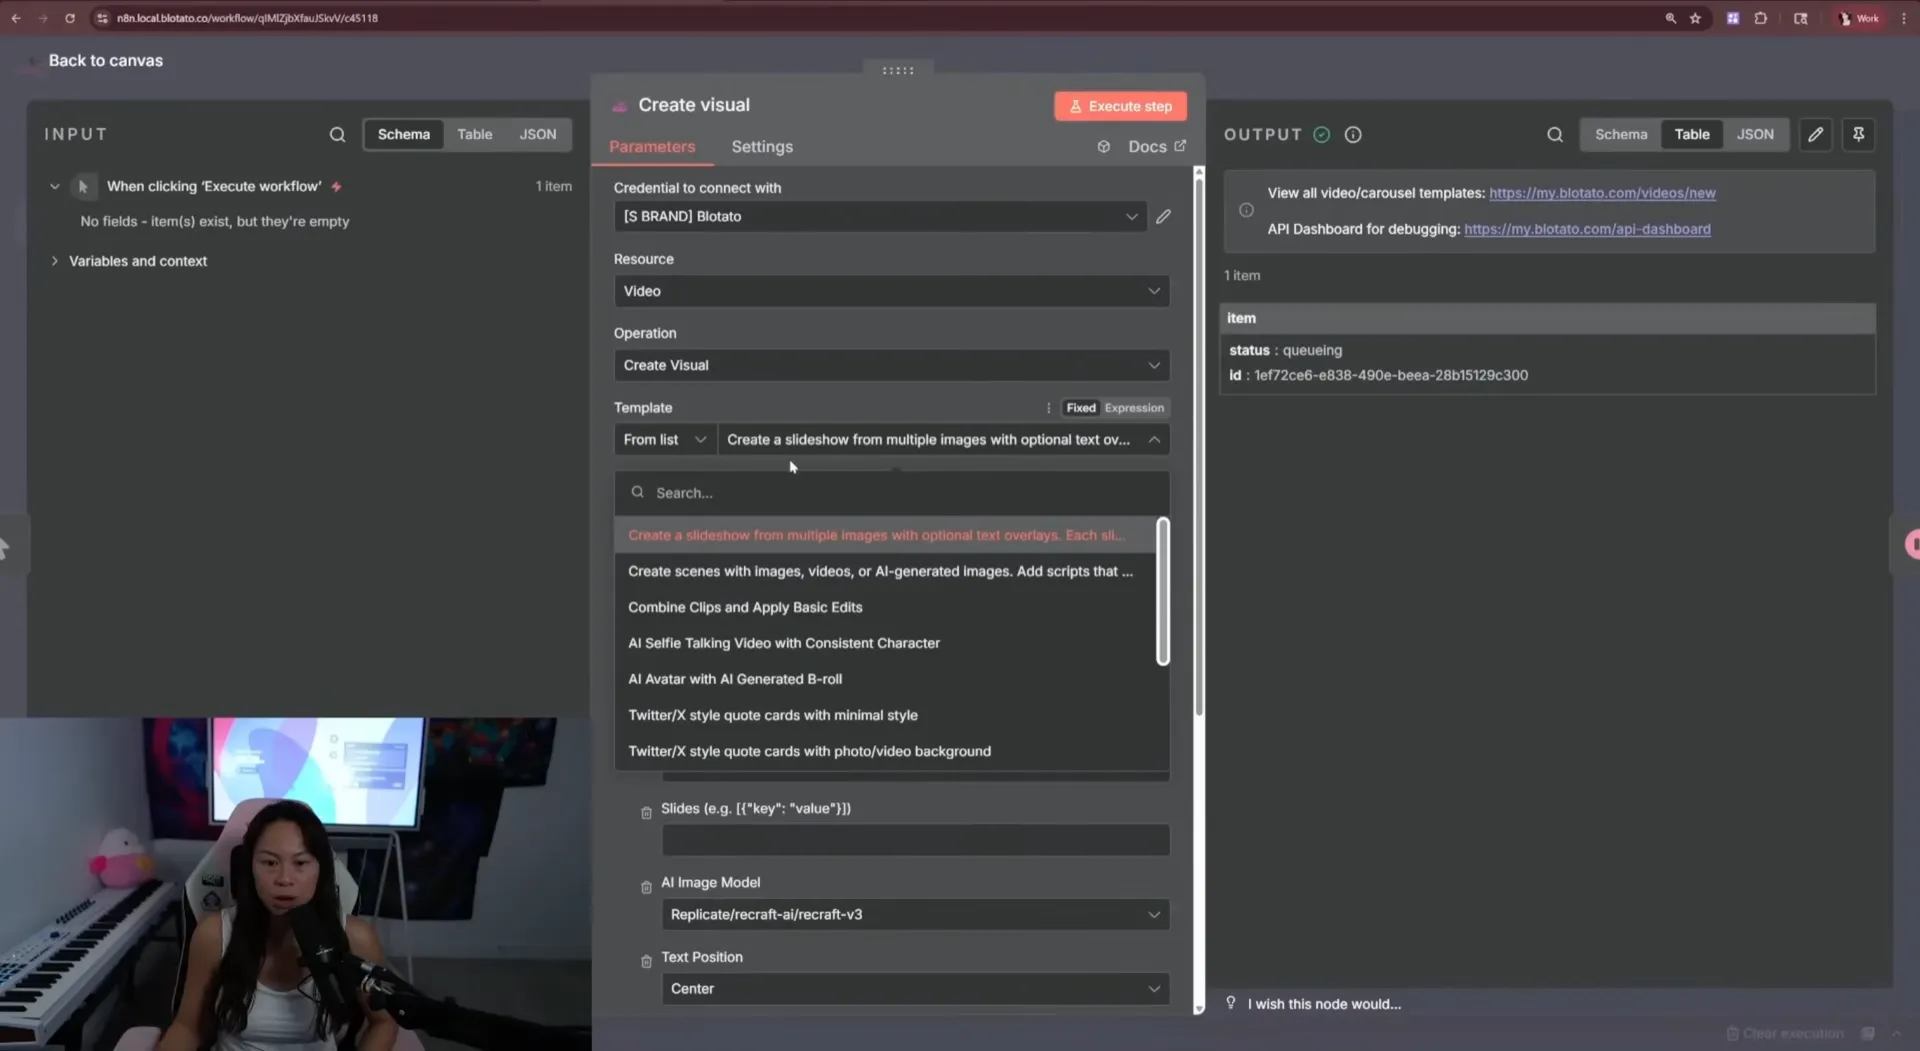
Bump the Wait node up (2 minutes for the slideshow, 5-10 for the true AI video) and run it again. Same five nodes, faceless video on the other end.
You can scroll down inside the Create Visual node to override the AI image model (Recraft v3 if you want photorealistic), the text position, and most of the scene parameters. For a first run, leave them all on the defaults.
Step 7: Add an AI Research Agent and a Schedule Trigger
This is the upgrade that turns the workflow from “I type a prompt once” into “it runs every morning while I’m asleep.”
Add two more Blotato nodes at the front: Create Source and Get Source. Create Source takes a topic and runs it through the AI research agent (powered by Perplexity under the hood). Get Source returns the cleaned research output. Pipe that output into the Prompt field of the Create Visual node.
Then delete the manual trigger and replace it with a Schedule Trigger node set to “every day at 10am” (or whatever cadence you want).
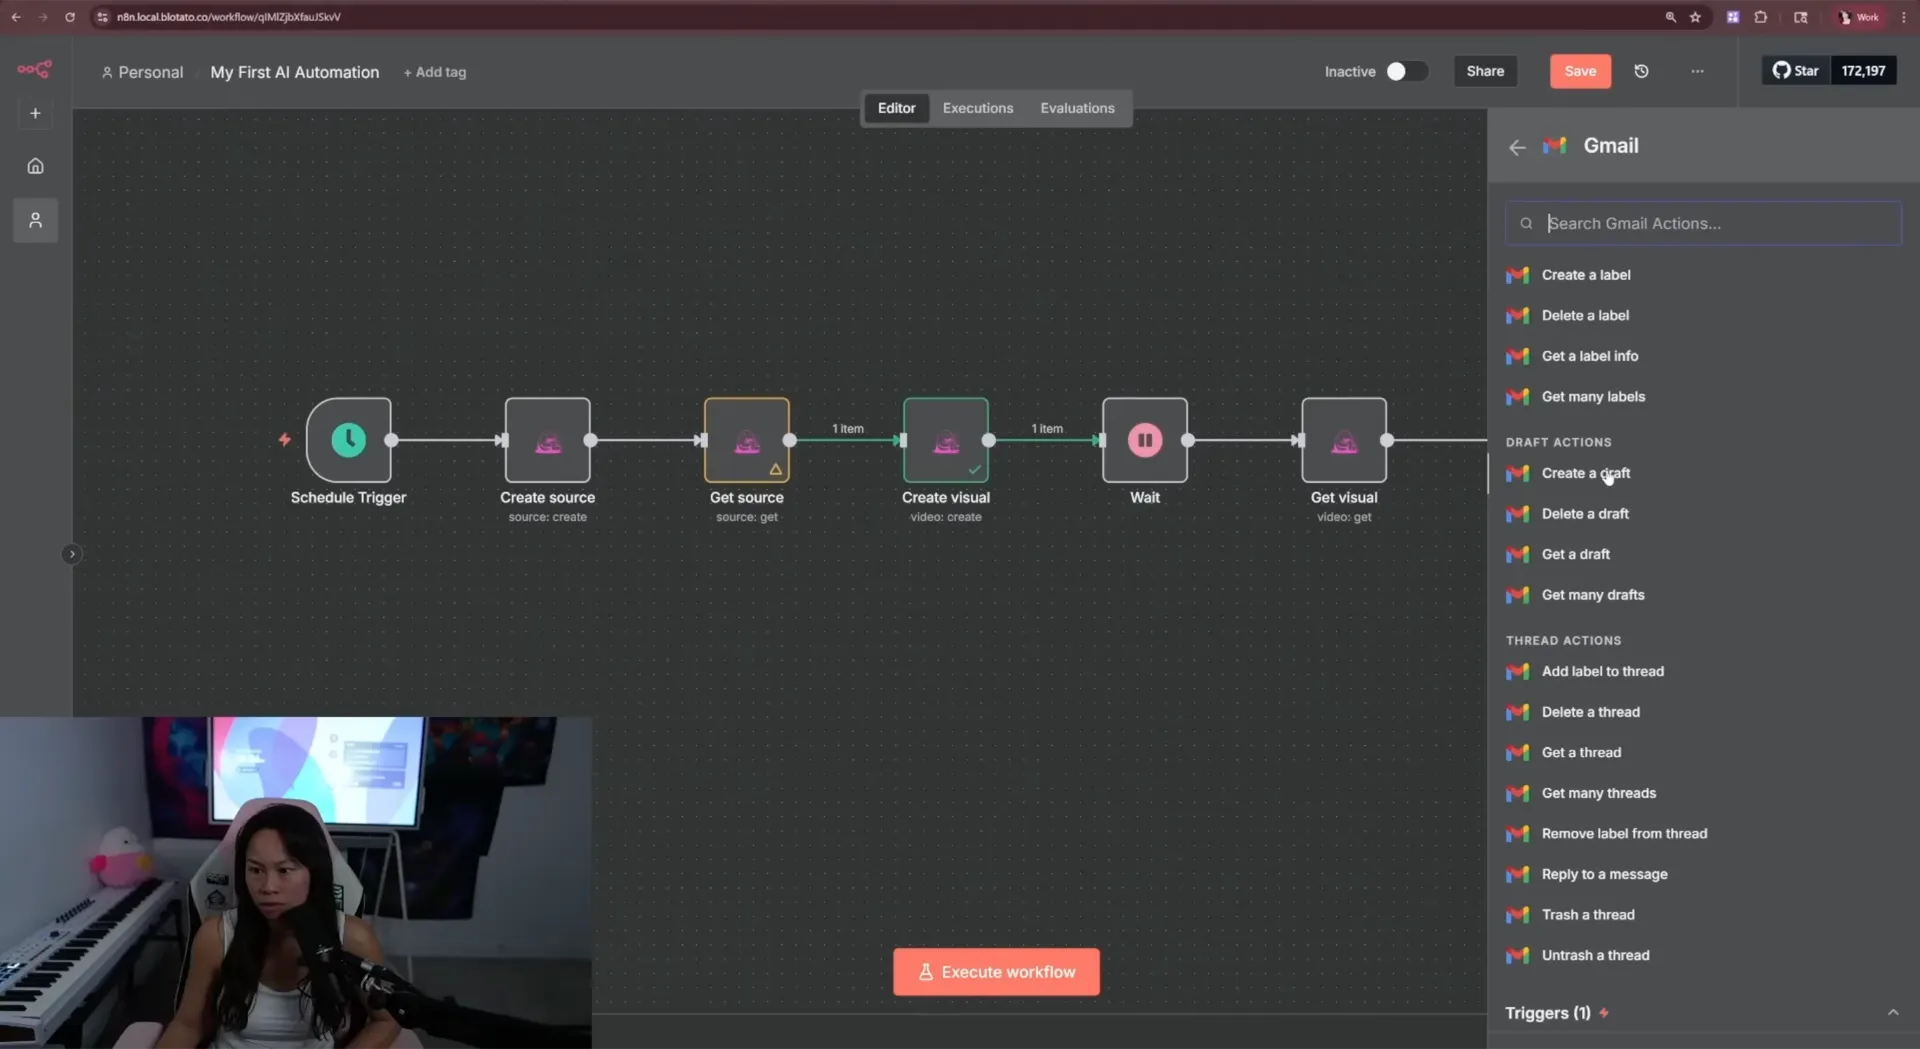
You can also duplicate the Create Post node and run multiple platforms in parallel (one node per channel). And if you don’t trust the workflow to post unattended, add a Human in the Loop node before Create Post. n8n sends you a Gmail (or Discord, or Google Chat) with an Approve / Decline button. Approve fires the post. Decline kills it. That’s the safety wheel until the output quality is high enough that you stop checking.
Pro Tips From the Build
Always test the carousel template before you build the video template. Carousels render in 5 seconds. Videos take minutes. Get the wiring right on the fast template, then swap. Saves you from waiting through a 10-minute render only to find the Get Visual ID wasn’t connected.
Set the Wait time per template, not per workflow. The same Wait node behaves correctly for a carousel and badly for an AI video. If your faceless video keeps failing at Get Visual with a “not ready” error, your Wait is too short for the template, not broken.
Use the per-node run button constantly while building, not the full workflow run. Every node in n8n can fire in isolation. Test each step until it returns a green check, then connect to the next. Save the full workflow run for the final smoke test once the chain is wired.
What This Workflow Can’t Do (Yet)
A few honest limits before you build.
- It can’t pick the niche or the hook for you. A faceless workflow that publishes daily AI Shorts on a niche nobody searches for is just expensive automation. Validate the niche with one or two manual posts first.
- All-in-one Shorts tools are still faster for the very first video. If your goal is to see if Shorts work for your brand at all, install AutoShorts.ai or Invideo AI, ship one video, then come back and build this when you want flexibility.
- AI disclosure matters on YouTube. YouTube requires disclosure for realistic AI-generated content. Stylized animation usually doesn’t trigger it, but lifelike avatar voices and faces usually do. Check the current policy before posting at scale.
- The Schedule Trigger doesn’t replace human review for the first 30 days. Use the Human in the Loop node until the workflow’s output quality stops surprising you. Pulling a bad faceless video down after it ships is harder than approving a good one before.
Results You Can Expect
The first end-to-end run (sign up for n8n, install the Blotato node, paste the API key, wire five nodes, publish to one platform) is one focused sitting for a beginner. After that, generating a fresh Short and running it through the pipeline is one trigger and one approval. The AI image slideshow renders in 30 to 60 seconds depending on the model. The true AI video with voiceover takes 5 to 10 minutes. Both ship to Instagram and TikTok in the live demo, plus any other accounts you’ve connected in Blotato, as soon as Create Post fires.
Sabrina’s Final Take
If you’ve never built an AI automation, this is the right one to start with. It’s a straight line, it ships a real asset to a real platform on the first run, and the same template extends from carousels to AI videos with one dropdown change. Pick a niche you’d post about manually for 30 days, build the workflow once, and then turn the Schedule Trigger on. Once this basic version is running, see how one builder scaled the same idea into a fully custom faceless video factory that turns one topic into four platform-native videos. The Creator and Agency tiers on the pricing page cover multi-account posting if you decide to run this across more than one channel.
How to Make Faceless YouTube Shorts FAQs
Can I use Make.com instead of n8n for this build?
Yes. The Blotato nodes exist in both Make and n8n, and the same Create Visual / Get Visual / Create Post chain works in either one. The live stream uses n8n because it has more tutorials online and runs fully self-hosted for free. If you’re already paying for a Make seat, the same Blotato nodes are available there, you paste the same API key, and the build behaves the same way.
Should I use n8n cloud or self-host it?
Sign up for the cloud version on your first build so you don’t have to set up any infrastructure before you’ve shipped a Short. Once you’re past the first end-to-end run and you want unlimited executions, self-host n8n. The Blotato community node and every Create Visual template behave the same in both environments. The only caveat with self-hosting in your own closet, which is what I do, is that a power outage takes the automations offline.
What if n8n feels too complicated and I want to use Blotato without it?
Blotato also has a web UI where you can do most of what the workflow does manually. Paste a YouTube URL, run the AI research agent, generate a carousel or AI video, and publish to your connected accounts, all without wiring nodes. The n8n build is for when you want the same flow to run on a schedule, with a research step, without you touching it every day.
How long does the AI video template actually take to render?
Carousel templates ship in about 5 seconds. AI image slideshows take 30 to 60 seconds. The true AI video template with ElevenLabs voiceover and scene transitions takes 5 to 10 minutes depending on the model and the number of clips. Set the Wait node accordingly. If you animate the AI images into video clips instead of static-with-transitions, the render is even longer, so test before scheduling at scale.
Do I need to know code to run this workflow?
No. n8n is a no-code workflow tool, and every step in this build is drag, drop, paste an API key, and click Run. The only thing that feels code-like is dragging the id variable from one node into the next, and the n8n UI does the dragging for you.