How to Create Social Media Posts With Claude & Canva (In Minutes)
How to use Canva with Claude to generate posts, edit templates, and publish to Instagram and Facebook in minutes using the new Canva connector.
If you want to know how to use Canva with Claude to spin up finished social posts in minutes, this is the exact setup I run. The new Canva connector inside Claude lets you generate designs from scratch, edit existing templates by chat, and (with one extra connector) post straight to Instagram, Facebook, LinkedIn, and TikTok without ever opening a separate tool.
This guide walks through the full flow end to end: connecting Claude and Canva, finding every feature the connector exposes, generating a fresh design, editing a Canva template, and posting everything via the Blotato custom connector. Plus the two common errors that trip up first-time users and the one-line fixes for each.
How to Use Canva With Claude (Video Guide)
If you’d rather watch the full walkthrough, this is the video version where I build everything live on claude.ai. The written guide below covers the same workflow with extra detail on the discovery prompt, the template-analysis prompt pattern, and the two errors you will hit the first time you try to post.
Why This Stack Beats Designing Posts by Hand
Most “AI social media post” guides hand you one ChatGPT prompt and a Canva template pack. That still leaves you doing the design work: opening Canva, dragging text, tweaking colors, exporting, switching tabs, pasting the file into Buffer. By the time you publish, you’ve burned 20 minutes per post.
Real time savings come from chaining design and publishing into one conversation. With the Canva connector inside Claude, you describe what you want, Claude drafts the design in Canva, you review and tweak by chat, and the file is finished without ever leaving the Claude tab. Add the Blotato connector on top and the same conversation pushes the finished asset to Instagram, Facebook, LinkedIn, X, TikTok, Threads, and Bluesky in one go.
The whole setup uses claude.ai (no Claude Desktop or Claude Code required), a free or paid Canva account, and a Blotato account if you want the auto-post step. I’m involved with Blotato as a creator and tester, so take this with whatever grain of salt feels right.
How to Use Canva With Claude: The Stack
Everything you need to run this workflow:
- Claude on the web. The Canva connector lives inside Claude’s Connectors settings and works on a normal account.
- Canva account, free or paid. Most features in this guide work on the free tier.
- Blotato for the auto-post step. You add it to Claude as a custom connector pointing at
mcp.blotato.com/mcp, and Claude can then publish to all your connected social accounts in the same chat.
I built Blotato as a solo creator to manage my own posting across the channels I use, and the lowest plan today (May 2026) connects 20 social accounts on a single seat. If you want to test the whole Claude plus Canva plus auto-publish stack, start a free 7-day Blotato trial, connect Instagram and Facebook in settings, and grab the MCP URL from the API tab. That URL is the only thing you need to wire Blotato into Claude.
Claude + Canva vs Canva AI vs Native Schedulers: Pick the Right Workflow
Before you flip every workflow over, decide which approach fits how you already work. If you live inside Canva already, Canva’s own AI tools might be enough. If you need design plus publishing in one motion, the Claude stack pulls ahead.
| Approach | What it does | What it can’t do | Best for |
|---|---|---|---|
| Canva alone (Magic Studio) | Drag-and-drop design plus Canva’s built-in AI inside Canva | Doesn’t draft captions, doesn’t post to social, no template-aware editing prompts | Designers who want to stay inside Canva |
| Buffer / Later (manual design) | Schedule finished posts you designed elsewhere | Doesn’t generate or edit the visuals | Brands with a separate designer |
| Claude + Canva connector + Blotato | Generates designs, edits templates, drafts captions, publishes to 7+ platforms in one chat | Can’t replace strategy or a strong hook | Solo creators and small teams running 5+ posts a week across multiple platforms |
The Claude stack wins on volume, multi-platform reach, and the speed of going from idea to published post. The single-tool options win if every post needs heavy hand-crafted design or if you already have a dedicated designer. If you’ve automated other content types, the same pattern is in our Instagram carousels build and the TikTok slideshow build. For the video side of the stack, here’s how I make AI videos with Claude Code for free using Remotion, and for the full posting workflow, how to automate social media with Claude Cowork.
How to Use Canva With Claude (Step-by-Step)
Here’s the exact flow from the video. The first half wires Claude and Canva together, the second half adds the auto-post step and handles the two errors that come up the first time.
Step 1: Connect Canva to Claude
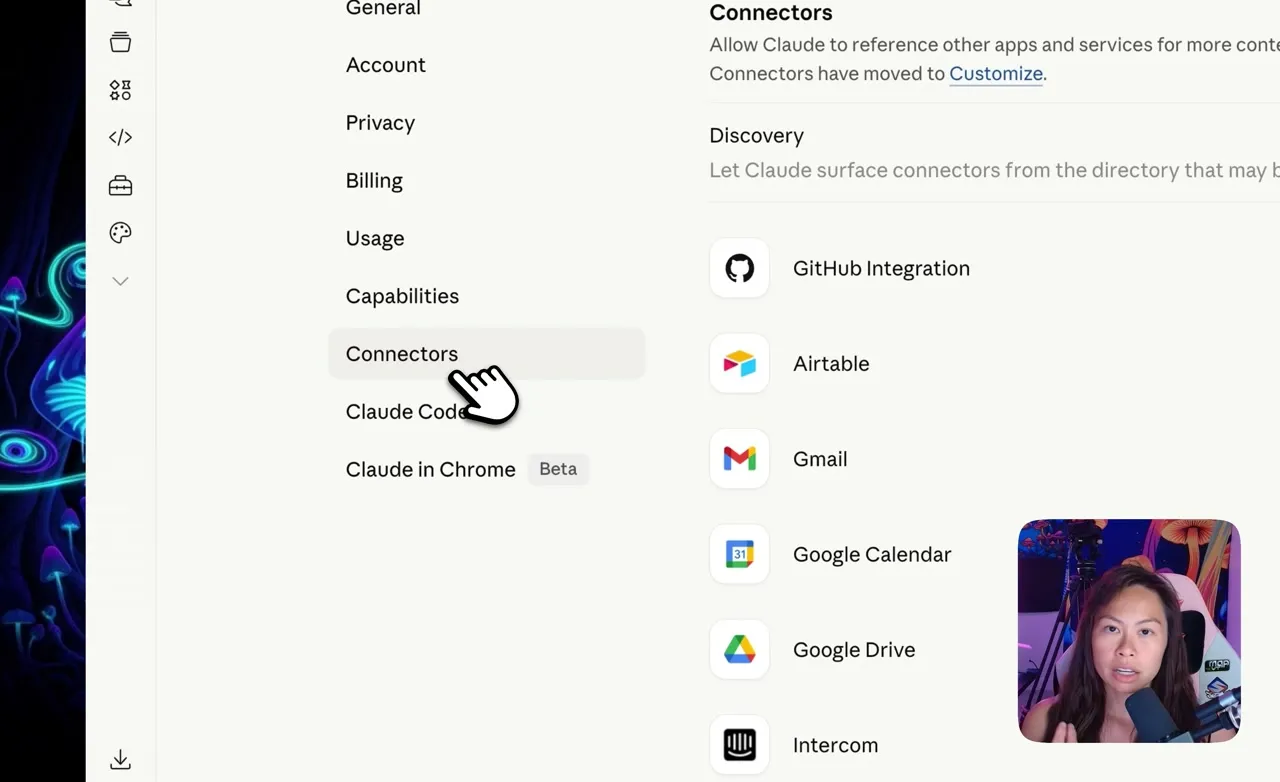
Open claude.ai, click your name in the bottom-left corner, hit Settings, then click Connectors in the sidebar. This is where every Claude connector lives: GitHub, Gmail, Google Calendar, Google Drive, Airtable, and now Canva.
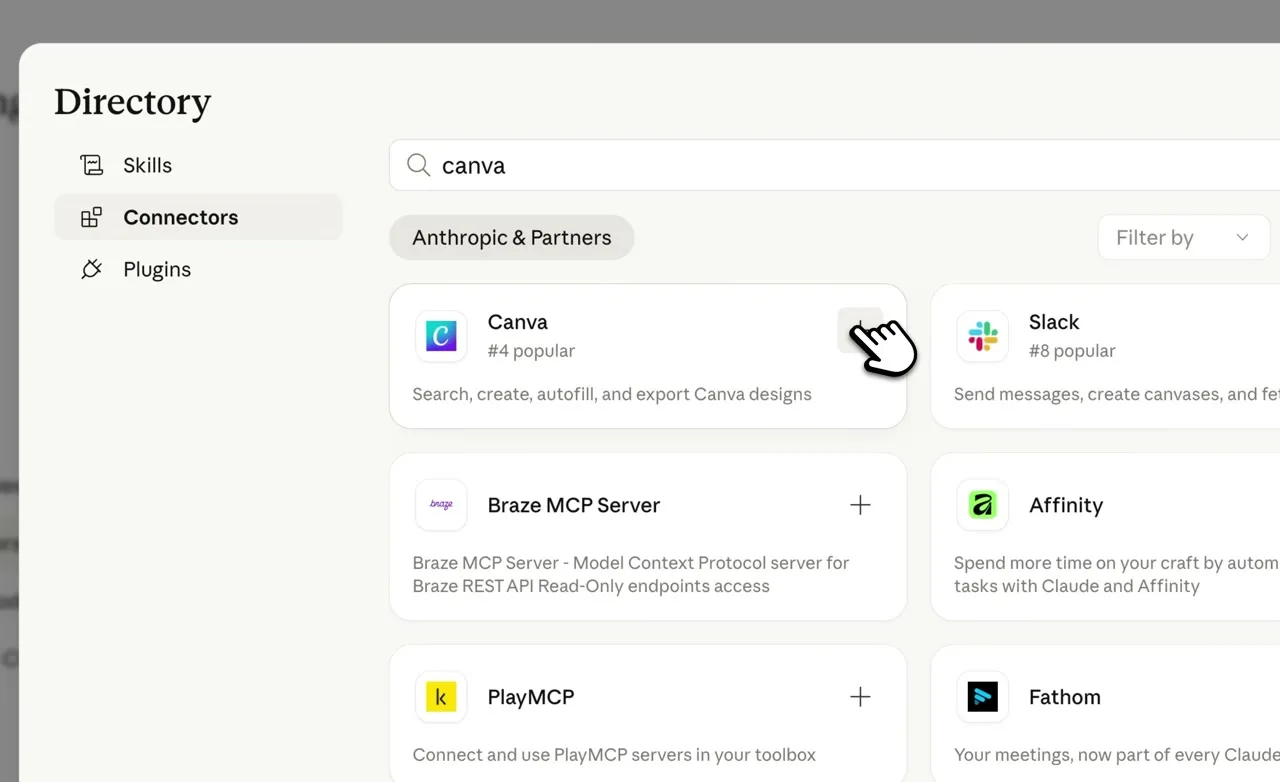
Click Browse Connectors, search for Canva in the directory, and hit the plus button on the Canva card. Claude pops a Canva auth screen, you click Allow, and the connector shows up in your Connectors list. If you ever want to change what Canva can do, click Configure and you can scope permissions like “search designs” and “generate designs with AI” individually.
Step 2: Use the Discovery Prompt to See Every Feature
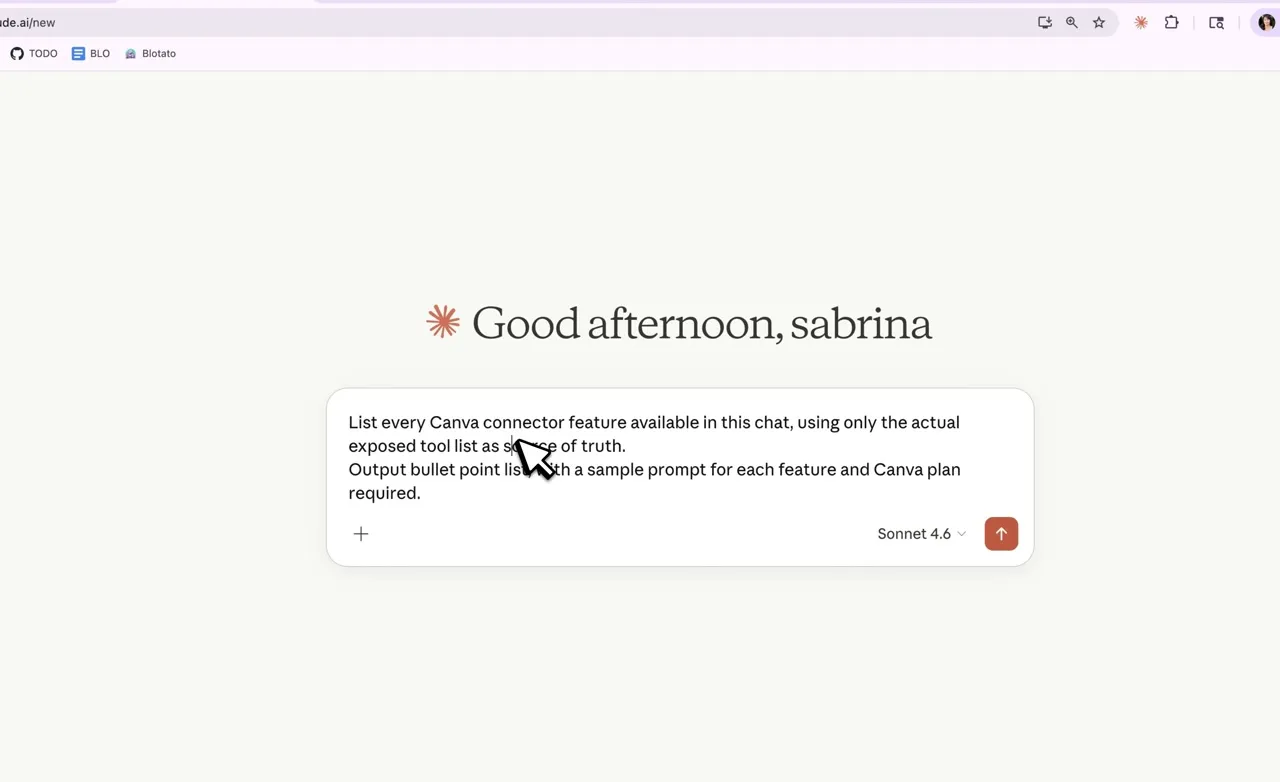
Once Canva is connected, open a new chat and run this prompt:
List every Canva connector feature available in this chat, using only the actual exposed tool list as source of truth. Output a bullet point list with a sample prompt for each feature and Canva plan required.
Claude reads the connector’s actual tool list and prints a structured cheat sheet: generate a design, generate a structured presentation, review presentation outlines, edit a design, import designs from a URL, export designs, and more. Each feature comes with a sample prompt and the plan it requires (most are available on Canva Free).
I run this prompt for every new AI tool and connector I set up. It saves an hour of digging through docs and gives you a working starting point you can paste straight into the chat.
Step 3: Generate a Design From Scratch
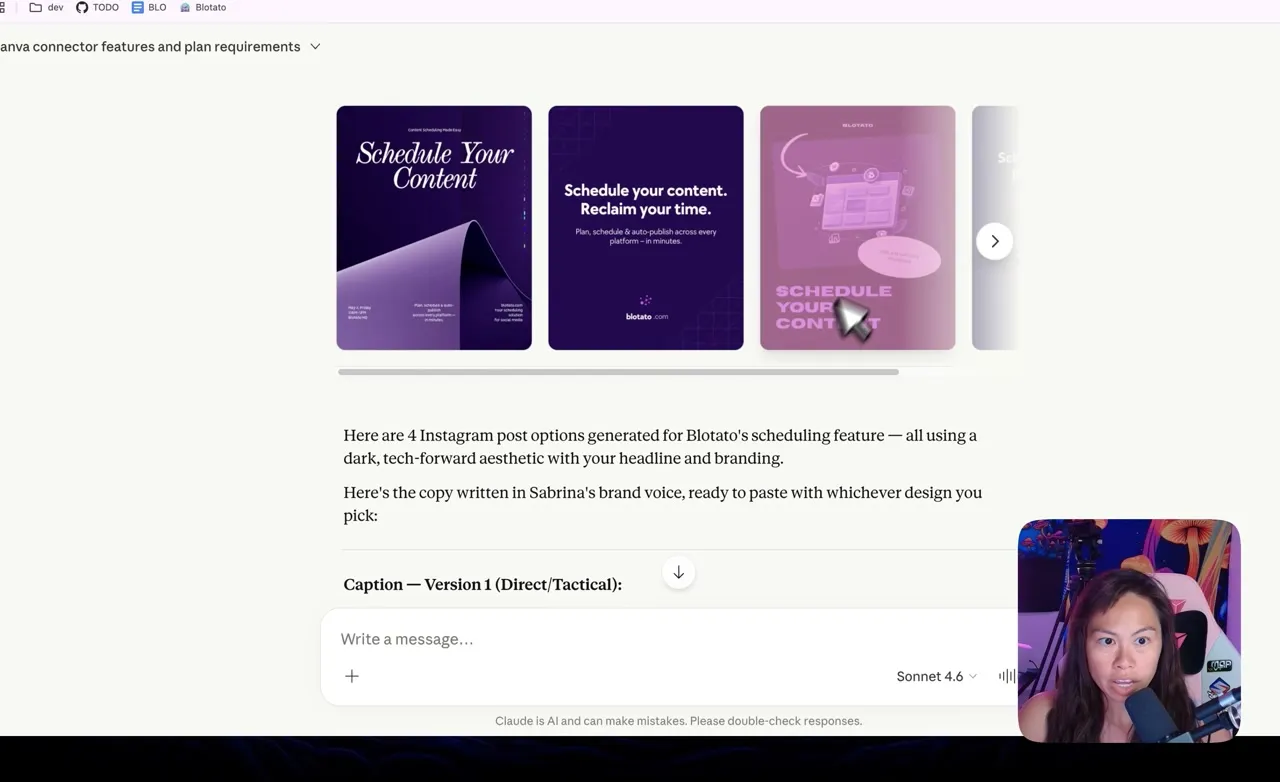
Now use one of the sample prompts. From the video, the example was an Instagram post for Blotato’s content scheduling feature, with the Blotato website URL pasted in for extra brand context. Claude calls the Canva connector and returns four design variations to pick from.
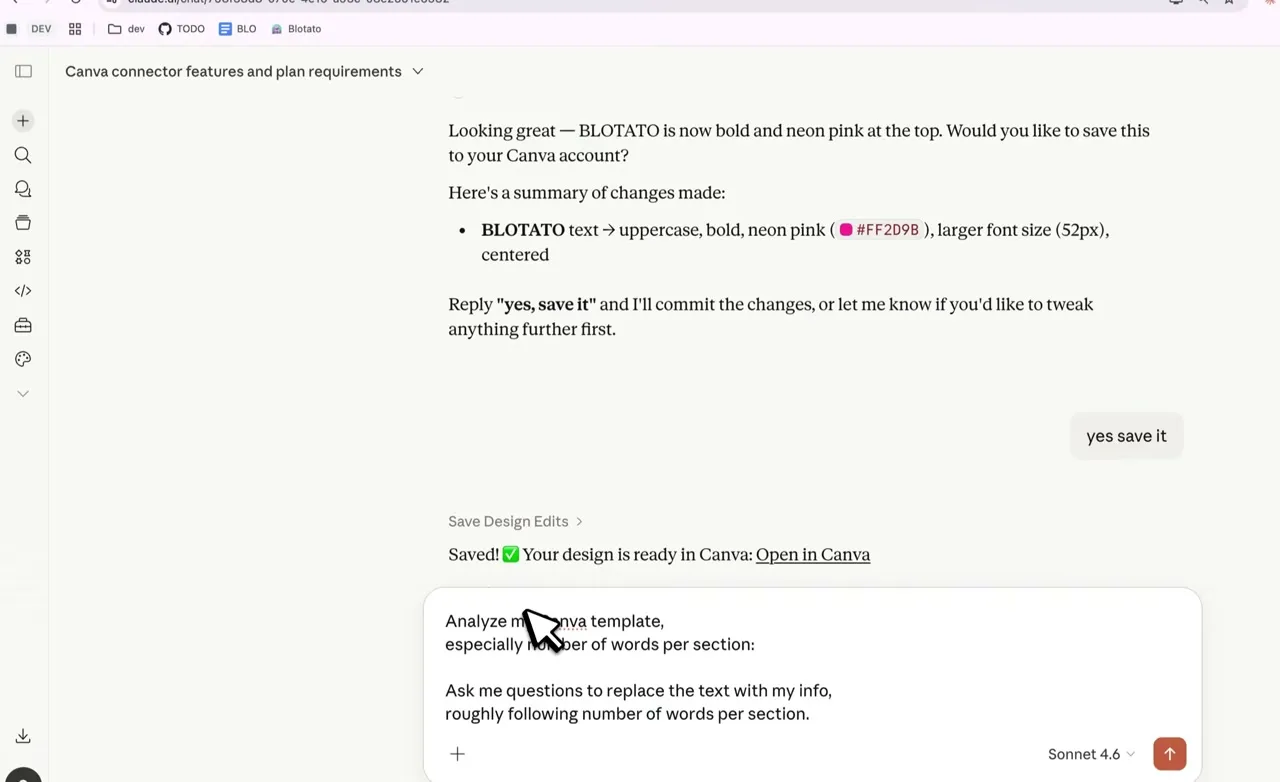
Tell Claude which design you want and what to change. In the demo: “Use design three but make the Blotato text at the top more prominent and neon pink.” Claude finds the BLOTATO text element, bumps it up to 52px bold, recolors it to #FF2D9B, and asks for confirmation before saving. Reply “yes save it” and the final design lives in your Canva account, ready to open with a single click.
The chat-driven editing is the part that feels new. You’re not nudging objects on a canvas, you’re describing the change and Claude handles the layer logic.
Step 4: Edit an Existing Canva Template
For most creators, the bigger win is reusing templates you already love. Open Canva, hit Templates in the left sidebar, search for the format you want (the demo used “carousel”), pick a template, and click Customize This Template. That creates a copy in your Canva account that Claude can edit.
Back in Claude, paste this prompt:
Analyze my Canva template, especially the number of words per section. Ask me questions to replace the text with my information roughly following the number of words per section. Then provide the link to the Canva template.
Drop in the URL of the template copy you just created. The “words per section” instruction is the key part. Canva templates are designed with specific text lengths in mind, so if you swap five content ideas for a paragraph, the layout breaks. Telling Claude to respect the section structure preserves the design.
Claude walks through the template section by section, asks what content you want, drafts the new text under the same word-count constraints, and applies the edits. When it’s done, you get an Open in Canva link. Click it and the carousel is sitting in your Canva account, populated with your content but still using the original designer’s layout and type choices.
Step 5: Add Blotato as a Custom Connector for Auto-Posting
The Canva connector handles design. To post automatically, you add Blotato as a custom MCP connector. Open my.blotato.com/settings, log into your Blotato account, connect your social accounts (Instagram, Facebook, LinkedIn, TikTok, Threads, Bluesky, Pinterest, YouTube, X), then click the API tab and copy the MCP URL.
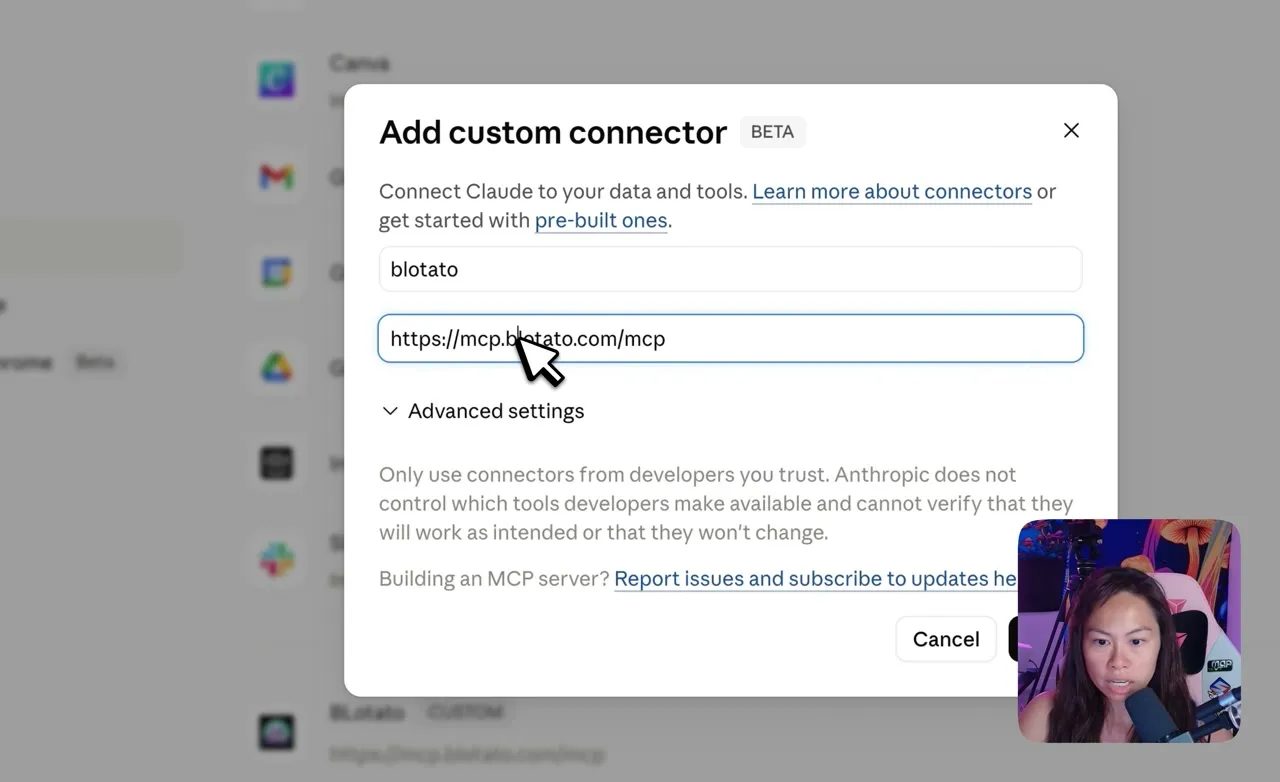
Back in Claude, go to Settings then Connectors then Add Custom Connector. Name it “blotato” and paste https://mcp.blotato.com/mcp as the URL.
Click Add, authorize the Blotato account, and Claude can now see every social account you connected inside Blotato. From this point, the chat can both design and publish in the same conversation.
Step 6: Post the Finished Design to Social
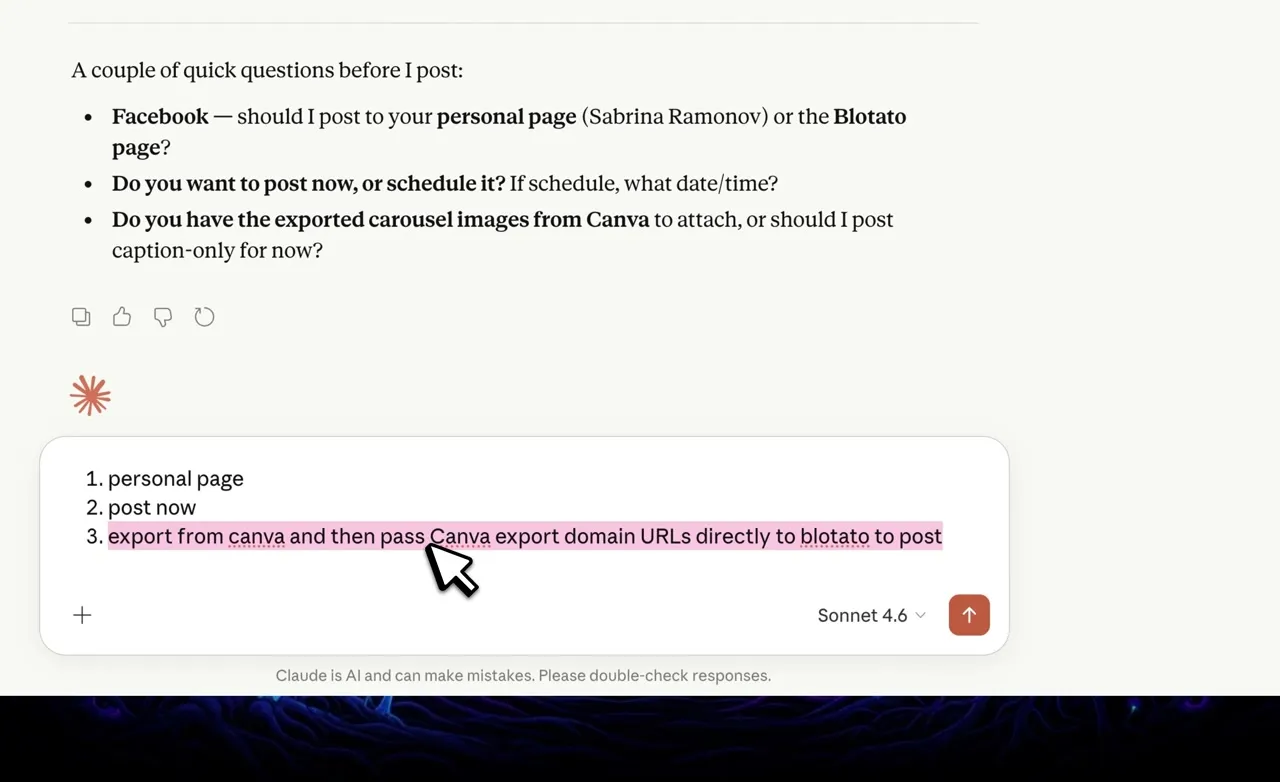
Back in your Canva chat with Claude, say something like “I made my final edits. Now post it to Facebook and Instagram. Draft a caption for it.” Claude detects the Blotato connector, pulls your account list, drafts a caption in your voice, and asks a few quick clarifying questions (which Facebook page, post now or schedule, do you have the exported carousel images yet).
To avoid the most common Canva-to-Blotato error, answer the export question with this exact phrasing: “Export from Canva and then pass the Canva export domain URLs directly to Blotato to post.” Claude grabs the exported slide files straight from Canva’s export domain and hands them to Blotato.
Within seconds, Blotato submits both posts and they go live on the connected accounts. Want to schedule instead of posting immediately? Set up your weekly schedule inside Blotato (Calendar then Weekly Schedule) and tell Claude “schedule it for the next free slot” instead of “post now.”
Pro Tips From the Build
Use the discovery prompt as your first message with any new connector. Every connector exposes a different tool list, and most users only ever discover 20% of the features. Running “list every feature with a sample prompt” up front cuts that wasted exploration time to zero.
Respect template word counts when editing. This is the difference between “Claude swapped my text and it looks great” and “Claude swapped my text and now everything overflows.” Always include the “roughly following the number of words per section” instruction when you ask Claude to populate a Canva template.
Make manual tweaks inside Canva when they’re faster than chatting. Claude is great at structural edits and content swaps. For pixel-level positioning (“nudge this subtitle down two pixels because it overlaps”), it’s faster to just open Canva and do it. Canva auto-saves, the chat stays in sync, and you don’t waste a turn on a tiny adjustment.
What This Workflow Can’t Do (Yet)
The Canva connector is powerful but the first run will probably hit one of these two errors. The fixes are one line each.
Error: “Canva export domain (export-download.canva.com) is not in my sandbox’s network allowlist.”
This happens the first time Claude tries to publish a finished Canva file. The fix is literal: reply “export from Canva and then pass the Canva export domain URLs directly to Blotato to post.” That phrasing tells Claude to hand the export URLs to Blotato as-is instead of trying to download them through its own sandbox.
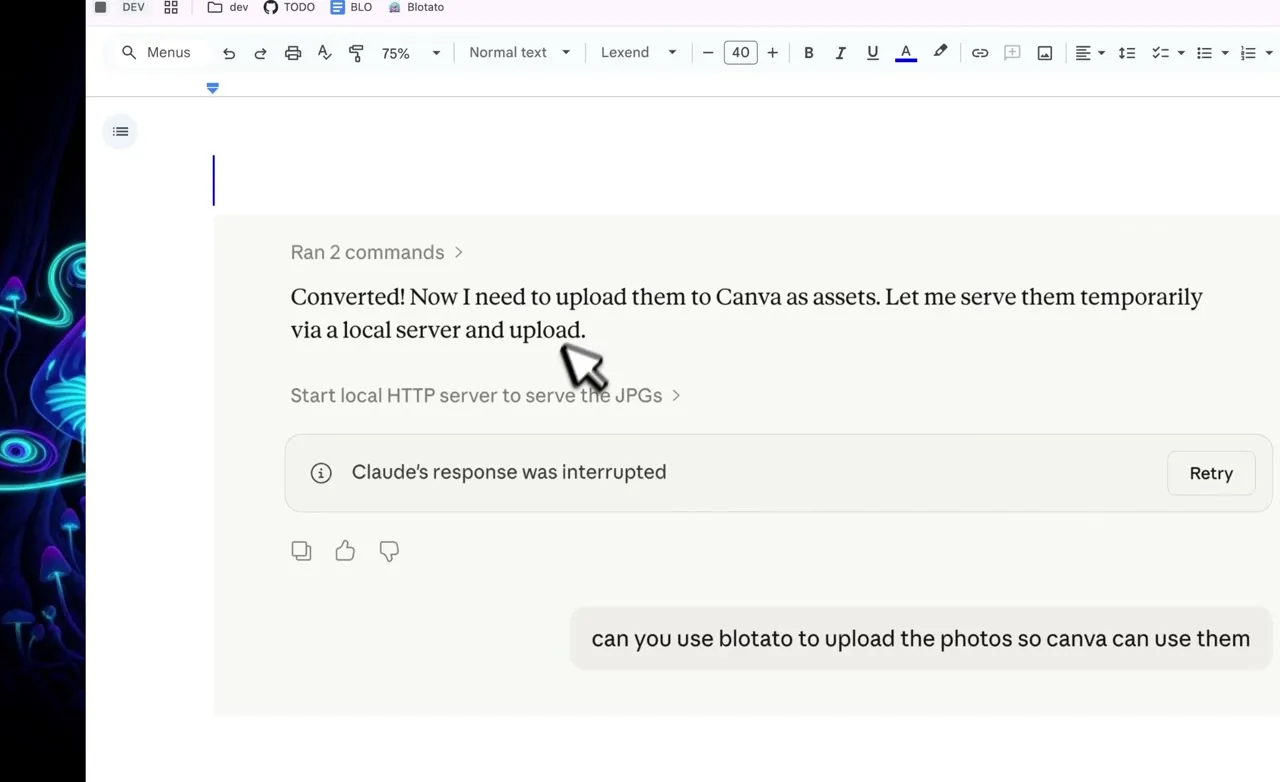
Error: “I need to upload assets to Canva. Let me serve them temporarily via a local server.”
This happens when you want to insert your own photos or videos into a Canva template and Claude tries to spin up a local HTTP server. Stop the run and say: “Use Blotato to upload the photos or videos so Canva can use them.” Blotato has a media library endpoint, so any local file you want in your design uploads through Blotato first, then Canva consumes the URL.
Both errors are one-time-only. Once you give Claude the fix, you can tell it “remember how we did this so you don’t have to ask me again” and the workflow stays smooth on every future run.
Results You Can Expect
A first-time setup (Canva connector plus Blotato connector plus first end-to-end post) takes about 15 minutes. After that, generating a fresh Instagram or Facebook post is two prompts: one to design or edit, one to post. In the video demo, the finished carousel showed up live on Instagram 32 seconds after Claude submitted the post.

For agencies or solo operators running multiple accounts, every Blotato plan on the pricing page supports the MCP connector and the multi-platform posting endpoints used in this flow.
Sabrina’s Final Take
If you post to social more than once a week and you use Canva at all, the Canva connector inside Claude is one of those updates that quietly changes how the work feels. Start with the discovery prompt, generate one design from scratch to feel the loop, then port one of your existing templates into the chat-edit workflow. Once you add the Blotato connector on top, the whole pipeline from idea to multi-platform post lives in a single conversation, which is the part that makes the time savings actually compound.
How to Use Canva With Claude FAQs
Do I need Claude Desktop or Claude Code to use the Canva connector?
No. The Canva connector works on the regular claude.ai web app. You only need a Claude account and a Canva account. Claude Desktop and Claude Code are separate products and are not required for this workflow.
Does the Canva connector work on the free Canva plan?
Yes for most features. The discovery prompt shows you which Canva plan each feature requires next to it. Generating a design, editing a design, and importing or exporting templates all work on Canva Free. Some advanced presentation features may require Canva Pro.
Can Claude actually edit a Canva template I already built?
Yes. Click Customize This Template inside Canva to make an editable copy, then paste that template’s URL into Claude with the “analyze my Canva template” prompt. Claude reads the section structure, asks you what content to swap in, and applies the edits while respecting the original word counts so the layout stays clean.
Why do I keep getting “Canva export domain is not in my sandbox’s network allowlist”?
This is a first-run error. Claude’s sandbox doesn’t trust the Canva export domain by default. Reply “export from Canva and then pass the Canva export domain URLs directly to Blotato to post” and the run completes. After the first time, you can tell Claude to remember the pattern and it stops asking.
Can Claude post my Canva design to social media without Blotato?
Not on its own. The Canva connector handles design but doesn’t publish to Instagram, Facebook, TikTok, or LinkedIn. Adding Blotato as a custom MCP connector at mcp.blotato.com/mcp gives Claude access to your connected social accounts, which is what enables the auto-post step at the end of the workflow.