How I Automate My Social Media With Claude Code (No Team)
30M views in 30 days, all scheduled from Claude Code. The five free skills, viral grader, and MCP setup I use to run social media from the terminal.
I use Claude Code for social media as my entire marketing team. I got over 30 million views in the past 30 days, and every one of those posts was scheduled through this setup. I broke down how that 30-day run actually worked if you want the numbers behind it.
No content team, no VA, no agency. If you are a solo creator, a small business owner, or a one-person agency, this is the setup that replaces the hire you keep telling yourself you need.
Everything here is designed for actual results. This is not one of those tutorials where you generate generic output that nobody watches.
In this guide I walk through the exact system: importing five free Claude marketing skills, posting photos and videos, cross-posting to multiple platforms, editing a selfie into an Instagram Story, generating AI carousels, and managing my whole content calendar without leaving the terminal.
Most guides on this topic stop at “draft your content.” The hard part is everything after the draft, and that is where this build earns its keep.
How to Use Claude Code for Social Media (Video Guide)
If you would rather watch, this is the build-along version where I run every use case live on camera. The written guide below covers the same build with extra detail on the prompts and the parts that needed a second pass.
Why Most AI Content Workflows Stall at the Draft
Most AI content advice gives you a prompt and a pat on the back. You paste it into a chat, get a post, and copy it somewhere by hand. That works for one post. It falls apart the second you want a week of content across several platforms.
The blank page is not the real problem. The real problem is what comes after a draft exists: checking it against your brand voice, catching the formatting that breaks on each platform, and getting it published without 40 copy-paste steps.
Publishing is the part I care most about getting right, which is why all of my posts go out through Blotato. It is an app I built, and the 30 million views above were all scheduled through it rather than posted by hand. I founded the company, so take my read on it with whatever grain of salt feels right.
My Claude Code Social Media Stack
The build is simpler than it sounds. Here is what each piece does.
- Claude Code: the agent that runs everything. I do this whole tutorial in the terminal so there is one thing to look at and no distractions.
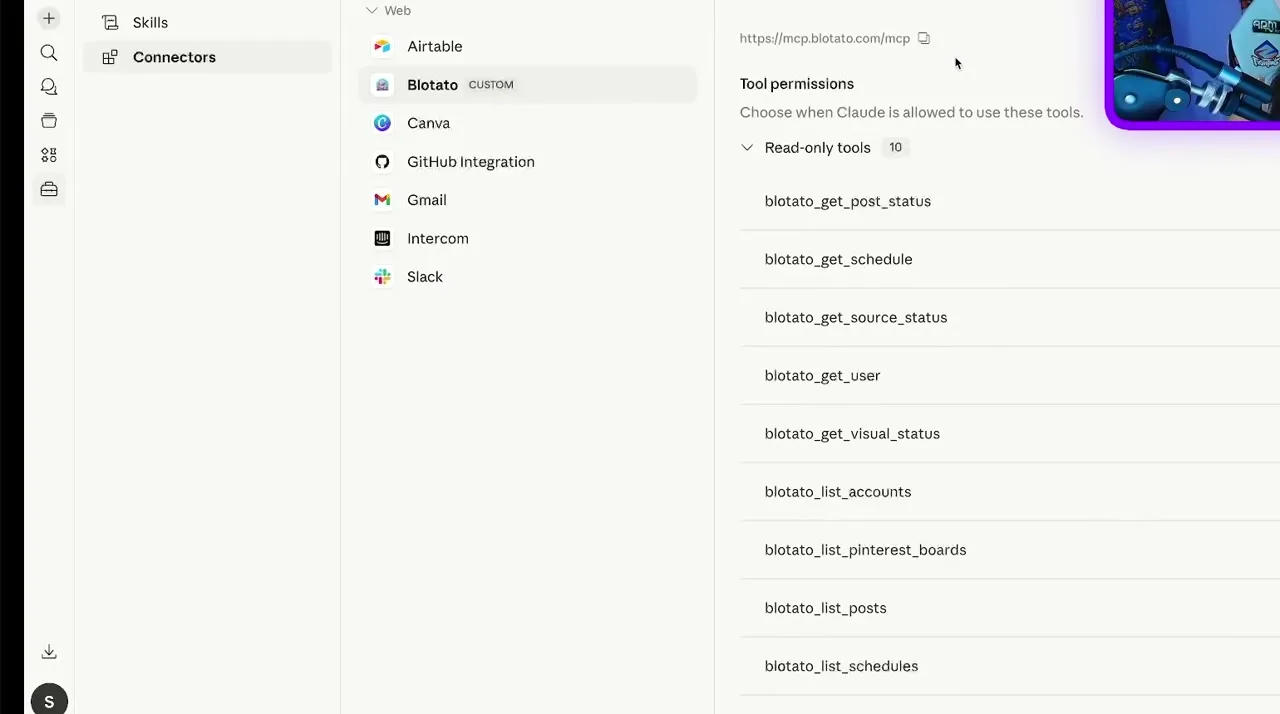
- The Blotato MCP connector: a hosted MCP server at
mcp.blotato.com/mcpthat lets Claude read your accounts and publish to them. You choose which tools it can use when you add it. No self-hosting, no wiring up platform APIs by hand. Each network has its own MCP reference page covering the actions available on it. - Five free Claude marketing skills: content coach, brand brief, post writer, post grader, and post scheduler. You import them once with a single prompt.
- Blotato: where your accounts connect, where AI visuals get generated, and where scheduling actually happens.
You do not need Claude Code for any of this. The same MCP connector works in Claude Cowork, Claude Desktop, and Claude.ai on the web. I use the terminal because I like it, not because it is required.
The publishing step is what breaks most DIY versions of this build. Wiring each platform API by hand is where people give up, which is why every workflow here hands publishing to Blotato. If you want to run this stack on your own accounts, know that Blotato API and MCP access sits outside the 7-day trial, so plan on starting a paid plan rather than trialing it. Generating an API key ends a trial and activates the subscription. Better to find that out here than halfway through your build.
Claude Code vs No-Code Automation: What Actually Fits
Before the build, here is how I think about Claude Code against the routes people usually compare it to. These fit different jobs, and I use more than one of them.
| Approach | Best at | Weak spot |
|---|---|---|
| Claude Code | Drafting in your voice, quality checks, flexible logic | Orchestration, scheduled triggers, pre-built integrations |
| Claude Cowork / Desktop | Same MCP workflow with zero terminal | Less control over files and folders |
| n8n | Orchestration, scheduled triggers, deployment | Steeper setup, you build the workflow first |
| Make.com | Visual scenarios, cheaper than most | Per-operation cost adds up at posting volume |
| Web chat alone | Quick one-off drafts | No publishing, no memory, no quality gate |
Claude Code and n8n cover different halves of the job, so I run both. If you are weighing the no-code side, compare Make.com pricing against Zapier on your own posting volume before you commit, and go deeper in my n8n vs Make vs MCP breakdown.
How to Use Claude Code for Social Media (Step-by-Step)
Here is the build in the order I run it on camera. Each step stacks on the last.
Step 1: Connect Your Social Accounts
In Blotato, go to Settings and connect your accounts. The lowest tier is $29 a month and covers up to 20 social accounts. For reference, Buffer charges per channel, so 20 accounts there lands north of $80 a month even with its volume discount. I tried to make the pricing as generous as possible for small businesses.
Step 2: Add the Blotato MCP Connector
Head to the API tab in Blotato settings and generate an API key. If you are technical, there is a copy-paste setup command for Claude Code right there.
For everyone else, the cleaner route is the custom connector: go to Claude.ai, click Customize in the left sidebar, click Connectors, click the plus button, add a custom connector named Blotato, and enter mcp.blotato.com/mcp. That connection follows you into Claude Code, Cowork, and Desktop.
Step 3: Verify the Connection
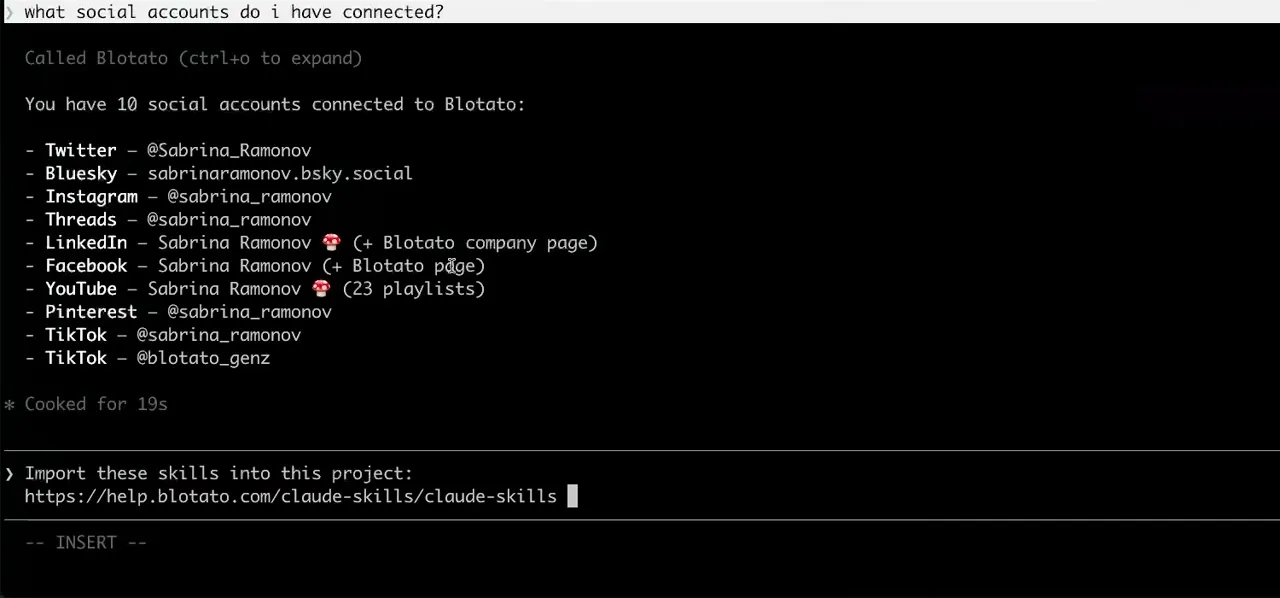
Create a project folder, open Claude, and type /mcp to confirm Blotato is listed. Then test it with a plain question: “what social accounts do I have connected?” It should read back your real accounts.
Step 4: Import the Five Free Marketing Skills
This is the longest step in the whole tutorial, and all you type is one line: “Import these skills into this project,” followed by the skills URL. It takes about five minutes.
The free skills pack is where you get them. Five of them run this pipeline. The content coach is an orchestrator that decides what to do with your request, so even “I don’t know what to post” gets you somewhere. The brand brief is a one-time setup that interviews you about your voice, products, and offers. The post writer does the actual writing. The post grader scores against a viral rubric and keeps iterating until the post passes. The post scheduler handles publishing.
For Claude Code you have to exit and restart the session after importing, or the skills will not load.
Step 5: Let the Writer and Grader Run
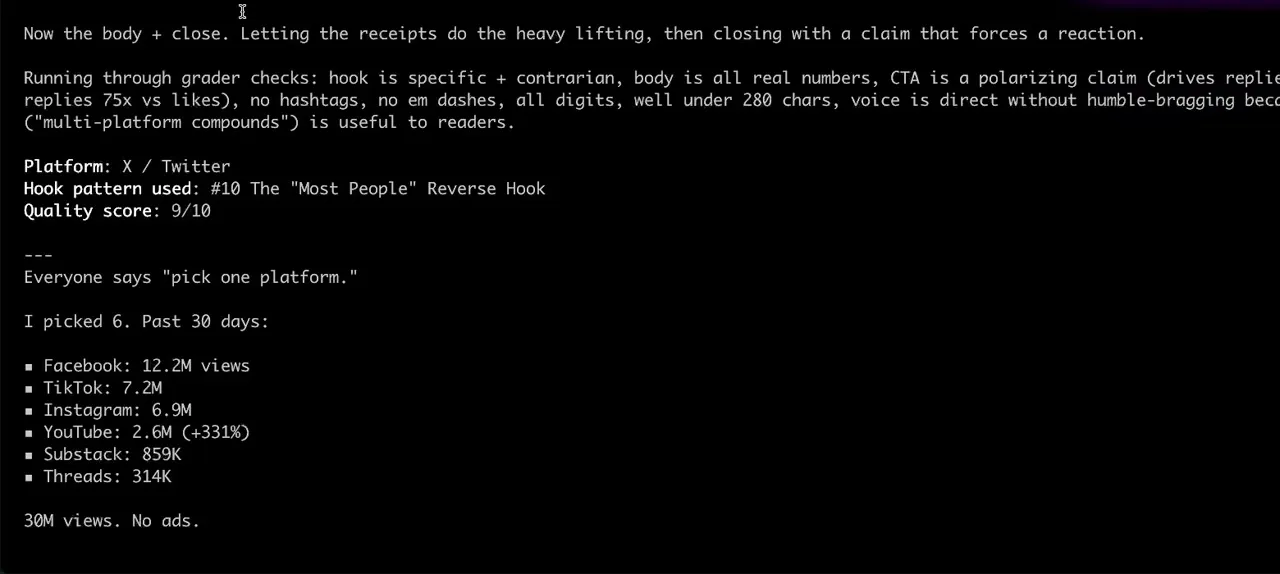
Now point it at real material. I keep a folder of screenshots I grab through the week, then tell Claude to analyze them and write a post. In the demo it read my platform stat screenshots and drafted a tweet.
Watch what it actually does. It drafts the hook first, because the hook is 50% of the grade, and it generates three variations across three different hook frameworks: a receipts hook, a reverse hook, and a specific-number hook. It picked the reverse hook because it is polarizing, and Twitter rewards replies.
Then the grader runs its checks: hook is specific and contrarian, body is all real numbers, no hashtags, no em dashes, all digits, well under 280 characters. That draft scored 9 out of 10.
Step 6: Cross-Post to Multiple Platforms
Once one post works, cross-posting is one sentence: “cross-post to LinkedIn and Facebook.” Claude understands the intent and handles it. You can fan a post out to a lot more than two platforms, and posting to LinkedIn with Claude works the same way as any other target.
Before anything publishes, the scheduler skill runs a pre-publish check. Mine covers no em dashes, no banned words, active voice, hashtags only on Instagram and TikTok, and platform character limits. My real quality gates have far more rules than that, but it is a strong starting point and you can make it as strict as your business needs.
Step 7: Edit a Photo and Post It as an Instagram Story
This one is my favorite. I had a good hiking selfie that I would not post as a Story, because there was no call to action.
So I gave Claude this prompt: add a TikTok-style caption to the top of my selfie in the downloads folder, respecting social media safe zones for short-form vertical content. The safe-zone instruction matters. Without it the text lands too close to the edges and looks wrong on social.
It edited the photo, saved a new file, and then I posted it as an Instagram Story with one more sentence.
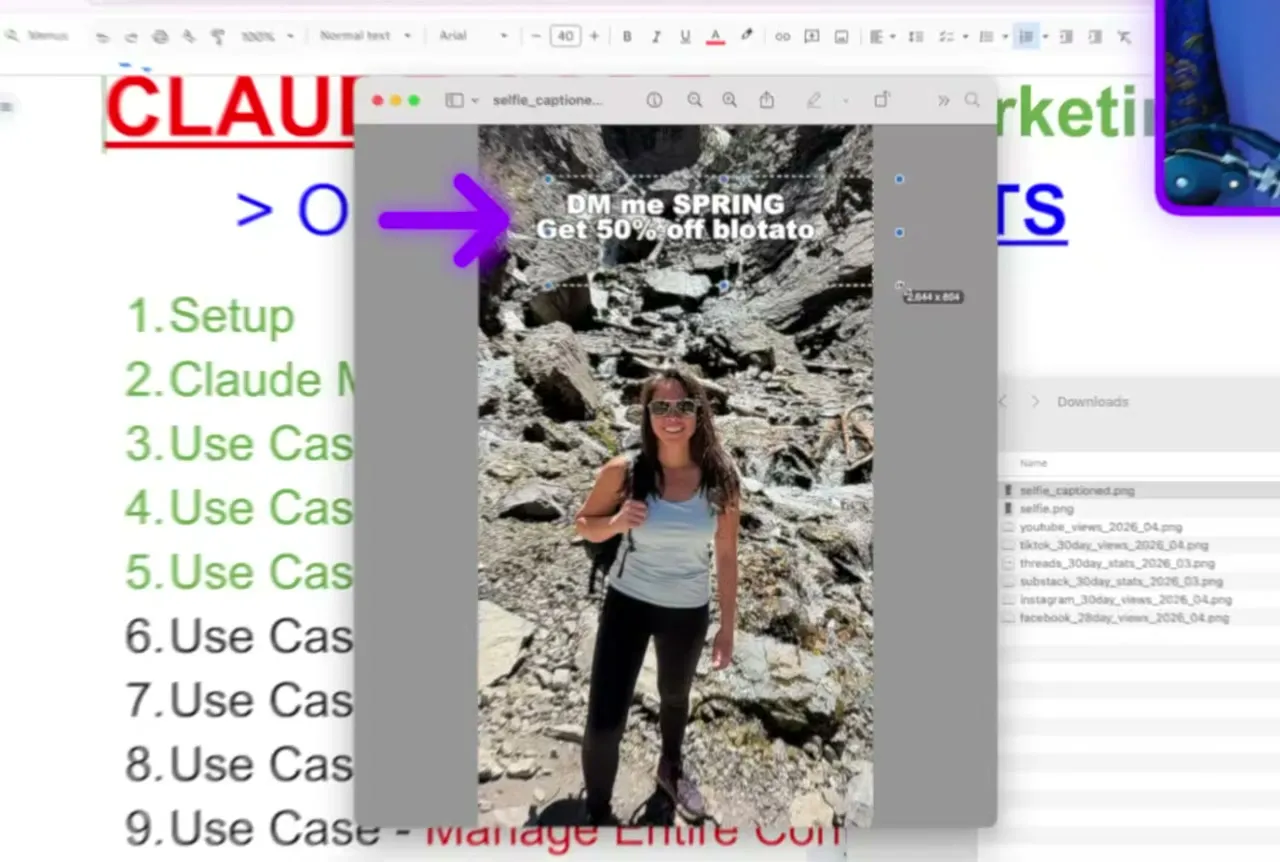
The bigger idea here is folder access. You can keep an ideas folder of screenshots you collect through the week and a separate folder of product or selfie photos, then have Claude process the whole thing at once.
Step 8: Generate an AI Carousel
You do not need Canva or a separate design tool for this. Browse the template library once in Blotato under Videos, then create new video, so you know what to ask for. I use the whiteboard infographic for LinkedIn, the manga panel infographic for live stream announcements, and the Instagram carousel slideshow for my faceless accounts. After that you name the template in the prompt and stay in Claude.
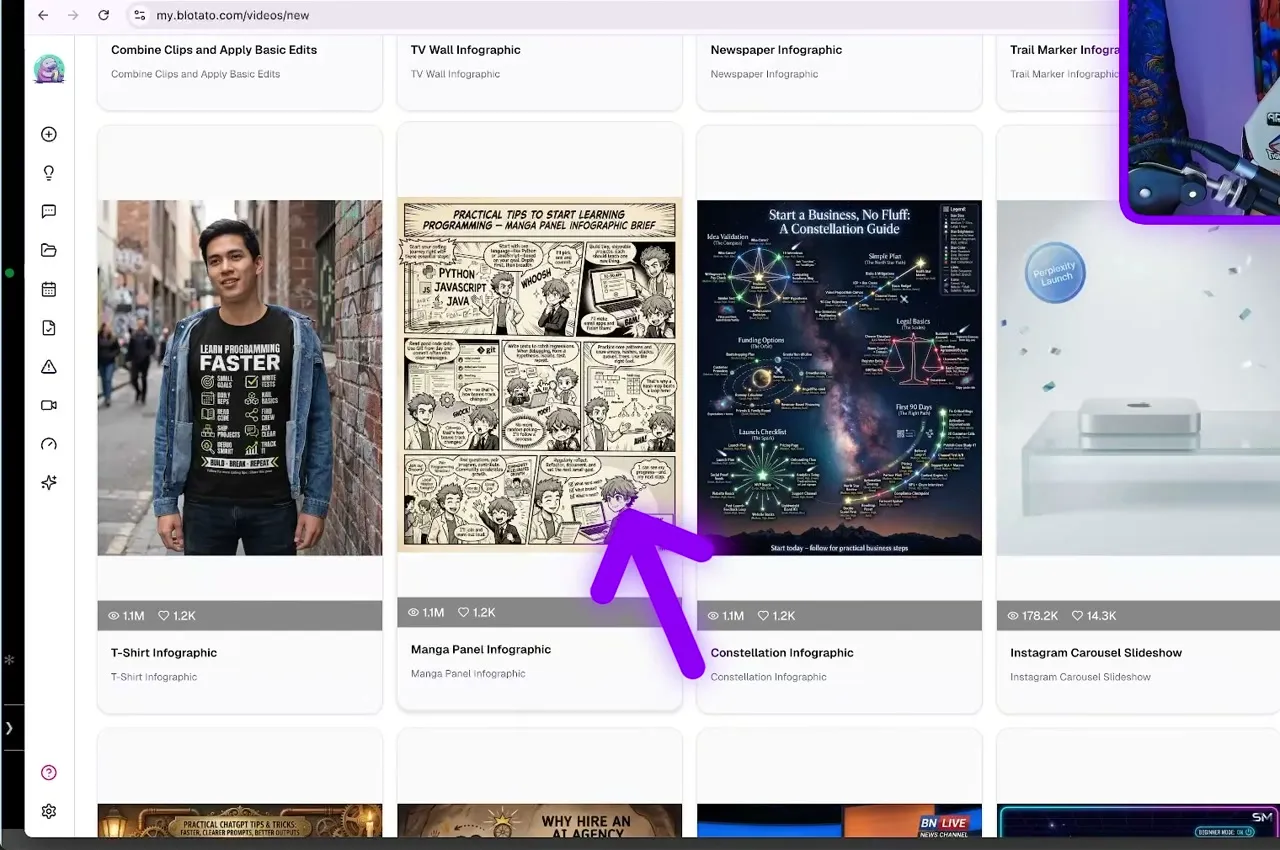
The prompt was simple: use the Blotato Instagram carousel slideshow template to make a carousel on the same topic. It calls Nano Banana 2 to generate each slide, so give it a minute.
One slide came back with messed-up text, so I told Claude to fetch the carousel and drop the first slide. The six-slide version was tighter, and I posted that to Instagram.
If you want more consistency, you can supply the prompt for each individual slide instead of letting it choose, so every slide matches a format you like.
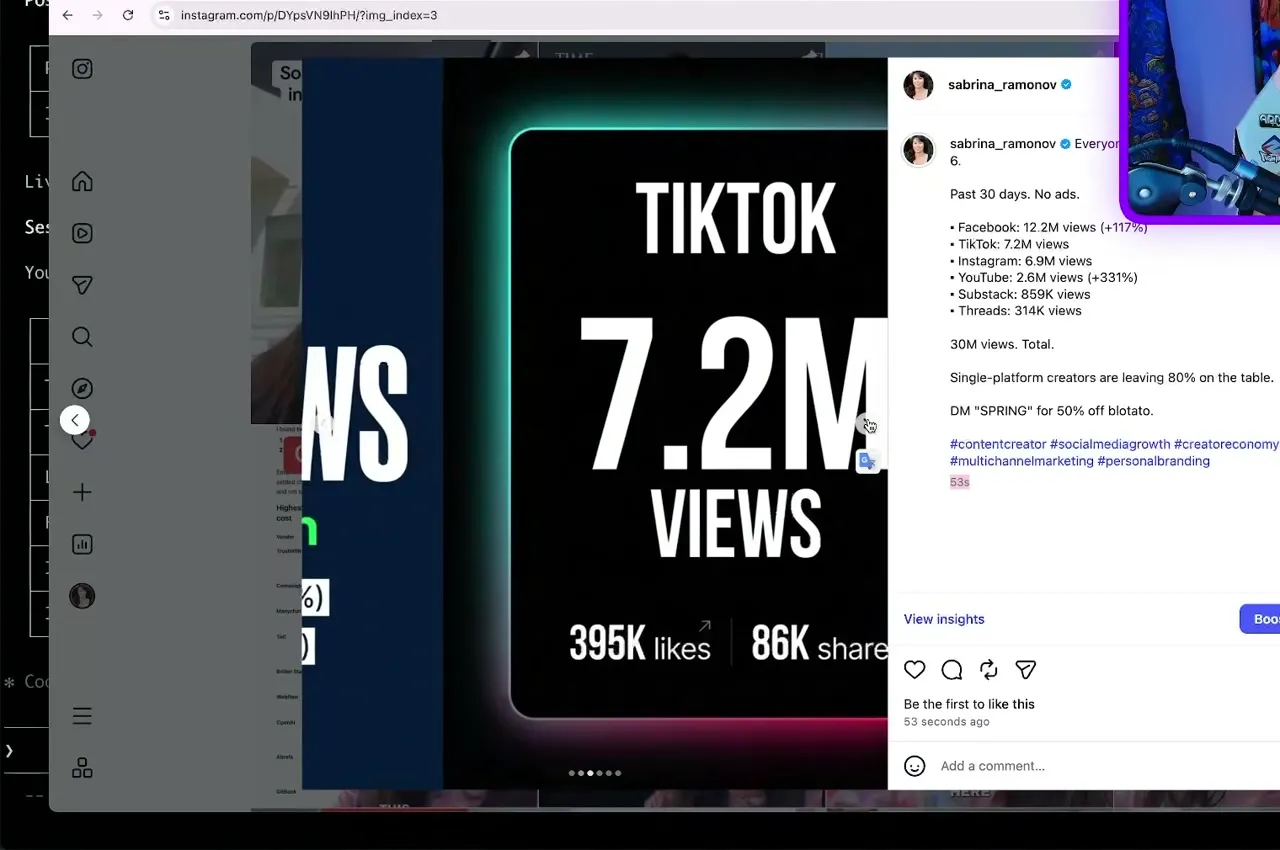
Once a carousel exists you can post it to Instagram, LinkedIn, TikTok as a slideshow, Pinterest as a carousel, or Facebook as a carousel. If you want a deeper build on this specific format, I broke it down in my automate Instagram carousels guide.
Step 9: Manage Your Entire Content Calendar
You have three scheduling options: post now, schedule a specific time, or use the next free slot. I use next free slot constantly.
Set it up once in Blotato under Calendar, then Weekly schedule. Those are your real posting slots, mapped to real accounts. After that, “schedule all of this content in my next free slot” is the whole workflow.
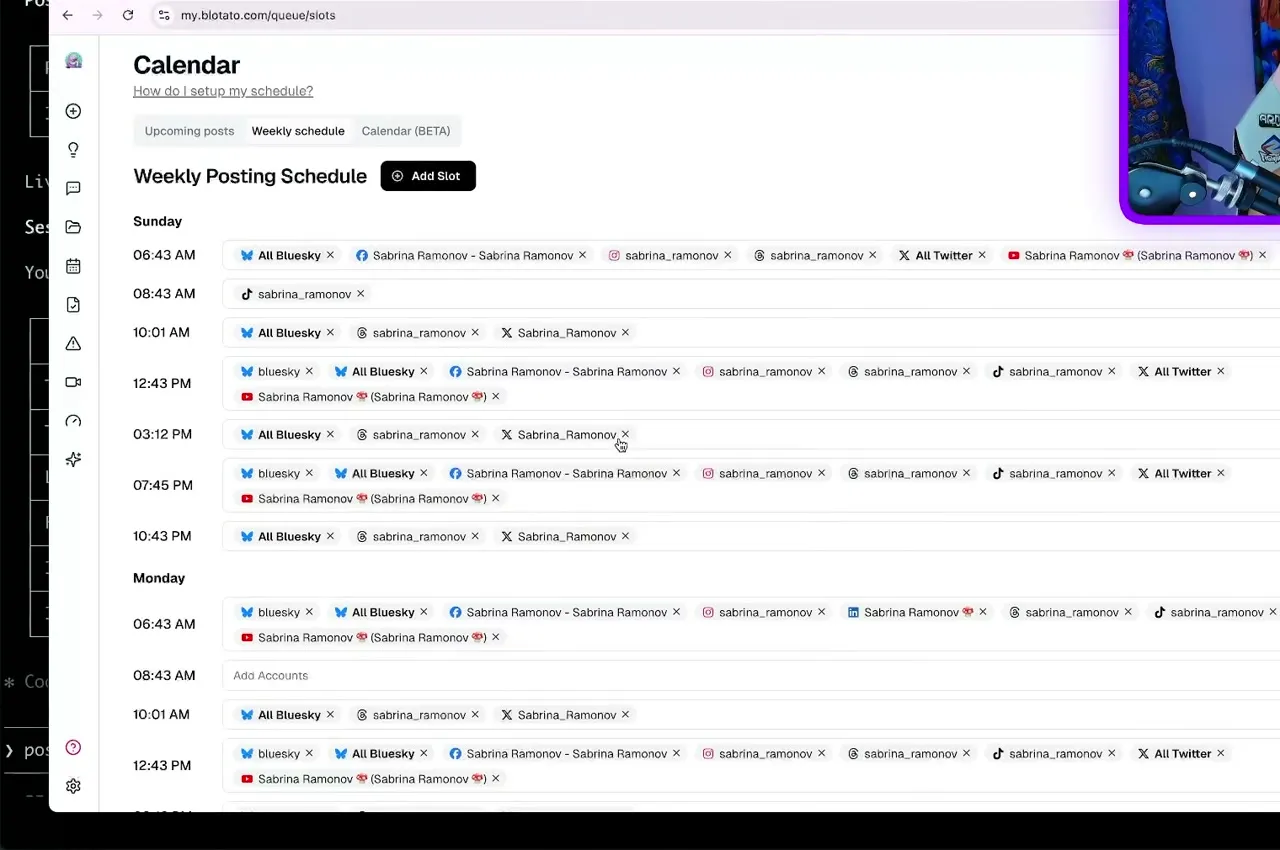
You can also list upcoming scheduled posts, reschedule them, and delete them, all in plain language. I asked it to move a Friday 12pm Bluesky post to 1pm, and it showed me the updated queue.
Think about what that replaces. A year ago, if your launch got delayed two weeks, you would open your scheduling tool and manually move every post. Now you say “our launch is delayed two weeks, shift all of these,” and it handles it.
Pro Tips From Running This Live
Give the grader real receipts, not adjectives. The tweet that scored 9 out of 10 worked because it was loaded with actual platform numbers. The grader rewards specificity, so feed it screenshots of real results rather than asking for a post about a vague topic.
Always name the safe zones when editing vertical images. Skip that phrase and the caption lands too close to the edges. It is one clause in the prompt and it is the difference between a Story that looks native and one that looks off.
Batch your inputs into folders during the week. The workflow only works if material is already waiting. Screenshot interesting things as you go, drop them in a folder, and let Claude mine the whole folder when you sit down to make content.
What This Workflow Can’t Do (Yet)
The AI image generation is not perfect. One of my carousel slides came back with garbled text and I had to drop it, so budget for a review pass rather than assuming every generation ships.
Video editing is possible with Claude Code and Remotion, but it is a whole separate build and not something this setup handles casually.
Claude Code is also weak at orchestration, deployment, and pre-built integrations. If you need scheduled triggers and connectors that just exist, that is where pairing it with n8n earns its place. And the pre-publish gate only catches what you tell it to catch, so a thin rule list still ships thin posts.
Results You Can Expect
In one session I shipped the same “30 million views in 30 days” reveal as six posts: a text tweet, the same tweet with a screenshot, LinkedIn, Facebook, an Instagram Story with a DM call to action, and a six-slide Instagram carousel. That is one idea, adapted per platform, published from one conversation.
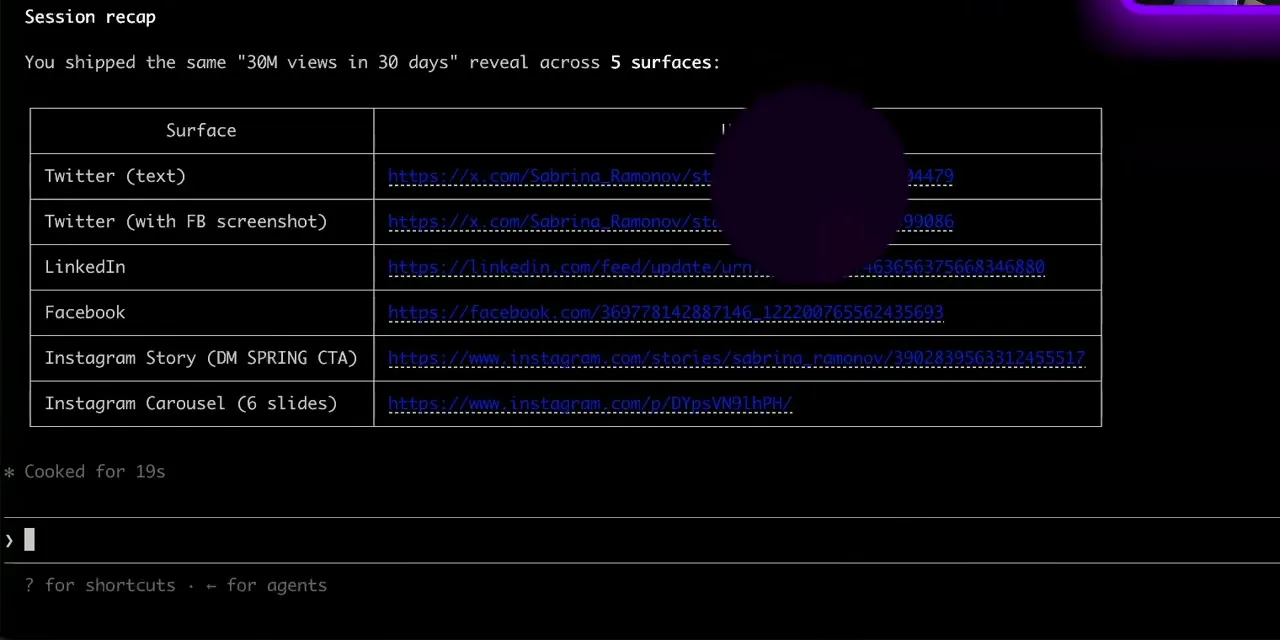
Ten minutes here, ten minutes clicking around there. At my current volume, which is six platforms and multiple posts a day, it saves at least 15 hours a week. Scale that down to your own cadence and the number drops with it, but the pattern holds: the savings come from the clicking, not the writing. That is what lets me run this solo.
Sabrina’s Final Take
If you already make decent content and you are drowning in production, this is worth the afternoon it takes to set up. Start by connecting the MCP and importing the five skills, get one platform publishing cleanly, then add your own pre-publish rules once you trust it. Do not automate everything on day one, because if you do not know what good content looks like yet, you will not learn it by setting and forgetting. This is not a replacement for taste, it is a replacement for the headcount you would have hired to do the clicking. Since API and MCP access sits outside the trial, check which Blotato plan matches the number of accounts you actually post to before you start.
Claude Code for Social Media FAQs
Do I need Claude Code, or does Claude.ai work?
Claude.ai works. So do Claude Cowork and Claude Desktop. The Blotato MCP connector is what does the publishing, and you add it the same way in all of them. I use the terminal in this tutorial because it keeps everything in one window, not because the workflow requires it.
Do I need to know how to code to build this?
No. The skills install with one sentence, and every workflow after that is plain English. The only semi-technical step is generating an API key and adding a connector URL, both of which are copy-paste. Sandy Lee built a $48K month with no tech background on this same stack.
What does this actually cost to run per month?
Two subscriptions. On the Claude side, Pro is $20 a month and Max starts at $100. I run Max because I am in Claude Code all day, but Pro is enough to test this build. On the Blotato side, API and MCP access is not included in the 7-day trial, so you need a paid plan: Starter is $29 a month and covers 20 social accounts. Carousel and video generation draw from your monthly AI credits, so heavy image generation is the variable cost to watch.
What does the post grader actually check?
It scores the hook first, since that carries about half the grade, then checks the body and CTA. In my setup it verifies real numbers over adjectives, no hashtags outside Instagram and TikTok, no em dashes, digits instead of spelled-out numbers, and the platform character limit. You can add as many custom rules as your brand needs.
Can it schedule posts, or only publish immediately?
Both. You can post now, pick a specific time, or drop it into the next free slot from a weekly schedule you set up once. You can also list, reschedule, and delete already-scheduled posts conversationally, which is the part that saves the most time when a launch date moves.
Which platforms can it post to?
Blotato covers 9 platforms, and in this build I published to Twitter, LinkedIn, Facebook, and Instagram, including an Instagram Story and a carousel. A generated carousel can also go to TikTok as a slideshow and to Pinterest or Facebook as a carousel.