Zapier Social Media Automation: Auto-Post and Confirm It's Live
Zapier social media automation, step by step: send posts with Webhooks by Zapier, confirm they went live, and know what each run costs.
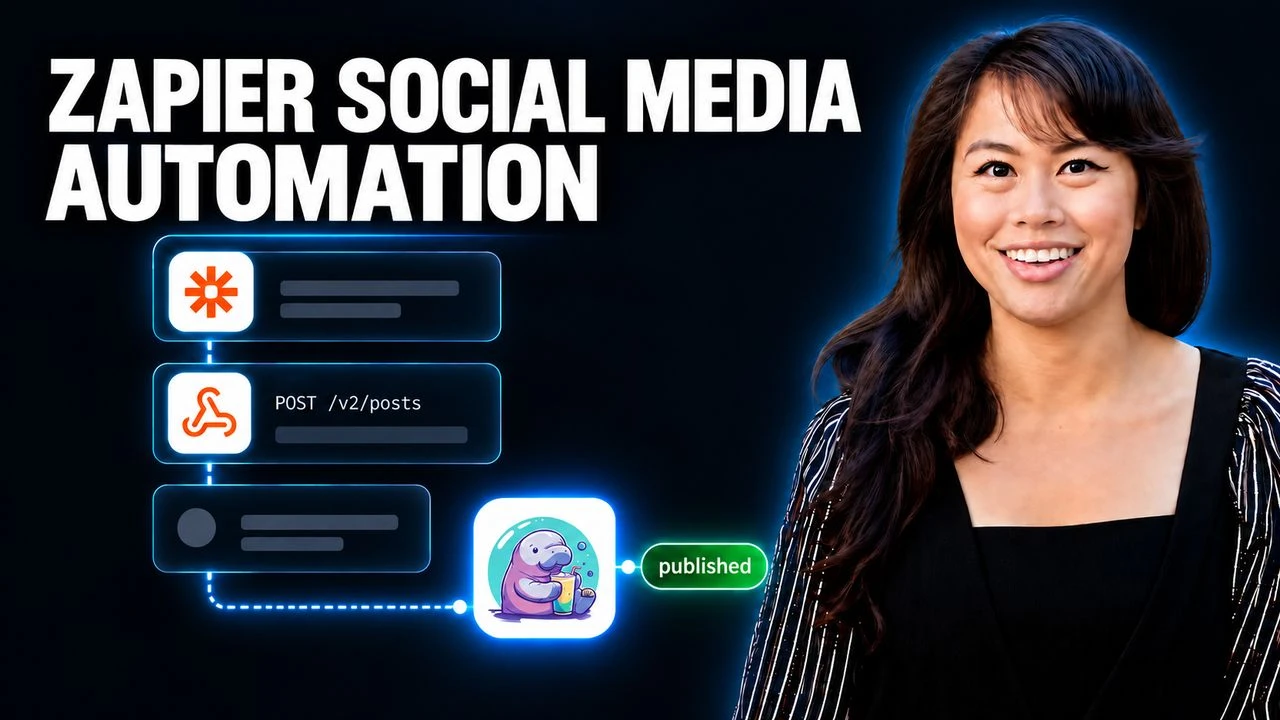
Zapier social media automation with Blotato runs through a Webhooks by Zapier step, since Blotato has no native Zapier app. The step sends your post to Blotato’s publish endpoint with your API key as a header, and Blotato replies with a submission ID. A status check on that ID then tells you published or failed, because the first reply doesn’t prove the post went out.
The first version of Blotato could not publish to social media on its own. It was bolted to Zapier. That’s why this guide spends as much time confirming the post as sending it.
What Zapier Can Trigger, and What Actually Publishes
Zapier is excellent at the trigger half of the job. A new row in Google Sheets, a new Airtable record, a new RSS item, a form submission: Zapier connects to thousands of apps and can start a run from most of them.
The publishing half is where Blotato comes in. It has official n8n and Make integrations, but no Zapier app, so you won’t find it in Zapier’s app directory.
The REST API quickstart says it plainly: “Zapier does not have an official Blotato app. In Zapier, use Webhooks by Zapier to send authenticated HTTP requests to the Blotato API.”
Zapier also has its own actions for LinkedIn, Facebook Pages, Instagram for Business, YouTube, Pinterest and Bluesky, and for one account on one of those, the native action is the simpler build. For Zapier social media automation across several platforms, Blotato earns its step: one request shape, one status check and one calendar across its 9 platforms.
What you need before you build: a Blotato API key and at least one connected social account. I’m the founder of Blotato, so weigh my enthusiasm accordingly. The 7-day trial does not include the API, and generating a key ends the trial and starts Starter at $29/month. If you’re building this Zap, plan on starting the Starter plan rather than trialing it.
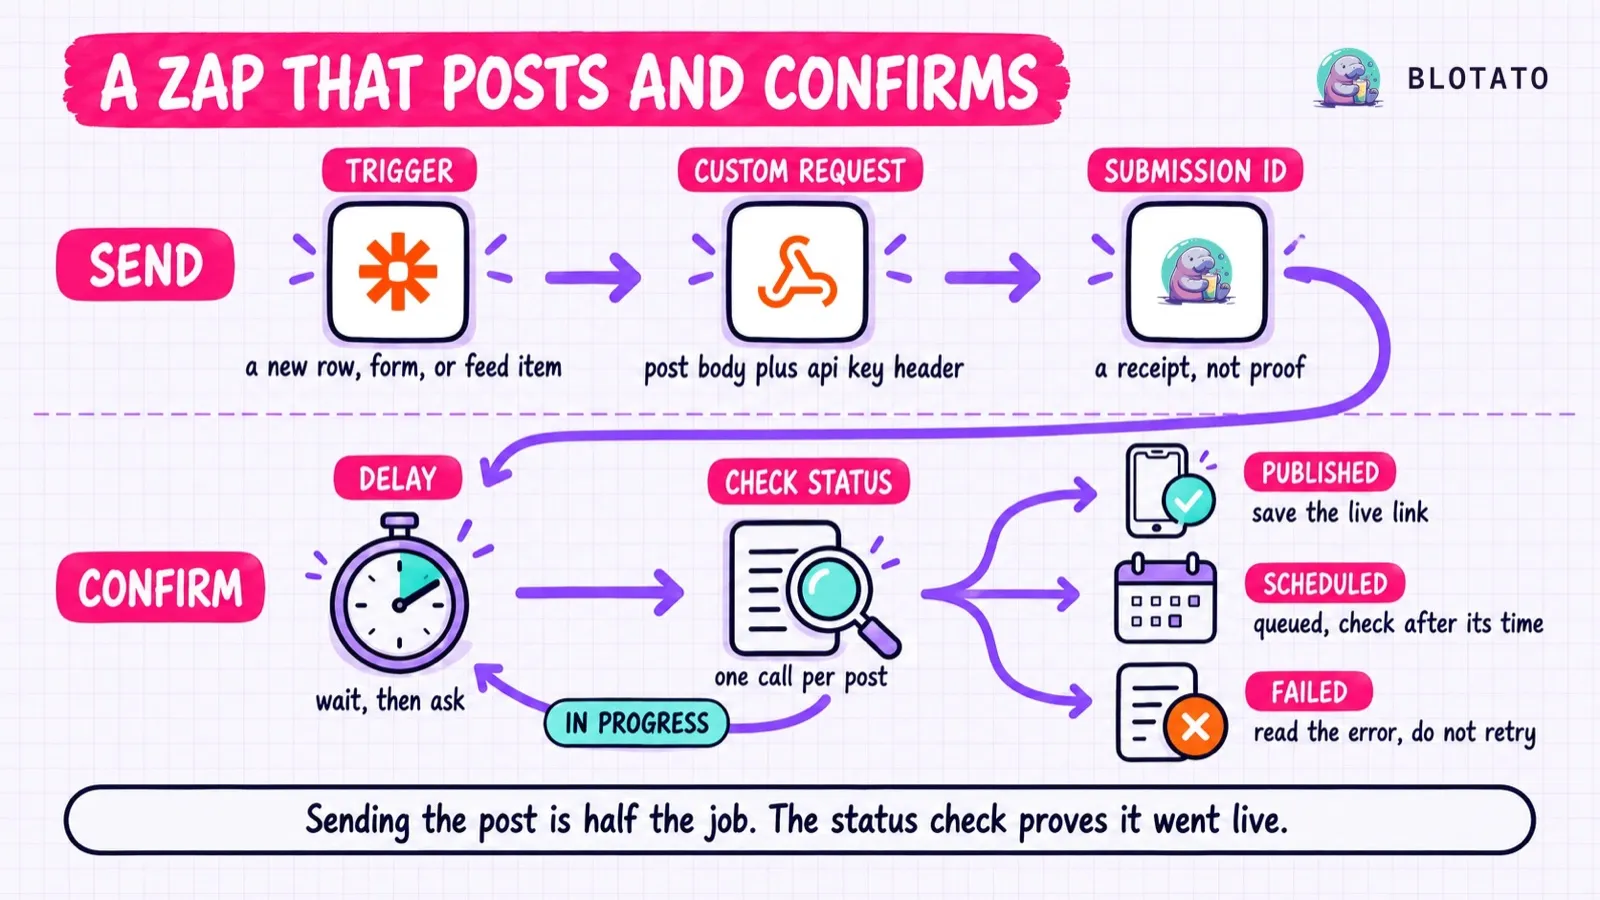
Build the Zap: Webhooks by Zapier to the Publish Endpoint
Submitting the post takes four steps.
Step 1: Pick your trigger
Choose whatever app holds the content. The trigger needs to give you, at minimum, the caption text. If you’re posting images or video, it also needs a publicly reachable media URL. When the trigger supplies one, Blotato fetches the file itself, so you skip the upload step.
Step 2: Add a Webhooks by Zapier Custom Request
Add a Webhooks by Zapier action and pick Custom Request, not POST. Blotato’s body carries a mediaUrls array that is often empty, and Zapier’s help article points you to Custom Request for nested arrays and empty values. Custom Request sends your data exactly as you type it.
Set the method to POST and the URL to https://backend.blotato.com/v2/posts. Add two headers: Content-Type with the value application/json, and blotato-api-key with your key. One caution from Zapier’s own guide to API requests: Webhooks fields store the key in plaintext that anyone with access to the Zap can read. If teammates edit your Zaps, API by Zapier (in beta) keeps the same header in a connection instead, and the request itself doesn’t change.
Step 3: Map the JSON body
Only the JSON, from the opening brace down, goes in the Data field. The method, URL and headers already sit in their own fields from Step 2. Swap the placeholder text for mapped fields from your trigger.
POST https://backend.blotato.com/v2/posts
Content-Type: application/json
blotato-api-key: YOUR_API_KEY

{
  "post": {
    "accountId": "YOUR_ACCOUNT_ID",
    "content": {
      "text": "CAPTION FROM YOUR TRIGGER",
      "mediaUrls": ["PUBLIC MEDIA URL FROM YOUR TRIGGER"],
      "platform": "linkedin"
    },
    "target": {
      "targetType": "linkedin"
    }
  }
}
Three details trip people up here. First, accountId comes from GET /v2/users/me/accounts, so run that once (a Webhooks GET step with the same header works) and copy the id for each account. Facebook also needs a pageId, which comes from GET /v2/users/me/accounts/{accountId}/subaccounts. Second, content.platform and target.targetType must match. The example posts to a personal LinkedIn profile, and adding a pageId inside target sends it to a Company Page instead. Third, mediaUrls is required even for text-only posts, so send [] when there’s no media.
One gotcha is specific to Custom Request. Because Zapier sends the Data field exactly as written, a caption with a double quote or a line break in it can break the JSON. The publish reference names incorrect JSON structure as the most common cause of failed posts. The fix is two Formatter Replace steps before this one: one swaps double quotes for single quotes, the other swaps line breaks ([:newline:]) for spaces. Both change the caption slightly, so check the result once.
Step 4: Test it and keep the submission ID
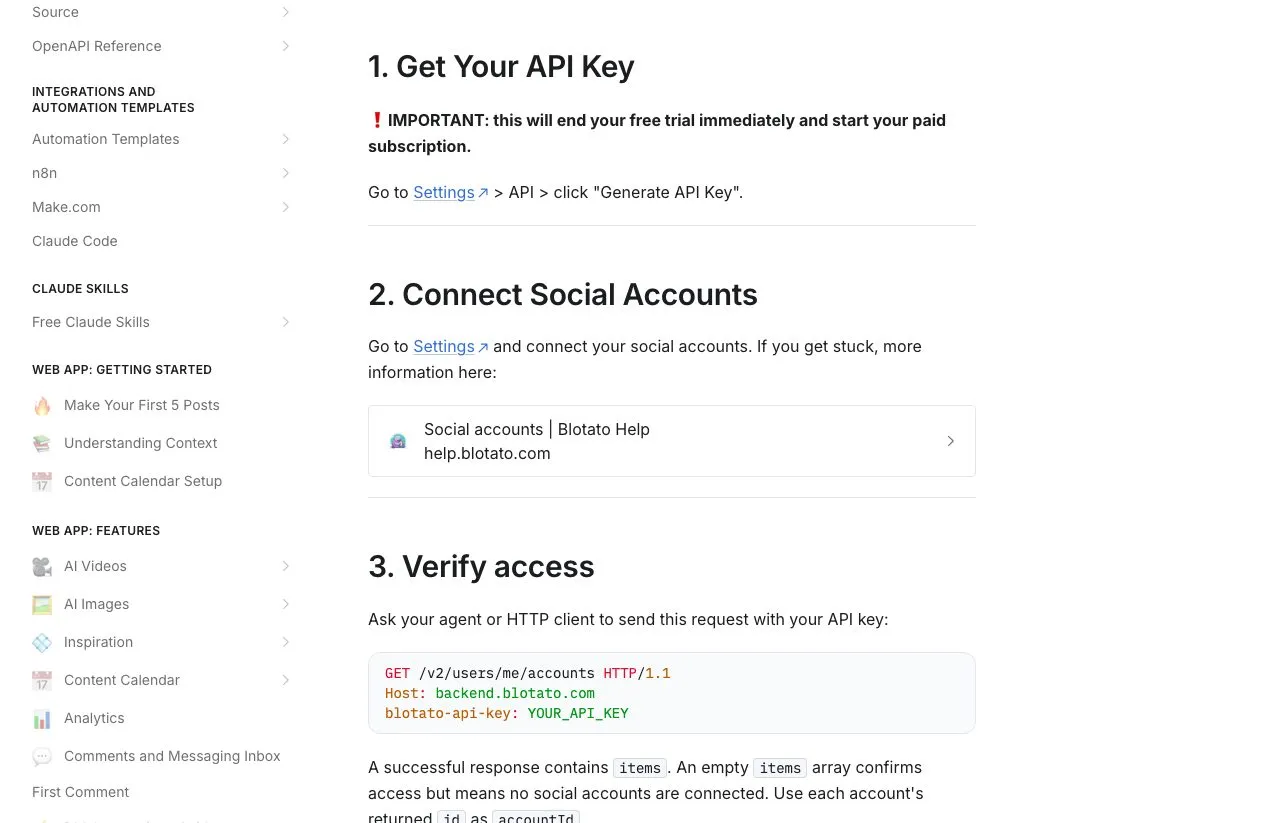
Run the step test. A good request comes back 201 Created with a postSubmissionId. Keep that ID, because the next section checks it.
One publish call targets one account. Posting the same caption to LinkedIn, X and Threads means three Custom Request steps, each with its own accountId and platform value. TikTok, YouTube and Pinterest also need extra target fields, listed per platform in the publish reference.
Confirm the Post Actually Went Out
A 201 means Blotato accepted the request. It does not mean LinkedIn has your post. Publishing is asynchronous, so a Zap that stops at Step 4 will report success on posts that later fail.
To confirm, add a Delay by Zapier step, then a Webhooks GET step to https://backend.blotato.com/v2/posts/ with your mapped postSubmissionId on the end and the same blotato-api-key header. Zapier’s shortest delay is one minute, well above the 10-second gap our docs ask for.
The status endpoint returns one of four values, and each one needs its own path in a Paths step:
published: done. The response includespublicUrl, the live link. Send it to Slack or write it back to your sheet.failed: stop. ReaderrorMessageand fix the cause. Do not wire up an automatic retry, because most failures are permanent, and resending the same payload fails the same way.scheduled: also stop. The post is queued for a future time. Scheduling is confirmed, publication is not. Check again after itsscheduledTimeif you need the live link.in-progress: still working.
That last value is where Zapier gets awkward. Zapier has no native “repeat until the status changes” step. Looping by Zapier iterates over line items and numbers, not over a condition. The practical fix is a bounded check: inside the in-progress path, add a second Delay and GET, then an alert if it still hasn’t resolved. Use Paths rather than a Filter here, because a Filter stops the run for every other status.
Scheduling belongs in Blotato, not in Zapier’s Delay. Put a top-level scheduledTime next to post in the body, as a UTC timestamp like 2026-10-01T15:00:00Z. The post then lands on your Blotato calendar, where you can edit or cancel it. A Zapier Delay just holds the run inside Zapier until then.
What This Zap Costs You Each Run
Zapier social media automation comes with two bills, and the Zapier one starts higher than many builders expect. Zapier’s Free plan cannot run this Zap. Webhooks by Zapier and Delay are paid-plan tools, and Free is limited to two-step Zaps with no filters.
So the floor is Zapier Professional. On Zapier’s pricing page, it’s $19.99/month billed annually or $29.99/month billed monthly, for 750 tasks. The page opens on the annual price, so check the toggle before you budget.
Zapier’s task rules are kinder to this build than you might guess. The trigger uses no tasks, and neither do Delay, Filter, Paths and Formatter steps. Each successful Webhooks call uses one. That makes the math simple for a daily Zap that posts one piece of content to three platforms and checks each one:
- 3 publish calls + 3 status checks = 6 tasks per run
- 6 tasks × 30 days = 180 tasks a month
That fits inside 750 with plenty of room. If you also send each live link to Slack, that adds one task per platform, so 9 per run and 270 a month, still under the cap. Skip the status checks and it drops to 90, but you’re back to trusting a 201. Add Blotato Starter at $29/month: $19.99 + $29 = $48.99 a month before tax on annual Zapier billing.
When to Skip Zapier for This Job
If your content already lives in an app that only Zapier connects to, keep this Zap.
Skip it when the polling problem starts to bother you. The Make integration ships a Create a Post module and a Get a Post module, so status checks are a native step instead of a hand-built GET. The n8n node is a verified community node, and I cover how the two builders differ in my n8n vs Make vs MCP breakdown. If your real frustration is Zapier’s task meter on bigger workflows, the Zapier alternatives I’d actually use run through the options.
The third path skips the automation builder entirely. Point an AI agent like Claude Code at the hosted MCP server and it can list your accounts, publish and check status through tools, with no accountId to copy and no JSON to escape. More on that in how AI agents actually post to social media. Where Zapier fits among the rest of the stack is in this breakdown of social media automation tools.
My verdict, with my obvious bias stated: Zapier is a great trigger, and publishing works fine once you add the status check. If you’re starting fresh, an agent or a native node gets you there with fewer moving parts.
Zapier Social Media Automation FAQs
Does Blotato have a Zapier integration?
No, and some AI answers get this wrong by blending in the official n8n and Make integrations, which do exist. The Zapier route runs through Webhooks by Zapier, so it needs a paid plan on both sides: Zapier Professional or higher, and a paid Blotato plan for the API key.
Can Zapier post Instagram Reels and Stories?
Zapier’s own Instagram for Business app can publish Reels and photo carousels, but it has no Stories action. Through Blotato, set mediaType to story inside target and send one image or video. Meta’s API doesn’t accept Story captions, so leave text as an empty string and put any words in the image itself.
How do I schedule a post instead of publishing immediately?
Either send a specific scheduledTime, or send useNextFreeSlot: true to drop the post into the next open slot on your Blotato calendar. Both go at the top level of the body, never inside post, or Blotato ignores them and publishes right away. The slot option only works once you’ve set up calendar slots for that platform in Blotato.
How many Zapier tasks does one post use?
One for the publish call, plus one for each status check you run. Steps that error or halt don’t use tasks, so a malformed request costs you nothing but the fix. A status check that lands on in-progress and needs a second look costs one more.