How to Use Blotato for Beginners: From First Post to Autopilot
A walkthrough of the current Blotato app: your first AI-drafted post, slot scheduling, visuals, the inbox, DM automations, and connecting Claude.
If you searched how to use Blotato and landed on a tutorial that told you to paste a source and get five posts back, close it. That was the old app. I rebuilt the product around an AI agent you talk to, and most of the guides floating around still describe an interface that no longer exists.
That mismatch is not a small thing. Our help center FAQ now carries entries like “the options from the tutorials don’t exist” and “how do I go back to the old Blotato.” People are not confused because the app is hard. They are confused because they are following instructions written for a different version of it.
So this is the current walkthrough, written by me, in the order I would actually do it. I grew from zero to 3 million followers in two years with no team and no ad budget, and Blotato is the app I built to do it. I founded the company, so take my read on it with whatever grain of salt feels right. You will go from your first drafted post to a queue that fills itself, and by the end your AI agent will be able to do all of it without you opening the app at all.
How to Use Blotato (Video Guide)
This is the full walkthrough on video if you would rather watch me click through it. The written version below adds the exact posting limits per platform (the full nine-platform table, with what each platform allows next to what we enforce, lives in the posting limits reference), the credit rules nobody reads until they get surprised, and the one setting that decides whether the trial or a paid plan is the right starting point.
Why the Old Tutorials Don’t Match Your Screen
The first version of Blotato worked like a blender. You dropped in a source, picked platforms, and it produced five posts. Simple, and also limited: you could not tell it what to fix.
The current app opens on an AI agent instead. You type what you want, read what it wrote, and then talk to it until the draft is right. That is a real change in how you use the product, not a reskin, which is why a 2025 tutorial will send you looking for buttons that are not there.
The practical upside is that everything downstream got easier. The same agent that writes the post also schedules it, makes the graphic, answers the comment, and runs the DM automation. Once you connect Claude or ChatGPT, it does all of that from a chat window.
What You Need Before You Start
There are only three things to sort out before your first post.
- A Blotato account. Start a free 7-day trial and answer the onboarding questions about your business, offer, and brand. Fill them in as well as you can, they feed the brand kit the AI writes with. You can change all of it later.
- At least one connected social account. Blotato publishes to 9 platforms: X, LinkedIn, Facebook, Instagram, TikTok, YouTube, Threads, Bluesky, and Pinterest.
- An API key, but only if you want the agent path. Read this before you generate one: the 7-day trial excludes API access, and generating a key immediately ends the trial and starts your paid Starter subscription. If running Blotato through Claude or ChatGPT is why you are here, plan on starting the subscription rather than trialing it. The ChatGPT connector walkthrough explains why the trial cannot cover it.
Blotato is an app I built, so the honest framing is this: if you only want a scheduler, plenty of tools schedule. What this does is put creation, publishing, visuals, the inbox, and automations behind one login, and then hand the whole thing to an AI agent.
Your First Post, Step by Step
Five steps from empty screen to published. I am using a motivation brand called Moodivational as the example, same as in the video.
Step 1: Tell the AI Agent What You Want
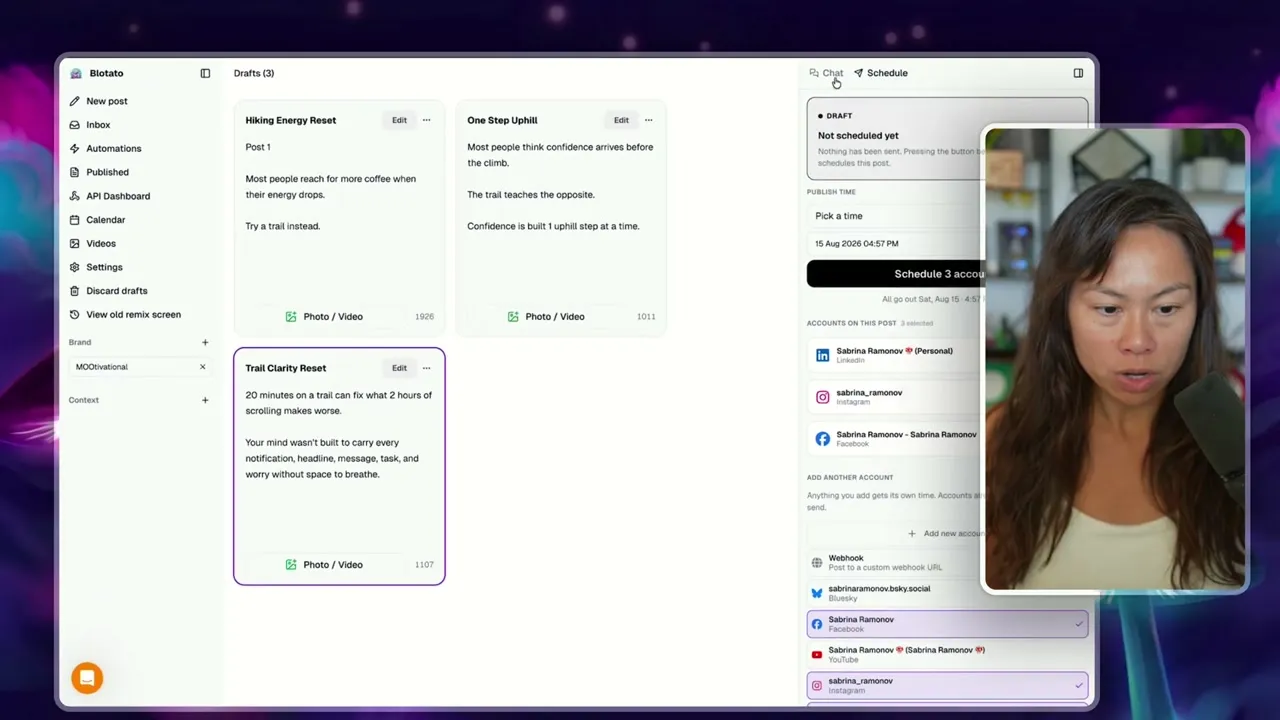
Pick your brand on the left, then type a plain-language request. Mine was: write three posts about motivation, specifically going hiking to energize yourself.
The agent thinks, then writes three drafts using the brand kit you selected. Do not overthink the prompt. You are going to edit this anyway.
Step 2: Talk to It Until the Draft Is Right
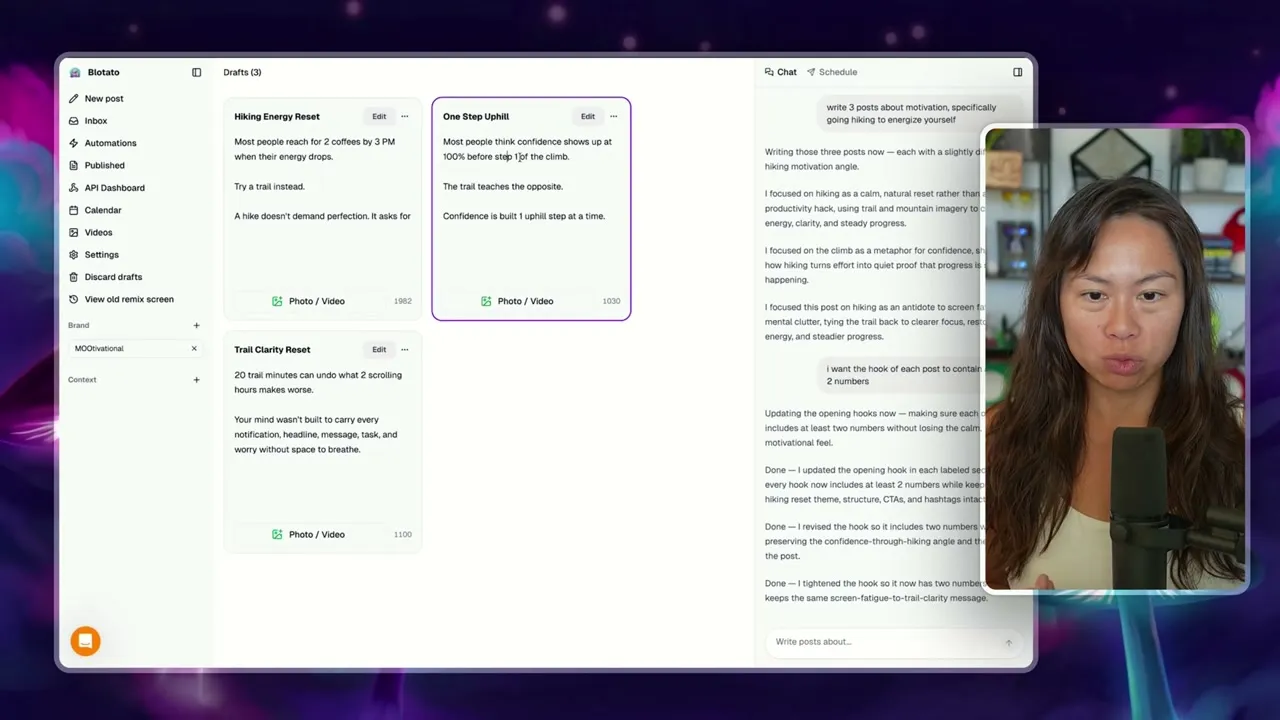
Click the chat button on the right and tell the agent what to change. Change the hook, change the wording, change the angle.
I asked it to rewrite every hook so the first sentence contained at least two numbers, and it redid all three. This is the part the old version could not do.
Here is my honest advice, and it matters more than any feature in this post. Use the AI draft as a starting point, then add your own point of view, your two cents, your personal stories. The draft gets you past the blank page. It does not get you a voice.
Step 3: Attach Your Photo or Video
Click the Photo / Video button and add your own media. For the hiking post I attached a selfie from an actual hike.
Plenty of Blotato users bring everything from their phone or another app and use Blotato purely to publish. That is a completely fine way to run it.
Step 4: Choose Your Accounts
Click add new account, pick the platform, and log in. You can connect up to 20 social accounts on the Starter plan, 40 on Creator, and 100 on Agency.
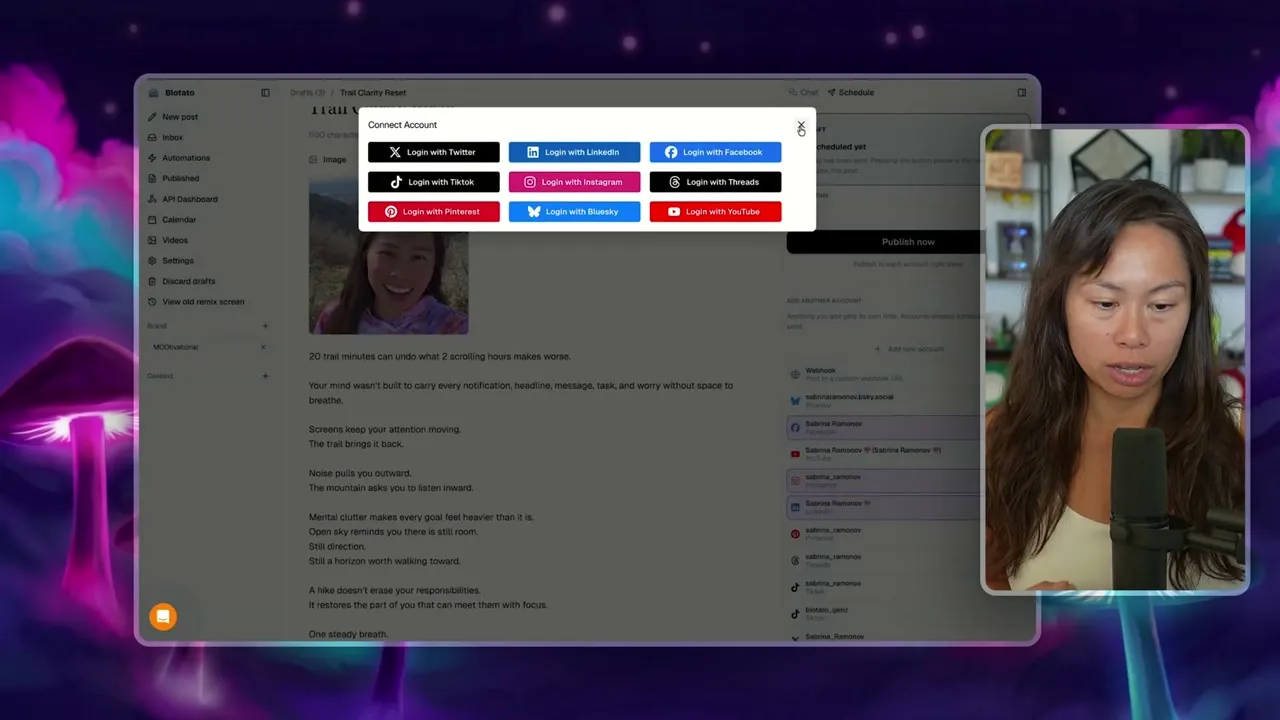
Scroll down once an account is selected. This is where you pick which LinkedIn page or company page the post goes to, and it is the single easiest thing to get wrong. Facebook works the same way and lets you select several pages at once.
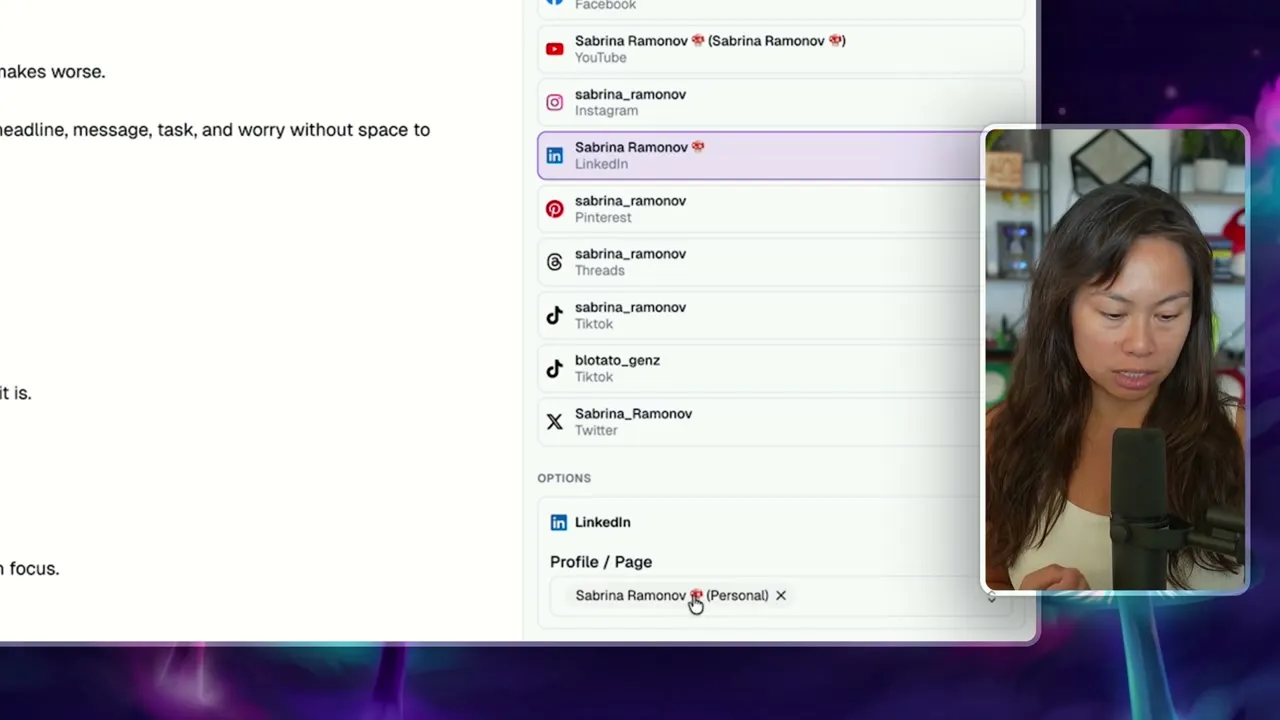
Each platform has its own parameters underneath, like first comments. Scroll the panel to see what a given platform accepts.
Step 5: Publish and Confirm
Hit publish now and watch the status go to sending, then published. Click the link it gives you and confirm the post looks right on the platform.
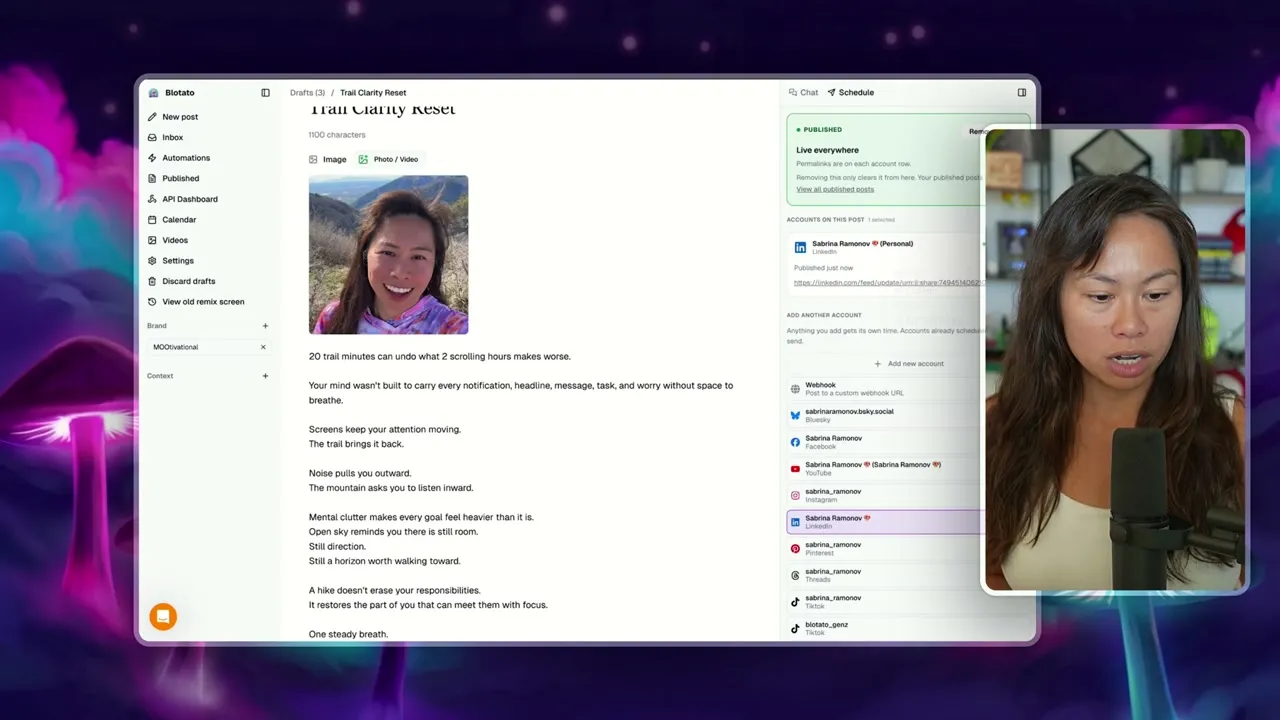
Always click through on your first few. Publishing is asynchronous, so a queued post reports back when it lands rather than the instant you press the button.
Set Up Your Calendar So the Queue Fills Itself
This is the part that turns Blotato from a posting tool into something closer to autopilot, and most beginners skip it.
Click Calendar in the sidebar and open your weekly posting schedule. A slot is a recurring time on a specific day with specific accounts attached. My Sunday 8:43 AM slot has TikTok on it, and I can add Instagram to the same slot.
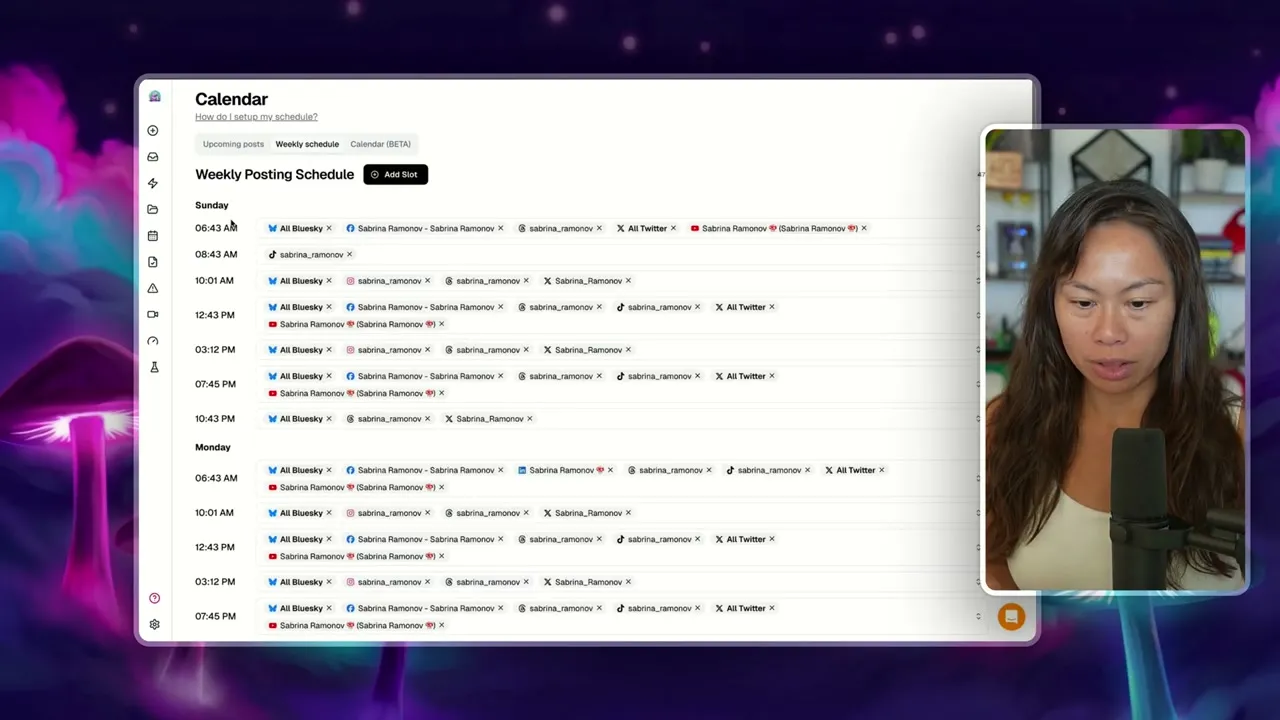
Here is how I actually use it. I batch content one day a week, then tell Blotato to drop each post into the next free slot for that platform. I never think about what time anything goes out, because the weekly schedule already decided.
Once slots exist, “next free slot” appears as a scheduling option next to publish now and pick a time. Choose it and the post queues itself. Click view all scheduled posts to see everything upcoming.
If you want the deeper version of slot setup, rescheduling, and moving posts back to drafts, the content calendar guide covers every case.
Make Visuals Without Leaving the App
Click Videos in the sidebar, then create new video, and you will find a template library. Three worth knowing:
- Whiteboard infographic for LinkedIn and Substack style posts
- Instagram carousel slideshow for carousels
- AI video with AI voice for faceless video
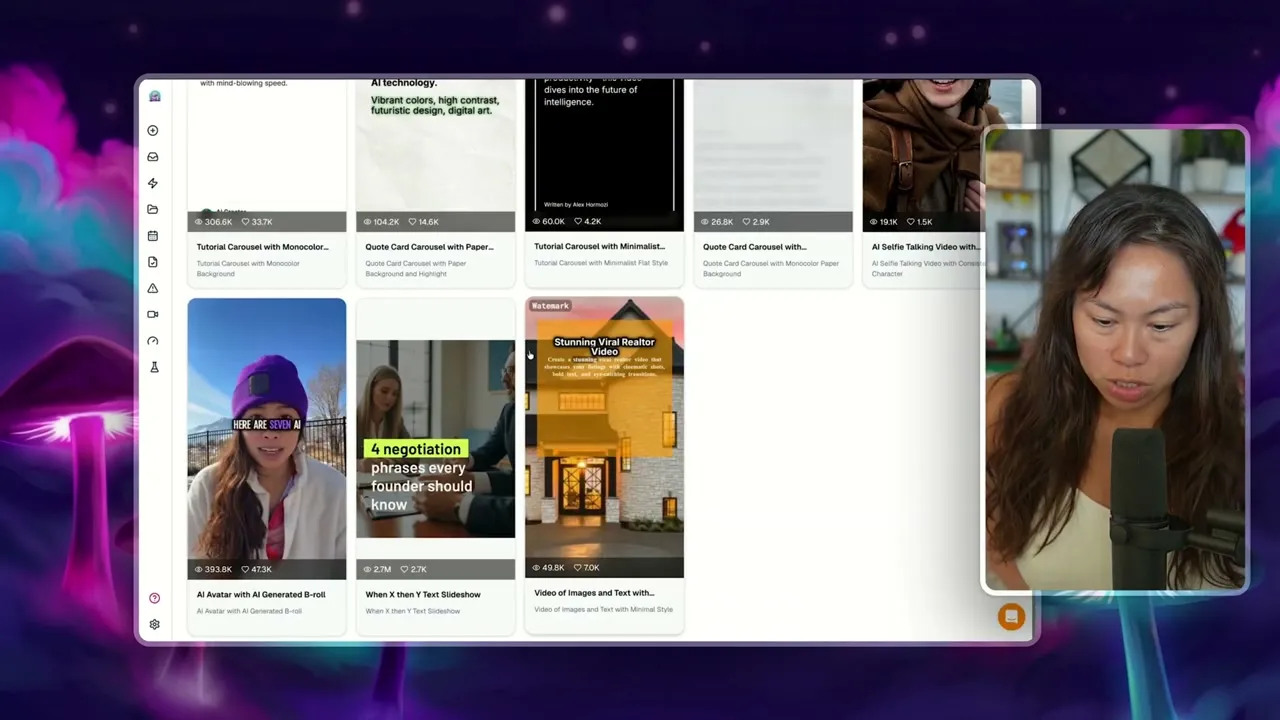
For an infographic, type your idea, toggle the brand kit on, and generate. I made one on beginner prompting tips for Claude Code. Anything involving image or video generation takes a few minutes.
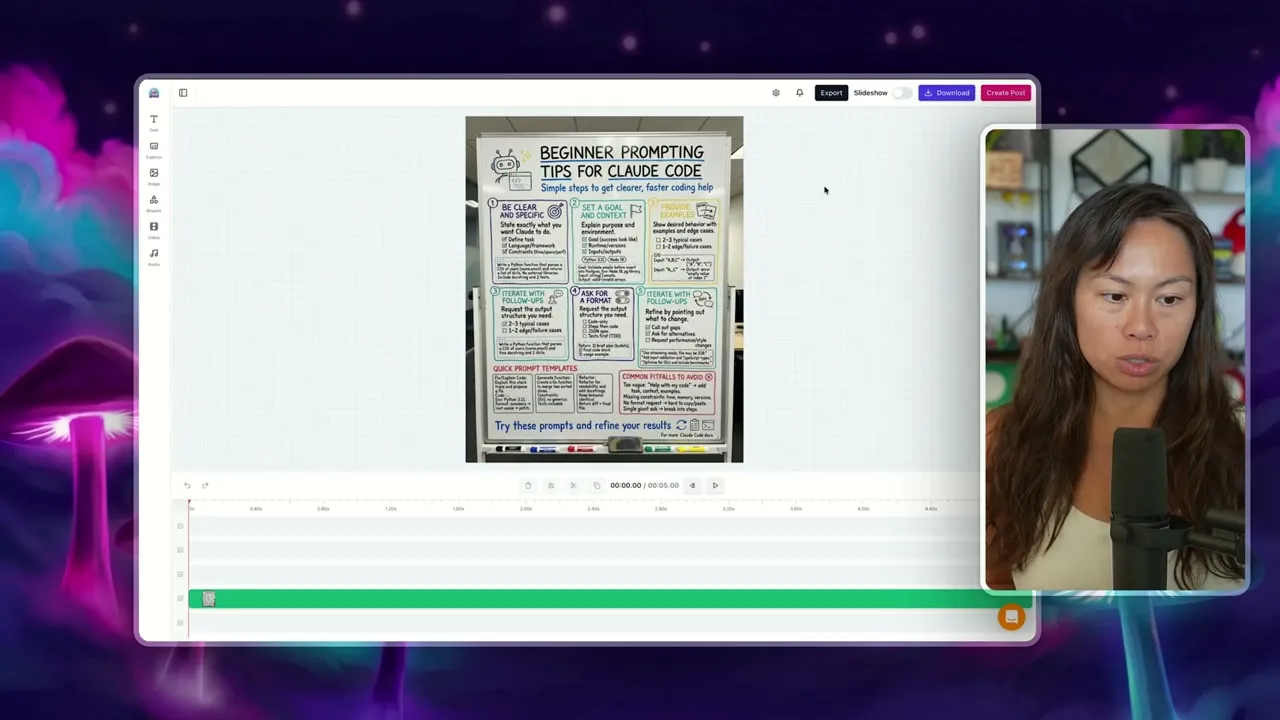
Video has far more control if you want it. You can write the prompt and voiceover script for every individual scene, upload your own image per scene, pick the image model, convert stills into motion, and choose an ElevenLabs voice.
Two things to know before you generate. The default image model is the cheapest one on purpose, because I did not want beginners burning credits by accident, and animating still images into video costs more than leaving them static. Also, click export before you download, or you will save a version without your edits.
Credits only get spent on AI image and video generation. Scheduling, publishing, API calls, and voiceovers do not touch them, and unused credits roll over.
Analytics, Inbox, and DM Automations
Three features that live one click apart and are easy to miss.
Analytics sit under Published. Give it 24 to 48 hours before expecting numbers. I use the top performing view over the last 30 days to see what worked. Analytics currently cover 8 of the 9 platforms, everything except LinkedIn, and your AI agent can read the same numbers through the API.
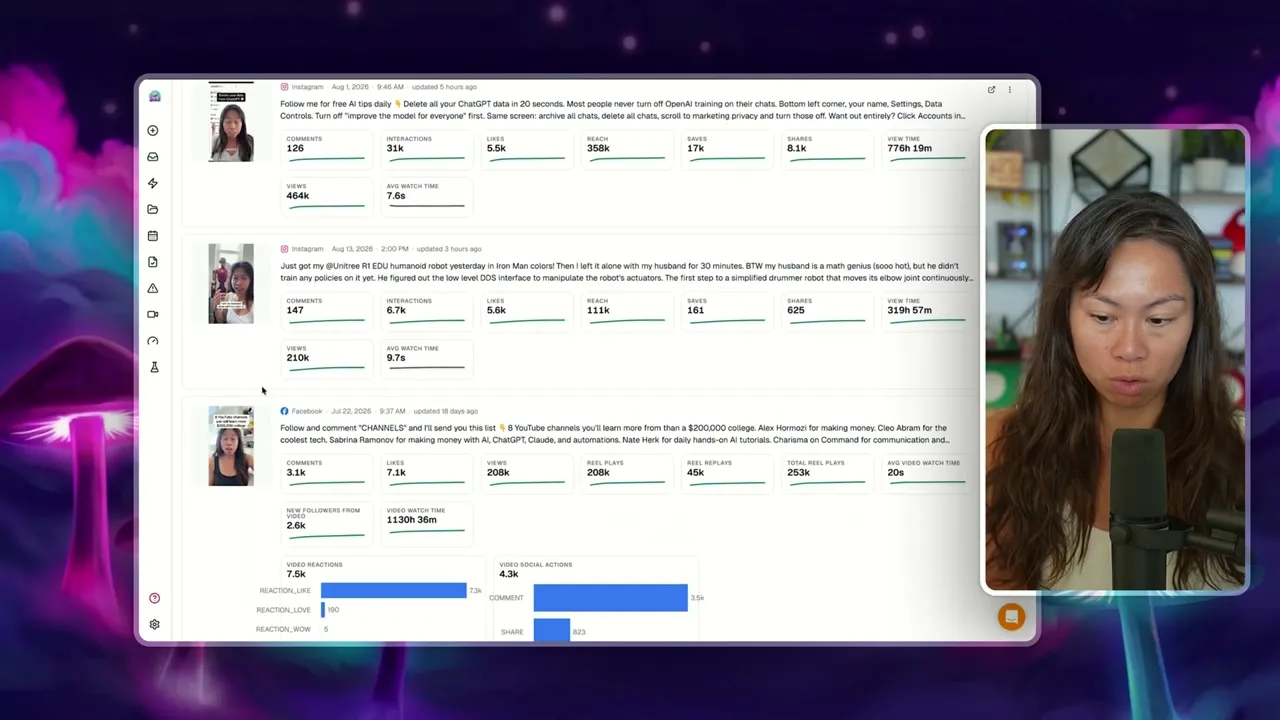
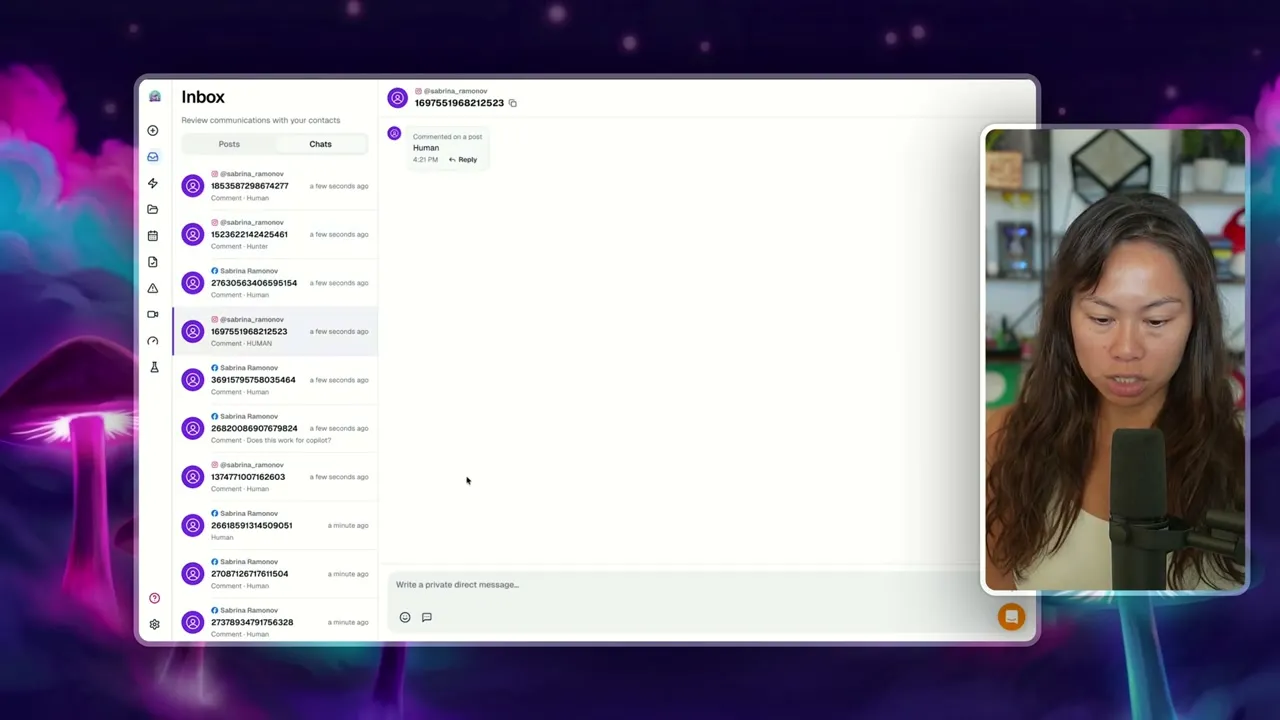
Inbox shows comments on your posts, and Chats shows DMs. Both are available for Facebook and Instagram, and you can reply from inside Blotato, or drive the same inbox from the API.
DM automations are the fun one. Someone comments a keyword on your post, and Blotato sends them a DM with your lead magnet, link, or offer.
Go to Automations, click new automation, pick your accounts, and choose the trigger: a specific post, or any post or reel. Because I batch content, I use any post or reel with a unique keyword per offer. Then write the message, set the button label and destination URL, and publish.
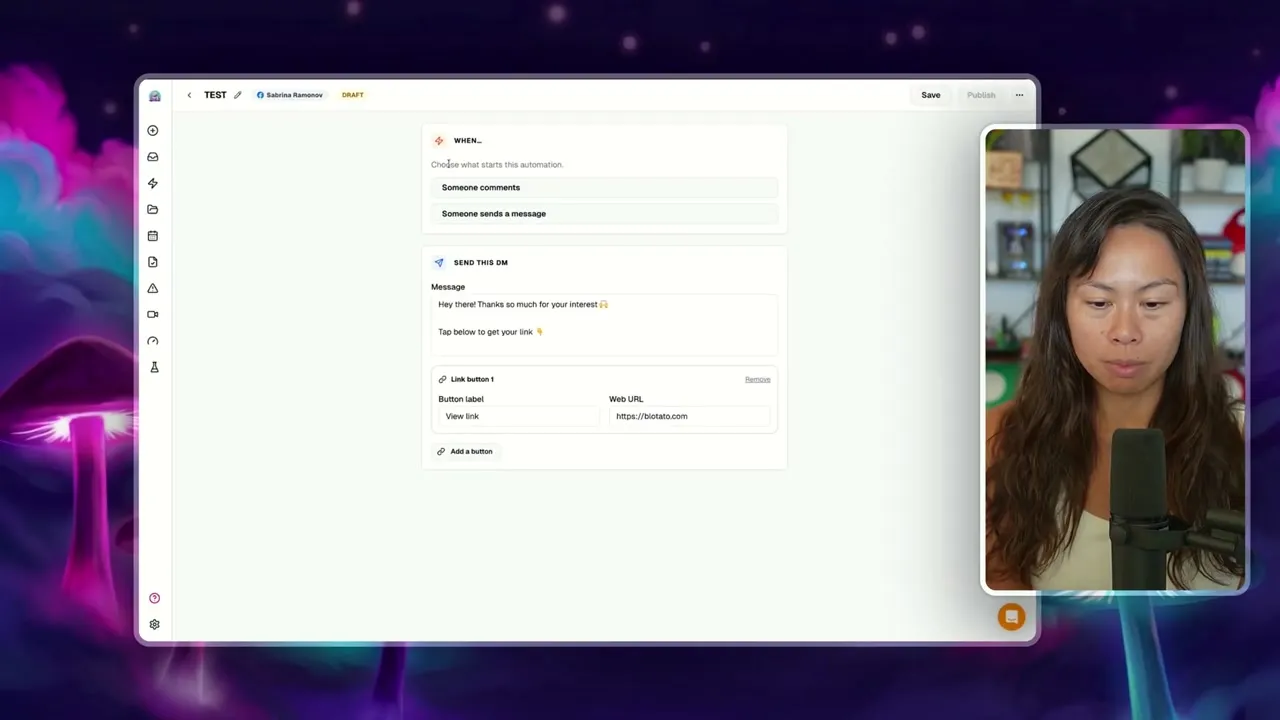
They keep running once live. One of mine has fired 363 times. Calvin Hia’s 46 produced 3,000 leads in a month. If you want the fine print before building one, I covered the limits worth knowing about DM automations when the feature launched. Once you are running one for every offer, you can build them in batches instead of one form at a time.
Connect Blotato to Claude or ChatGPT
Everything above can happen inside Claude instead, and the setup takes about two minutes.
Go to claude.ai, click Customize in the sidebar, then Connectors. Click add custom connector, name it Blotato, and paste the MCP server URL: https://mcp.blotato.com/mcp.
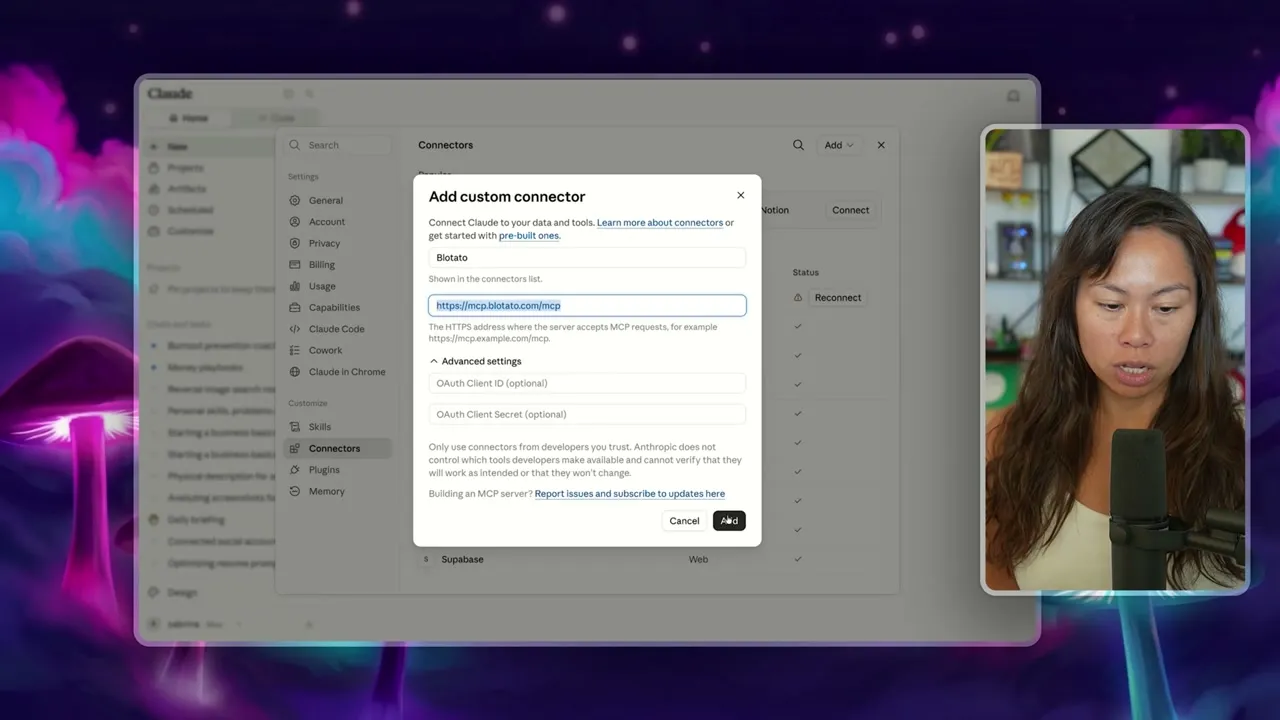
You will need an API key, which lives under Settings, then API. That page also has per-client instructions for Codex, Cursor, and the rest, so you are not stuck if you do not use Claude.
This is the trial catch I flagged at the top, and it is worth repeating in one line because people hit it by accident: generating the key ends your trial and starts billing.
Once connected, the server exposes 36 tools. Publishing, analytics, comments, messages, DM automations, all of it, from the chat window. For a full example of that workflow end to end, see how I post to social media with Claude.
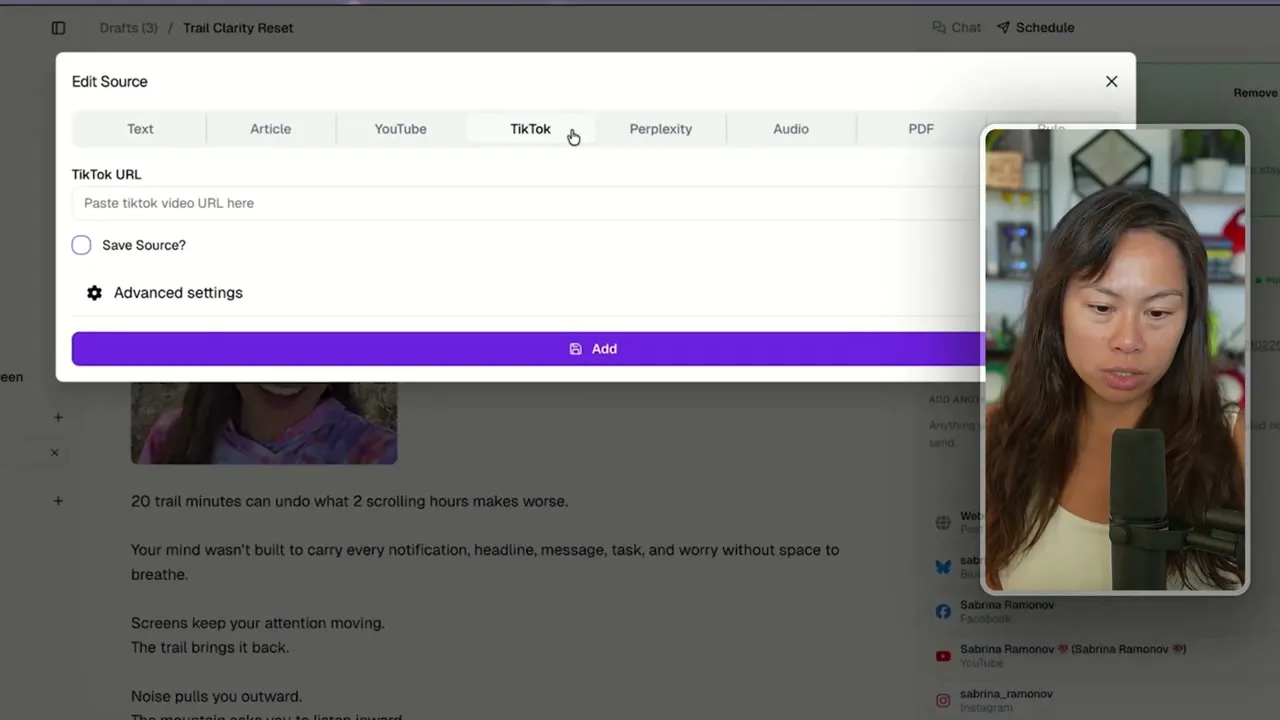
One last thing on the agent screen: the Context panel on the left. It takes YouTube links, TikTok links, articles, PDFs, audio, and raw text, then uses them as source material. Think of it like NotebookLM, except the output is ready-to-post social content instead of a chat answer. I drop my own YouTube videos in and repurpose one long video into a week of short-form posts.
What Blotato Won’t Do
Honest limits, because finding these out later is worse.
Blotato sets its own posting caps, and on Instagram ours is stricter than Instagram’s. These are deliberate anti-spam limits. Instagram’s own API allows 100 published posts a day, and we cap it at 50 per account. LinkedIn is 50 per profile and 50 per company page, counted separately. Facebook is 25 per page per 24 hours. Pinterest is 10 pins per day per account, and new Pinterest accounts need a warm-up period first. On Starter, TikTok is 3 unique accounts per day at 10 posts each, and YouTube is 10 uploads per channel per 24 hours.
Comments, DMs, and DM automations are Instagram and Facebook only. If your engagement lives on LinkedIn or X, that part of your workflow stays manual.
Analytics skip LinkedIn. Eight platforms report metrics. LinkedIn returns none yet.
Generation takes minutes, not seconds. Any image or video request runs long enough that you should batch rather than sit and wait.
Should You Start on the App or the API?
If you are posting to one or two accounts by hand and it is working, you do not need this yet. Blotato earns its keep the moment you are running several accounts, or you want an AI agent doing the work instead of you clicking through an interface. Start on the web app for a week so you learn what good output looks like, then connect Claude once you trust it. Generating an API key moves you straight onto a paid plan, so make that move deliberately. The people who get the most out of this are the ones who set up their weekly slots on day one, because that is what makes the whole thing run without them.
Beginner Blotato FAQs
What is Blotato used for?
Blotato is an AI content creation and social media management app. You draft posts with an AI agent, generate infographics, carousels and AI video, schedule everything across 9 platforms, read and answer Instagram and Facebook comments and DMs, and run keyword-triggered DM automations. It also exposes an API and a hosted MCP server, so an AI agent can do all of it for you.
Is Blotato free to use?
No. There is a 7-day free trial on all plans, and it requires a card and converts to a paid subscription unless you cancel. Paid plans are Starter at $29 a month, Creator at $97, and Agency at $499. The trial also grants 60 AI credits rather than a full month’s allotment.
Who is the founder of Blotato?
I am. My name is Sabrina Ramonov, and I run Blotato as a solo founder. That matters for how you read this guide: I use the app every day on my own accounts, so the defaults are set the way I would want them set, and the limits I describe are ones I chose.
Why doesn’t Blotato look like the tutorial I watched?
Because most tutorials still show the previous version, where you pasted a source and got five posts back. The current app opens on an AI agent you give instructions to and refine with follow-up chat. If your screen shows a chat box rather than a source field, you are on the current version and this guide matches it.
Can I use Blotato without connecting it to an AI agent?
Yes. The web app is complete on its own, and plenty of people never touch the API. Connecting Claude or ChatGPT is an upgrade path, not a requirement. Just note that generating an API key ends a free trial and starts a paid Starter subscription immediately.