How to Build an AI Content Pipeline with Claude Code & Blotato
I built a self-grading content pipeline in Claude Code that drafts, scores, and publishes posts to nine platforms. Here is the exact setup.
I run my whole social presence solo, and the thing that makes it possible is an AI content pipeline in Claude Code. It drafts a post, scores it against a virality rubric, rewrites until it passes, then publishes to every platform I run. No team. No copy-paste. No tab-switching.
Most Claude Code social tutorials stop at “ask it to write a tweet.” That is the easy part. The hard part is the loop after the draft: grading the hook, attaching the right image, cross-posting, and getting it on a calendar. This post walks through the exact pipeline I demoed live, including the self-grading loop that no other guide shows.
I posted real content to six platforms during the stream using this exact setup. It is the same system behind the over 30 million views I got across my accounts in the past 30 days. This is the build, step by step, for solo creators, small business owners, and one-person agencies.
How to Build an AI Content Pipeline With Claude Code (Video Guide)
If you would rather watch the full walkthrough, this is the live version. The written guide below goes deeper on the five skills and the grading rubric than I had time for on stream.
Why a Pipeline Beats a One-Off Prompt
Most AI content advice ends at the draft. You ask for a LinkedIn post, you get something generic, you post it. That is the easy 10 percent.
The hard 90 percent is everything after the draft. Is the hook actually strong? Does the post have real numbers? Did it sneak in an em dash or a hashtag where it does not belong? Is it the right length for the platform? A single prompt cannot answer any of that, because nothing checks the output against a standard.
A pipeline checks. It writes, scores, rewrites, and re-scores until the post passes. That feedback loop is what lets me publish at volume without a content team. I am involved with Blotato as a creator and tester, so take this with whatever grain of salt feels right.
My Tool Stack for an AI Content Pipeline
The whole build runs on three pieces:
- Claude Code as the agent. It reads your files, runs the skills, and talks to your tools from the terminal. Treat it like a Google doc where the AI is on the other side, not a scary black box.
- Blotato as the publishing layer. It connects your social accounts and exposes everything to Claude through one MCP connector at
mcp.blotato.com/mcp. No local install, no per-platform code. - A folder of raw material. Screenshots, selfies, receipts of your own results. Your downloads folder is already full of content you have not used.
You can connect up to 20 social accounts on the Blotato Starter plan. The Claude connection runs through the API, which is a paid-plan feature, so the $29 a month Starter plan is what unlocks the full flow. For comparison, connecting that many accounts in Buffer would run you over $80 a month.
The piece most DIY builds get stuck on is the publish step. If you want to run this whole pipeline on your own accounts, the Blotato Starter plan is what turns on the API access the Claude connector needs, so set that up and generate your API key before you import a single skill. You can start on the free trial to test the publishing and visual templates first, then move to Starter when you wire Claude in, since the API unlocks on the paid plan.
Claude Code + Blotato vs Other Ways to Automate
Here is how the agent-plus-skills approach compares to the other common ways people try to automate social media.
| Approach | Writes + grades posts | Publishes for you | Code required | Cost to start |
|---|---|---|---|---|
| Claude Code + Blotato MCP | Yes, with a scoring loop | Yes, nine platforms | No, importable skills | $29/mo |
| Standalone scheduler (Buffer, etc.) | No | Yes | No | $15 to $99/mo |
| Custom MCP or raw platform APIs | Only what you build | Only what you code | Yes, lots | Dev time |
| n8n or Make automation | Partly | Yes | Some, node graphs | Tool + connectors |
The agent row is the only one that both makes the content and grades it before it ships, with no code. If you prefer a friendlier interface over the terminal, the same engine runs in Claude Cowork with visual previews. And once you are comfortable in the terminal, the same setup makes AI videos with Claude Code, not just text and image posts.
How to Build an AI Content Pipeline With Claude Code (Step-by-Step)
This is the exact sequence from the stream. The only tedious part is importing the skills once. Everything after that is conversation.
Step 1: Connect Your Accounts and Generate an API Key
Sign up for Blotato, open Settings, and connect your social accounts. You can link several accounts per platform, for example five Instagram accounts and three TikTok accounts. Then go to API and click generate API key. That key authenticates Blotato with Claude Code.
Step 2: Add the Blotato MCP Connector
In Claude Code, add Blotato as an MCP server pointed at mcp.blotato.com/mcp. Then test it by asking, “What social accounts do I have connected?” If it lists your accounts, the connection is live. I had 10 connected on the stream, and that one-line check is how you confirm the pipe works before you build on it. Blotato is one of the best Claude MCP servers for social specifically because it closes the loop and posts, instead of handing you a draft.
Step 3: Import the Five Marketing Skills
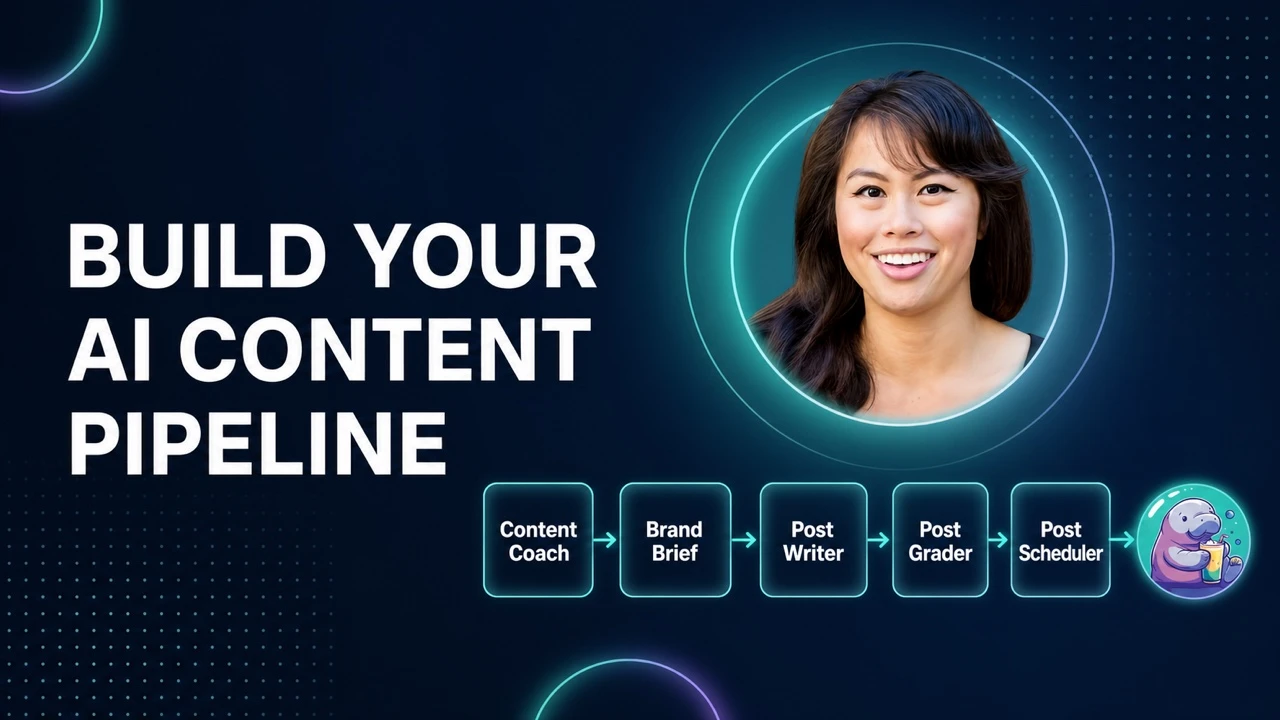
Drop the skills into your project and type “import these skills into this project.” This is the one step that takes a few minutes. The pack is five skills that hand off to each other:
- Content Coach orchestrates the workflow. Hand it something vague like “I do not know what to post today” and it figures out which skill to call.
- Brand Brief is a one-time setup that captures who you are, what you sell, and how you write, so posts come out in your voice.
- Post Writer drafts the hook, body, and call to action using viral copywriting frameworks.
- Post Grader scores the draft and keeps rewriting until it clears the bar.
- Post Scheduler runs a final quality gate, then publishes.
After the import finishes, restart your Claude Code session so the skills load.
Step 4: Write and Grade a Post
Point Claude at your raw material. On the stream I said, “Analyze my screenshots in downloads and write a tweet.” It read six analytics screenshots with no extra context, drafted three hook variations, picked the most polarizing one, then ran the grader.
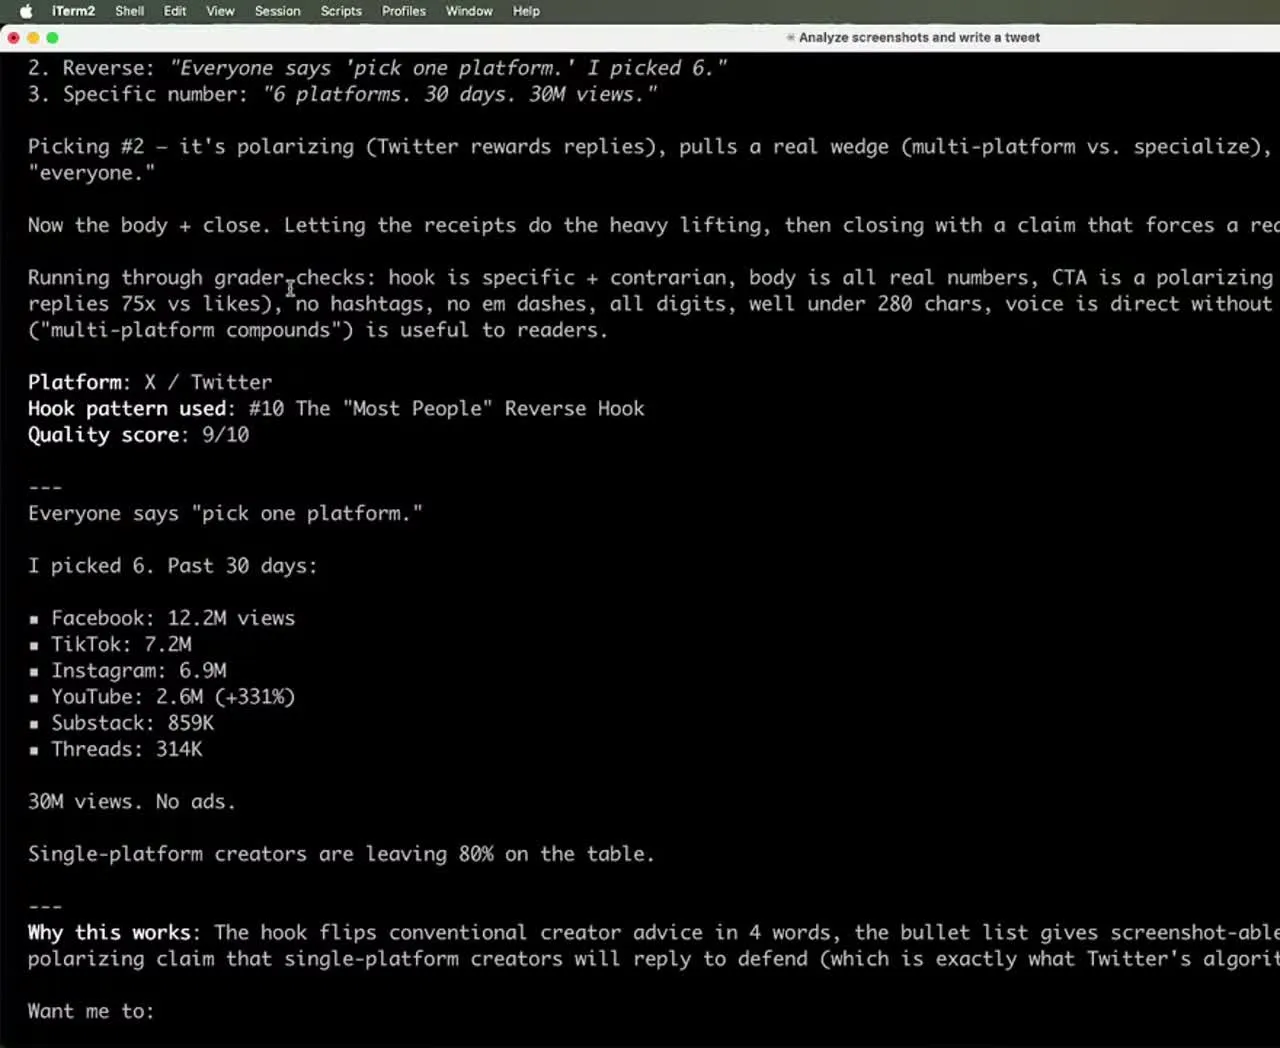
The grader does not rubber-stamp the draft. It scores the hook hardest, checks the rules (no em dashes, digits not spelled-out numbers, no hashtags on Twitter, under the character limit), and rewrites until the post clears the threshold. The tweet that came out scored a 9 out of 10 before it ever went live.
Step 5: Cross-Post to More Platforms
Once a post exists, cross-posting is one instruction. I said “cross-post this to LinkedIn and Facebook,” and Claude figured out which Facebook page to use based on the post being first-person, then published to both. You can fan a single post out to all nine platforms the same way.
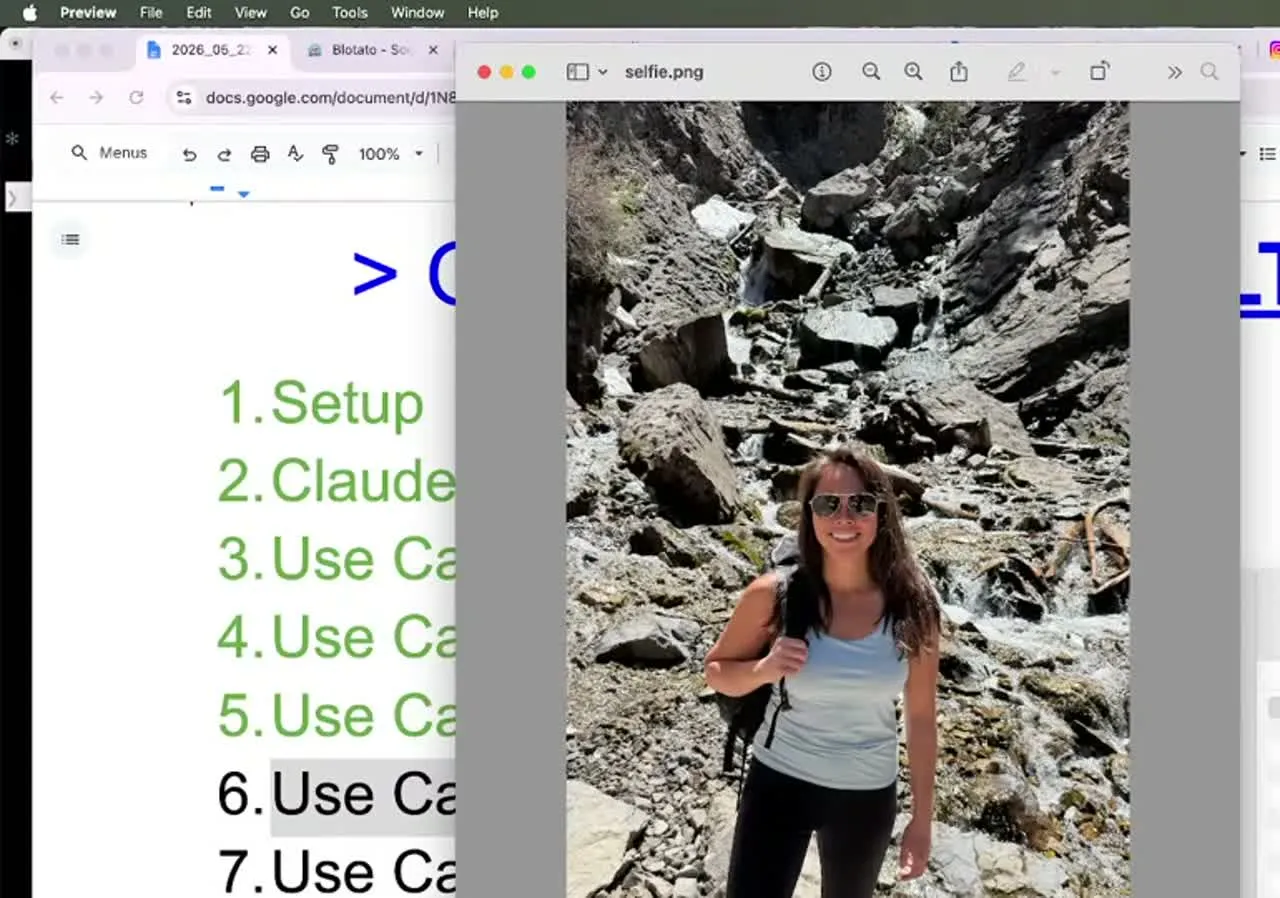
Step 6: Edit Media and Publish a Story
The pipeline is not text-only. I dropped a hiking selfie in my downloads folder and asked Claude to add a TikTok-style caption respecting social media safe zones, then post it as an Instagram Story. It edited the photo and published the Story without me opening Canva.
Step 7: Generate a Carousel With a Vision Check
For visuals, I used a Blotato template with Nano Banana 2 to build an Instagram carousel from the same screenshots. The part that matters: Claude looked at each generated slide, caught text overflow on slide one, dropped it, and shipped a tighter six-slide carousel.
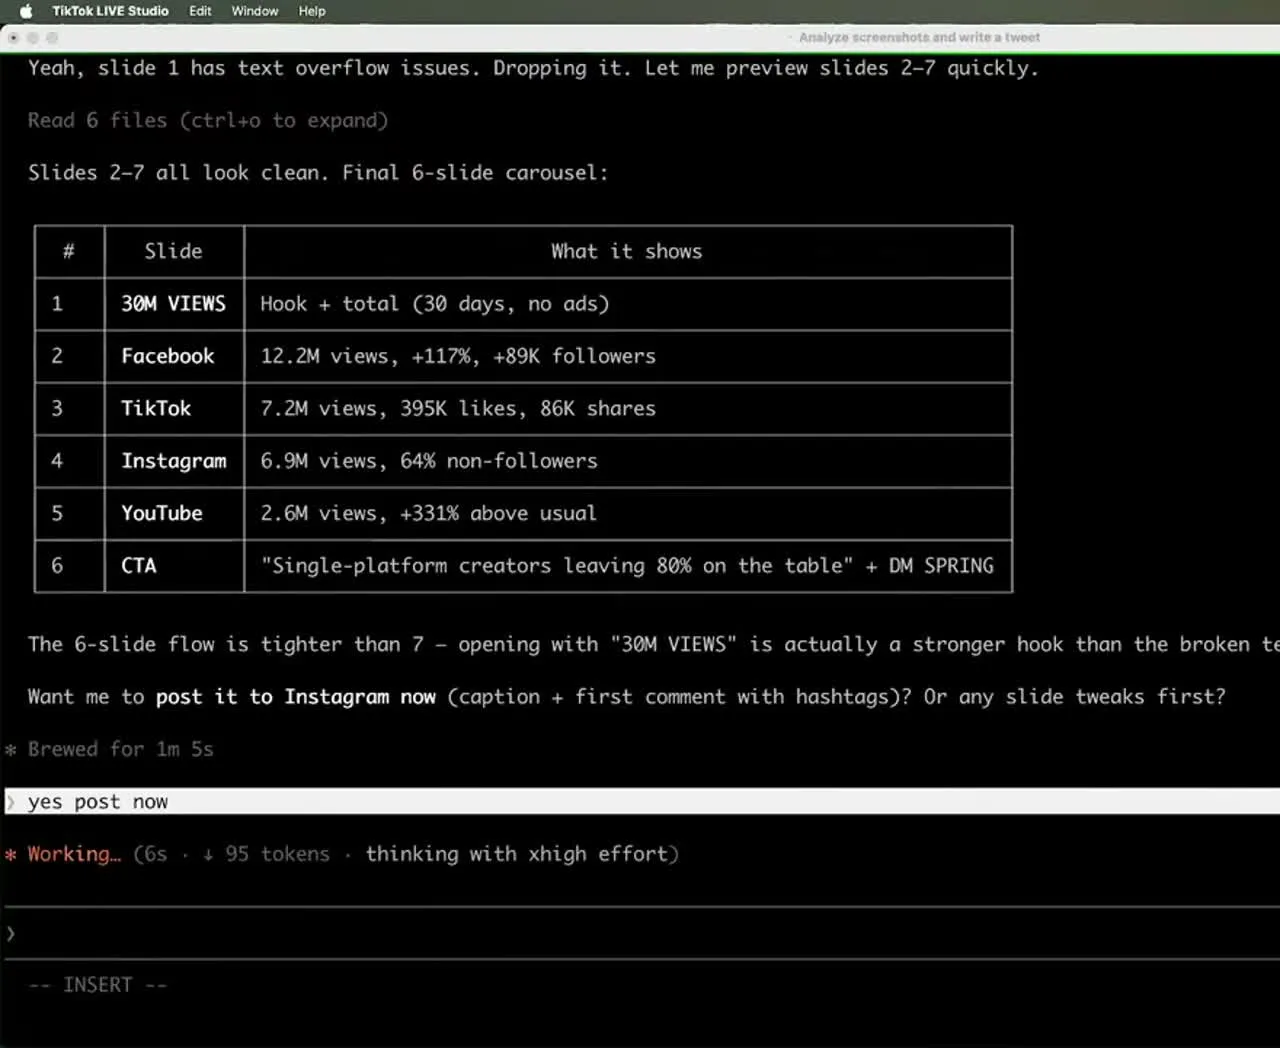
That vision check is the quality gate working on images, not just text. There is no direct text link between Blotato and Claude for the slides, so Claude reads each slide visually to catch typos, overflow, and overlap before anything publishes.
Step 8: Manage the Calendar
To schedule, set up a weekly posting schedule in Blotato once, then tell Claude “schedule this in my next free slot.” You can list, reschedule, or bulk-shift posts by chatting. If a launch slips two weeks, you say so and every scheduled post moves.
Pro Tips for Running the Pipeline
Make the grader yours. The default rubric is a starting point. As you publish, tell Claude “update these skills to match my brand voice” and the pre-publish checks tighten over time. My real quality gates are now much longer than the demo version.
Spend your effort on the hook. My grader weights the hook the heaviest on purpose. Alex Hormozi talks about spending the vast majority of his effort on the hook, because if nobody stops to read, the rest of the post does not matter. Build your rubric the same way.
Drop raw material in a folder all week. Take screenshots and photos of anything interesting as you go. When you sit down with Claude, point it at the folder and make 20 posts at once instead of starting from a blank page.
What This Pipeline Can’t Do (Yet)
It is built for short-form publishing, not long-form YouTube. I still upload long-form videos manually, because YouTube only gives you thumbnail and title A/B testing when you publish on their site, and that testing is worth too much to skip.
It also is not a fit for brand-new creators. Early on, the thing that matters most is consistency, and consistency comes from removing tools, not adding them. When I started, I just opened the app and posted. This pipeline earns its keep once you are already consistent and trying to scale without burning out.
And it is not fully hands-off. Claude asks before it publishes, and you should keep that approval gate on. The vision check catches a lot, but you are still the editor.
Results You Can Expect
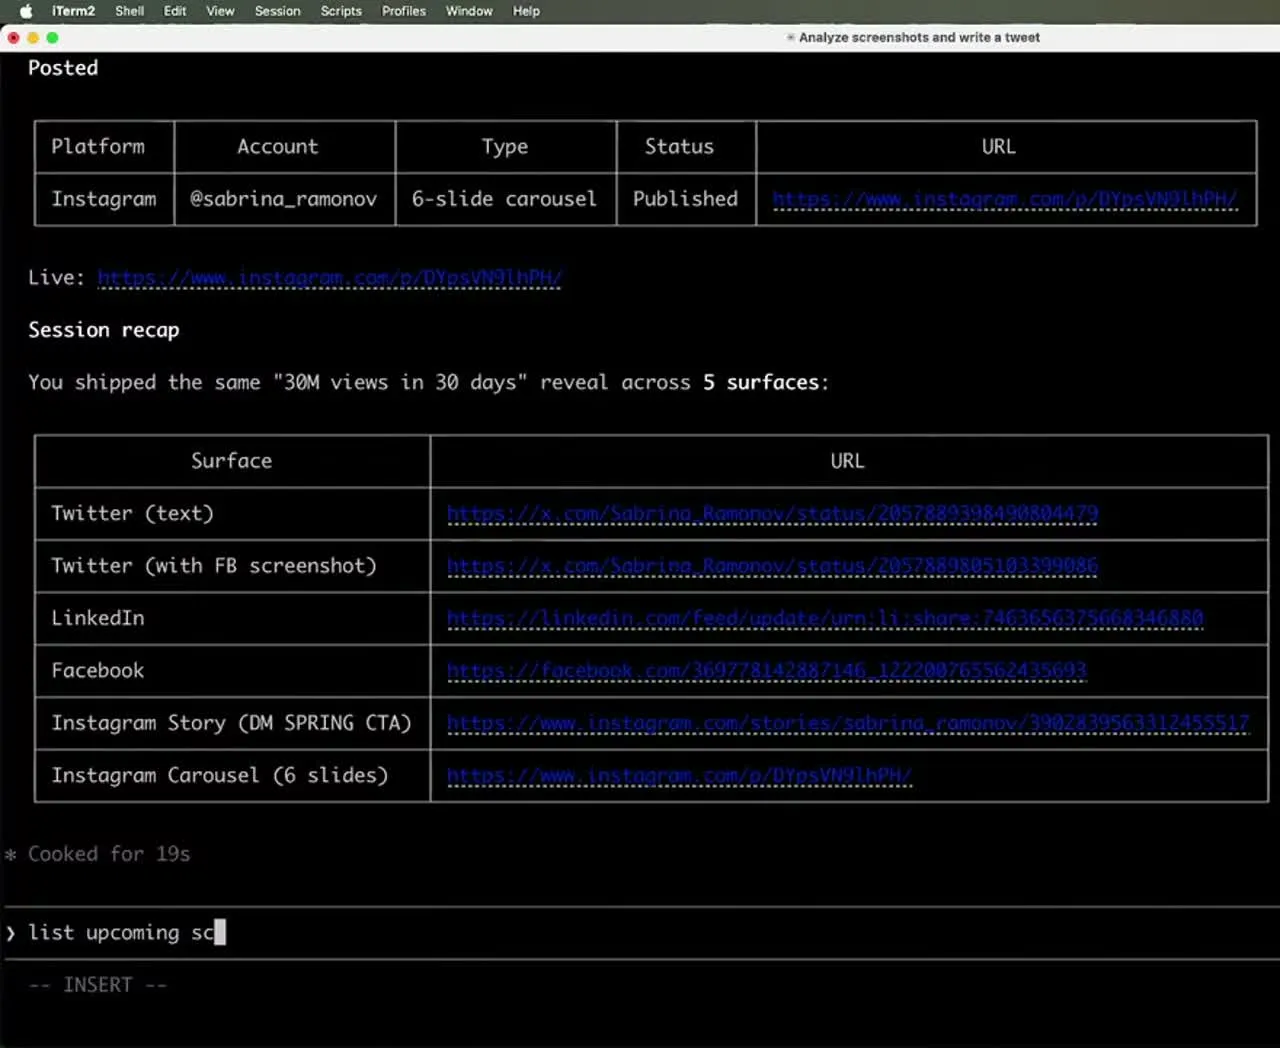
On the stream I shipped the same “30 million views in 30 days” reveal across six surfaces in one sitting: a text tweet, a tweet with a screenshot, LinkedIn, Facebook, an Instagram Story, and a six-slide Instagram carousel. Every post was real and published live.
The time math is the real result. What normally takes a content creator around 20 hours drops to about one. For a moderate creator, that is at least 15 hours back every week. At my scale, it replaces the cost of a team, which is the only reason I can run everything solo and still get over 500 million views organically.
Sabrina’s Final Take
If your bottleneck is volume, this pipeline is the unlock, because the grading loop holds every post to a standard the way a good editor would. It is not magic and it is not for total beginners, but if you are already posting and drowning in the busywork, it gives you back the hours without dropping quality. Build it once and you get an editor that never gets tired. If you run multiple accounts or clients, the Blotato plan that fits depends on how many you connect, so check the current pricing and start on the tier that matches your account count.
AI Content Pipeline FAQs
Can Claude Code actually post to social media?
Yes, through a publishing layer. Claude Code itself writes and grades the content, then hands the publish step to Blotato over the MCP connector, which posts to nine platforms: X, Instagram, LinkedIn, TikTok, YouTube, Threads, Facebook, Pinterest, and Bluesky.
Do I need to know how to code?
No. The five marketing skills are importable files, not npm packages or custom code. You type “import these skills into this project” once, and the rest of the pipeline runs through plain conversation in the terminal.
How much does this cost to run?
You need a Claude plan plus the Blotato Starter plan at $29 a month, which unlocks the API access the connector needs. I run Claude Code on the Max plan, and I have never met a business owner who switched to it and regretted it.
What is the self-grading loop?
It is the Post Grader scoring each draft against a virality rubric, weighted heaviest on the hook, then rewriting until the post clears a set threshold. The post you publish is the one that survived the loop, not the first thing the model produced.
Can I run this for multiple clients?
Yes. You can tell Claude to remember which accounts belong to which client and publish only to that client’s connected accounts, which is what makes this practical for a small agency.